

by Diego Sanchez
January 13, 2020
Diego prevents carpal tunnel syndrome in designers worldwide by making incredible time-saving Photoshop actions and mock-ups.

How To Add a Vintage Look To Your Own Handwritten Text
Vintage Vector Handwritten Text
Make your own handwritten text look vintage! Great for logos, badges, or over any other design. Today, you will learn how easy is to make your own handwritten text looks like a vintage one in less than 10 minutes and have it in a vector format so you can freely scale it, change the color and place it over any background you like.
But first, and if you want to follow this tutorial exactly as described, please download the Free Vector Textures Pack that you can find right here at Medialoot: Download.
Step 1
Pick a cheap print paper (70/75 gr) and write your text using a thick marker, in this case, i am using a 0.6 one to write "Medialoot". Try to write it slowly so the ink penetrates the paper fibers and spread a bit. In this way, we will have rough borders that will help us to mimic an eroded and aged old type.

Step 2
With your text ready, scan it at a resolution between 400 and 600 dpi and using a high contrast setup.

Step 3
Open the scanned image in Illustrator, be sure to have it selected and go to Window > Image Trace.

Step 4
Click over the "Advanced" icon to show more options for the Image Trace and use the following values.

Step 5
Hit the "Expand" button in the top toolbar to apply the tracing.

Step 6
With your traced text selected, go to Effect > Path > Offset Path. Apply the following values and click OK. Depending on your text thickness, you may need to change these values a bit.

Step 7
Go to Object > Expand Appearance and then to Object > Compound Path > Make.

Step 8
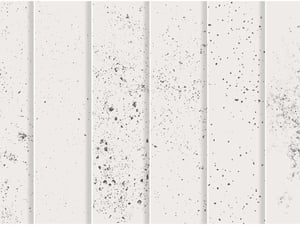
To make the text a bit more interesting, let´s add a texture to it. Open the Vector Textures pack and select any of the included textures (in this case, i will choose the first one from the last row). Go to Edit > Copy and then close the file.

Step 9
Back in the traced text file, go to Edit > Paste and transform the texture to cover your whole text.

Step 10
With the texture selected, go to Object > Compund Path > Make.

Step 11
Hold the Shift key on your keyboard and select the traced text.

Step 12
With both elemets selected (traced text + texture), and to finish the work, go to the Pathfinder window (Window > Pathfinder) and click on the "Minus Front" icon.

Conclusion
As you may see, making your own handwritten text look like a vintage one is very easy when you use the right tools. Due the vector nature of the end result you can scale it to any size, change the color to the one you want and place it over any background you like.


Comments