
How to Make a Realistic Watercolor Painting in Photoshop
Watercolor paint has always been a fascination of mine. But I don't use it as most painters do. I create splatters and textures for use in my digital artwork. That doesn't mean that I can't create stunning works of art with watercolor though. Below I'll describe the process I use to create a watercolor portrait of a Jaguar.
The resources we'll need
I like to keep things simple, so I've chosen just a few resources for this project. You can use your own textures and brushes over these, if you like. This is simply a technique, and the process is not dependent on these specific resources.
Step 1 - Document Setup
First up, create a new document in Photoshop. It should be 8x10 inches at 300 dpi. Add a texture from the Antique Paper Textures set, and invert it by pressing (Cmd+i)

Step 2 - Preparing the Jaguar Photo
Now, add the photo of the jaguar. Use whatever method you prefer to remove the background (green areas). You don't have to too precise since we'll be adding tons of watercolor texture that will hide most of the edges.
Now desaturate the image by pressing (Cmd+Shift+U) on the keyboard or click Image | Adjust | Desaturate.
Then duplicate the jaguar layer, and turn the visibility of the duplicate layer off. Select the original copy again and apply a Watercolor filter effect by clicking on Filter | Artistic | Watercolor. You can use settings similar to mine, or you can make your own adjustments base on your preference.

Set the layers blend mode to "Overlay" and the opacity to around 20%.

Turn the duplicate layer's visibility back on and set it's blend mode to "Vivid Light", then set it's opacity to around 45%.

Step 3 - Exploring Our Brushes
Before we start adding watercolor effects, let's take a look at our selection of brushes. This set contains a great variety of watercolor effects, but I only needed a few brushes, from this collection, for this project.

The brushes highlighted in blue (blob brushes) are used for layering color. The edges aren't too hard, and they blend very well with each other.
The brushes highlighted in red (drip brushes) contain a good variety of drips at the same angle. These are great for adding a running, dripping look. As if the paint was applied too heavy and ran before drying.
One other item to note… If the default angle of these brushes is not quite right when you're applying paint, you can always change the angle from the brush panel. To open the brush panel click Window | Brush.

Step 4 - Applying Initial Watercolor
On a layer below the jaguar layers, using various blob brushes, begin painting the jaguars black spots. You will most likely change sizes and brush angles several times while doing so. Here's a look at mine.

Now, using the Eyedropper Tool (I) select some colors from the jaguars eyes and fur and begin painting some more details on layers below the initial jaguar layers.

Step 5 - Applying More Base Watercolor
In this step will begin applying some heavy water color on layers below the jaguar photo layers. There is no hard rules or methodology here. It's a matter of placing blobs of paint where it feels right to you. Choose colors from the jaguars fur in the original photo, and/or colors that match the mood of the painting. Remember to create new layers as you go so that you can turn on and off layers as you experiment.
Below I've posted photos of my progress.


Step 6 - Adding Depth and Contrast
At this point you probably will begin to get the idea that this is a process of "build up"… You're basically applying small adjustments in large amounts until you've "built up" the painting.
Next, let's add some contrast with darker paint. Add some new layers above the jaguar photo layers and set their blend modes to "Overlay". Now, using dark colors apply some more paint with blog brushes around the jaguar's head.
Experiment with colors here… The Overlay blend mode will create some interesting effects.

Step 7 - Adding Drips and Runs
Using the drip brushes, begin applying drips around large blobs of color. You want to find areas of the painting that looks like it has heavy color that might drip or run down the canvas. Some of these runs may need to be applied above or below the photo layers depending on the look you're after.
Note: It's easy to get too crazy with the drips. Keep them subtle, and not too distracting.
Below is a series of photos showing by build up of drips.


Step 8 - Final Adjustments
I'm really happy with how this is turning out. But, before calling it complete, I want to add a few tweaks with adjustment layers.
First up, let's duplicate that bottom paper texture layer, and drag it to the top of our layer stack. Change this duplicate texture layer's blend mode to "Soft Light".

Add a Gradient Map adjustment layer using the following gradient. Purple (#290a59) to Orange (#ff7c00)

Tweak the Levels a little bit with a Levels adjustment layer.

Finally, take the saturation down a bit with a Hue/Saturation adjustment layer.

Conclusion
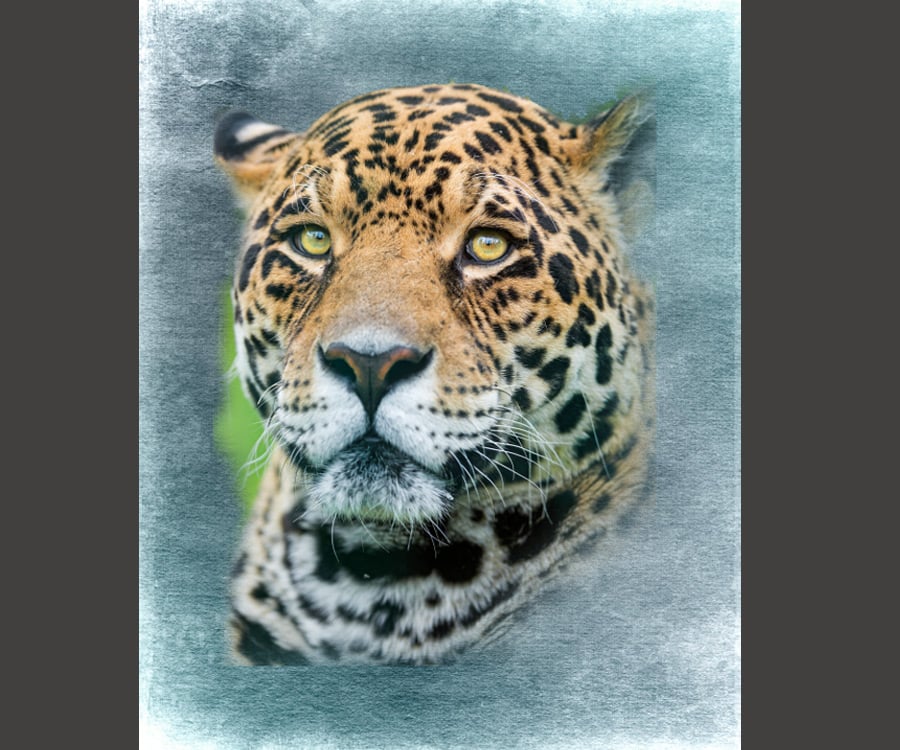
I hope this tutorial has inspired you to try your own digital watercolor paintings. It's easy, fun and provides room for lots of experimentation. Here's a look at my final pairing.



Comments