![[Free Download] How to Create a Sticker Mockup with Photoshop](https://img.glyphs.co/img?src=aHR0cHM6Ly9zMy5tZWRpYWxvb3QuY29tL2Jsb2ctaW1hZ2VzL3N0aWNrZXItdHV0L3N0aWNrZXItbW9ja3VwLXBvc3QtaGVhZGVyLmpwZz9tdGltZT0yMDE3MDYwNzA5MTU1MA&q=75&enlarge=true&h=215&w=570)

by Tony Thomas
June 08, 2017
Tony creates pixel-perfect UI kits & icons. His pug, Wednesday, is Medialoot's beloved mascot.

[Free Download] How to Create a Sticker Mockup with Photoshop
Create a glossy sticker mockup with Photoshop
This tutorial will teach you how to create a realistic sticker mockup with a glossy overlay effect using Adobe Photoshop. This effect uses Smart Objects, Transforms, Layer Styles and the Glass filter.
In a hurry?
Or feeling a bit lazy? Download our premium pre-made sticker mockups and save yourself some time! If you want a free version we've got a couple of those listed at the end of the post also (scroll down for more).

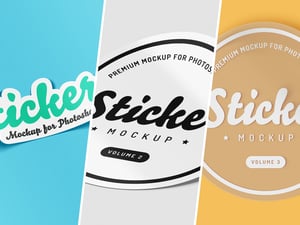
Sticker Mockup for Photoshop

Sticker Mockup or Photoshop - Vol 2
Step 1
Launch Photoshop and create a new document that is 3000 x 2000 pixels, 72PPI, RGB color.

Step 2
Use the Rectangle Tool (U) to draw a 1500 x 1500 pixel square in the middle of the canvas. The fill color doesn't matter as this layer will be temporary.

Step 3
In the Layers panel, select the Rectangle layer and rename it to 'Smart Object', 'Artwork' or something similar and then right click the layer and Convert to Smart Object

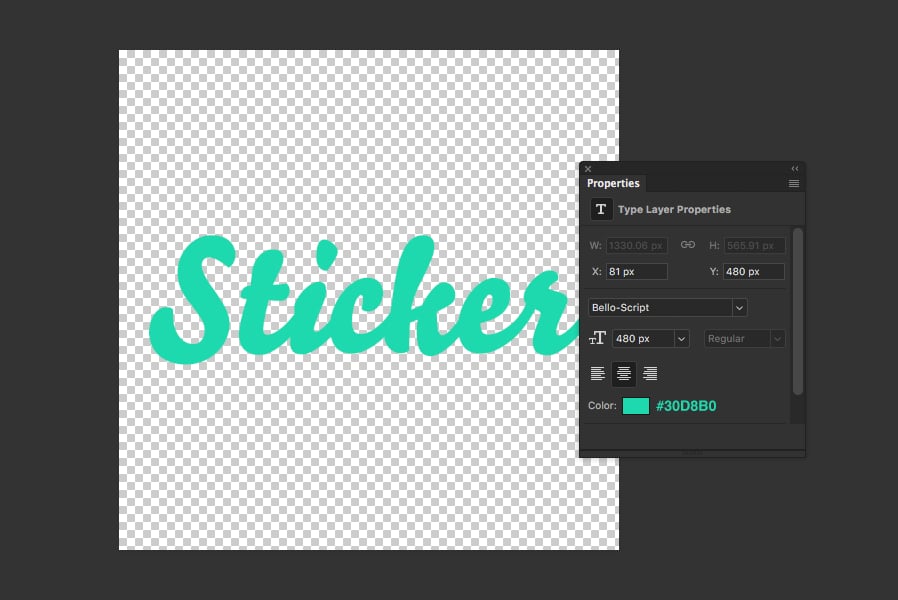
Step 4
Double click on the Smart Object thumbnail to open the contents in a new window. Hide the rectangle layer and use the Horizontal Type Tool (T) to create a new text layer. Type 'Sticker' using Bello Script, 480 px, #30D8B0.
Step 5
Now we want to give the text a thick white border which is common on sticker designs. Right click on the text layer when you are happy with it and choose Convert to Shape.

Step 6
Using the Path Selection Tool (A) give the text a 50 px white stroke, and align to Outside.

Step 7
You may notice that there is a small gap between the t and i letters, we can fix this manually by using the Pen Tool (P) to draw a small white shape that fills the space.

Step 8
Save and close the Smart Object to return to the main document. Enter Transform (T) mode and rotate the artwork -21º around the center. Then go to Edit > Transform > Skew and whilst holding down the Alt key use the mouse to skew the top right corner 7º.

Step 9
Go to Layer > New Fill Layer > Solid Color Fill... and enter #6dd6e9 then click OK.

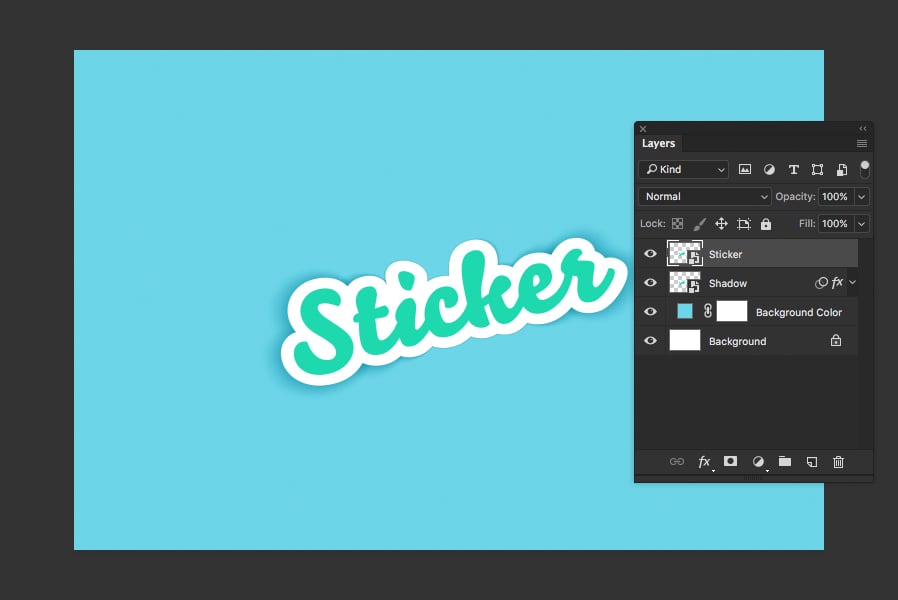
Step 10
Name the color fill 'Background Color' and move it to the bottom of the layers panel. Duplicate the Smart Object layer in place, then hide visibility and name the top version 'Sticker'. Make the bottom copy the active layer and name it 'Shadow'. The Layers panel should look like the screenshot below:

Step 11
Double click on the 'Shadow' layer to open the Layer Style window and set the Fill Opacity to 0.

Step 12
Give the layer a Color Overlay, using Black (#000000) and 25% Opacity.

Step 13
Ideally, we want to add a second Color Overlay effect now. But if your version of Photoshop doesn't support this we can use a Gradient Overlay instead with a Black to Black gradient, Overlay Blend Mode, and 100% Opacity.

Step 14
These layer styles should make the Shadow layer now look like this:

Step 15
Go to Filter > Blur > Gaussian Blur... and apply a 2 Pixel blur then click OK.

Step 16
Go to Filter > Blur Gallery > Tilt Shift... and set up the blur as shown below with 90 px Blur and 100% Distortion.

Step 17
Go back to the main document, show visibility and select the 'Sticker' layer.
Step 18
Enter Transform (T) mode and click the Warp Mode toggle. From the warp mode dropdown choose Arch and set the Bend to -20%. Click OK and then reposition the layer on top of the shadow as shown below:


Step 19
Double click on the 'Sticker' layer to bring up the Layer Style window and apply a Gradient Overlay using:
- Blend Mode: Multiply
- Opacity: 5%
- Gradient: Black to White (Default)
- Style: Reflected
- Angle: -150º
- Scale: 60%

Step 20
Go to Layer > New Fill Layer > Gradient... and use these settings:
- Gradient: Black to White (Default)
- Style: Reflected
- Angle: -150º
- Scale: 70%

Step 21
Name the gradient fill layer 'Gloss Effect' and right click the layer then choose Convert to Smart Object. Go to Image > Adjustments > Levels... and set the Shadow Input Level to 50 and Highlight Input Level to 90.

Step 22
Go to Filter > Filter Gallery... and choose Glass. Set the Distortion to 20 and Smoothness to 4.

Step 23
Go to Image > Adjustments > Brightness/Contrast and enter 150 for Brightness and 100 for Contrast.

Step 24
Finally for this gloss effect, go to Filter > Sharpen > Sharpen.

Step 25
Create a duplicate of the gloss effect layer and clip both copies to the Sticker layer by right clicking and choosing Create Clipping Mask. On the top copy, set the Blend Mode to Soft Light and Opacity to 25%.

Step 26
On the bottom copy of the gloss effect, set the Blend Mode to Multiply and Opacity to 2%.

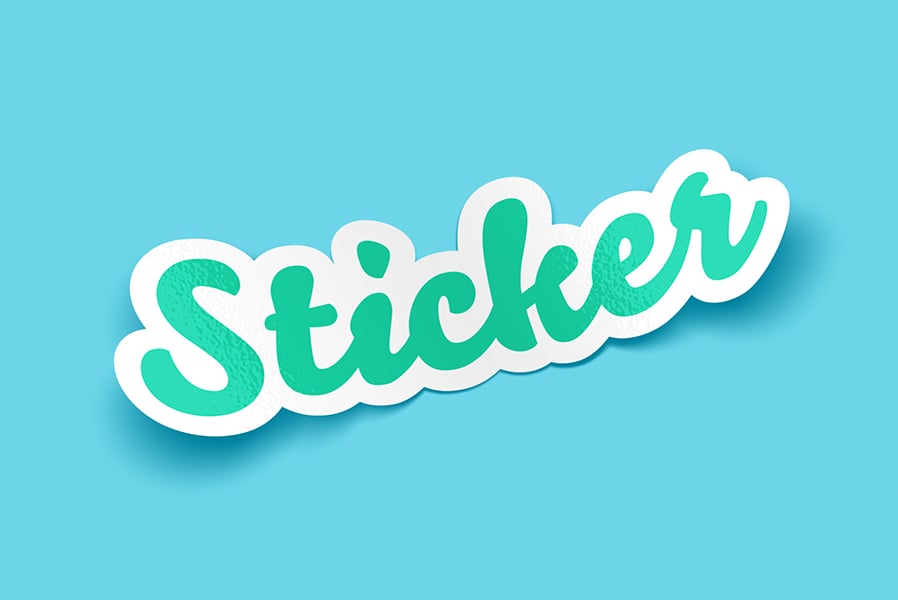
Result & Conclusion
Here is the final sticker. This mockup uses relatively simple effects in Photoshop to create a very impressive looking result. But remember, this isn't just a one-off effect! You have now created your very sticker mockup and you can put whatever you want into the 'Sticker' Smart Object layer to see it instantly mocked up.
Download the Mockup
Feeling a bit lazy? Download our full pre-made sticker mockups and save yourself some time! These are premium mockups that make use of Photoshop smart-layers to make this an easy process. At $6 for the download you'll find it can be quite easy and valuable for saving time.
Sticker Mockup for Photoshop
This is our first sticker mockup that we made (and the one from the tutorial). The premium set has more items, more styles, and everything is pre-made for you. Check it out here:
Sticker Mockup for Photoshop - Vol 2
Volume two of our premium Medialoot sticker mockups. This version has a few more styles including a clear frosted sticker that provides an awesome effect you're unlikely to find anywhere else. Find out more at the item page:
100% Free Sticker Mockup

This is a slightly smaller but still editable pack of sticker mockups. Using smart layers and photoshop you can easily configure this FREE download to meet whatever needs you may have.


Comments