

by Diego Sanchez
July 18, 2023
Diego prevents carpal tunnel syndrome in designers worldwide by making incredible time-saving Photoshop actions and mock-ups.

How to Easily Apply any Pattern to Clothes in Photoshop
Photoshop Photo Effects
There are times when you are in the middle of a pattern design and you want to visualize how it will look when applied to a piece of clothing. In Photoshop there are many different ways to achieve this task - Some more realistic, complicated, and time consuming. Other methods are easy for you to quickly visualize how a particular pattern will look when applied. Today, I will show you how to easily apply any pattern to clothes in Photoshop in less than 5 minutes with the most difficult task being the cloth selection (which can be easily made with the quick selection tool). If you are a fashion or textile designer, or just someone who wants to experiment with patterns on clothing, this tutorial is perfect for you.
Step 1
Open your image in Photoshop.

Step 2
Press "Ctrl+J" on your keyboard to duplicate the Background layer. Rename this layer to "Pattern Area".

Step 3
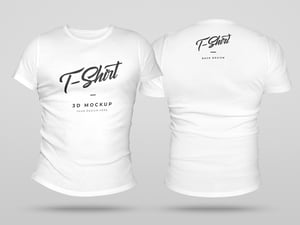
Using your prefered method, make a selection of the area where you want to apply the pattern. I will be using the "Quick Selection Tool" (W) to select the T-shirt.

Step 4
With the selection active, and on the "Pattern Area" layer, go to Layer > Layer Mask > Reveal Selection.

Step 5
Go to File > Place Embedded. Locate the design you want to use on your computer and click the "Place" button.

Step 6
If needed, resize and position the design over the area you selected and then hit the Enter key on your keyboard to commit the changes.

Step 7
Go to Layer > Create Clipping Mask.

Step 8
Select the Background layer and again press Crtl+J on your keyboard to make a copy of it. Rename this layer to "Shadows".

Step 9
Go to Layer > Arrange > Bring to Front.

Step 10
Press "Ctrl+Shift+U" on your keyboard to Desaturate the layer.

Step 11
Press "Ctrl+L" on your keyboard to open the Levels panel. Adjust the Shadows, Midtones and Highlights sliders until you get a good contrasting image on the area you selected previously and click OK.

Step 12
Set the "Shadows" layer blending mode to "Multiply" and bring down the Opacity to about 70-75%.

Step 13
Lastly, go to Layer > Create Clipping Mask.

Some Final Words
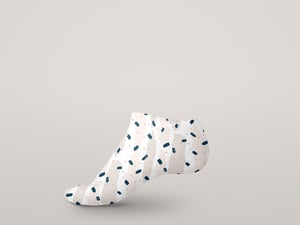
Now that you know how easily you can apply a pattern to a T-shirt, you can follow the same procedure for any other clothes you want to apply a pattern to. And once finished, you can change the pattern location simply moving the pattern layer, use a new one or simply change the T-shirt color with a solid Color Fill layer like in the following examples.


Comments