

by Diego Sanchez
February 03, 2020
Diego prevents carpal tunnel syndrome in designers worldwide by making incredible time-saving Photoshop actions and mock-ups.


How To Make Symmetric Live Designs in Illustrator
Illustrator Live Symmetry
Here's how you can easily make symmetric designs live in Illustrator. It's a great method if you're looking to speed your workflow and see what happens on the reflected side while you are drawing on the other side (instead of wasting time selecting, grouping and flipping the half of your design to achieve a symmetric one).
Step 1
Open Illustrator and make a new file at any size you want. In this case, I will make mine at 1800 x 1200 px.

Step 2
Select the Rectangle Tool (M) and draw a rectangle a bit bigger than the canvas size. Be sure to set the Fill and Stroke to "none".

Step 3
With the rectangle still selected, in the top toolbar be sure to have the align mode set to "Align to Artboard" and click on the "Horizontal Align Center" and "Vertical Align Center" icons.

Step 4
Press "Ctrl+R" on your keyboard to show the rulers and drag a ruler from the left to the center of the artboard as shown.

Step 5
Go to Window > Layers and click on the target icon right next to the square icon.

Step 6
Go to Effect > Distort & Transform > Transform. Apply the following settings and click OK.

Step 7
In the Layers Panel, expand the "Layer 1" and lock the "Rectangle" and "Guide" sub-layers by clicking on the empty space next to the eye icon.

Step 8
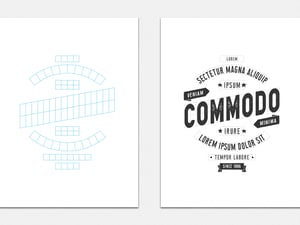
Now that our layer Symmetry is set, simply start designing as you normally do in Illustrator and you will see your design with a live symmetry in the X axis. Note: avoid designing outside the canvas bounds.

Step 9
When you finish your design, select any part of it and go to the Layers Panel. In the Layers Panel, click on the "Select Art" icon (usually in blue color). This will select all art in the layer.

Step 10
Now simply go to Object > Expand Appearance.


Comments