

by Diego Sanchez
May 03, 2022
Diego prevents carpal tunnel syndrome in designers worldwide by making incredible time-saving Photoshop actions and mock-ups.


How to Make a Vector Wood Texture in 6 Easy Steps.
Photoshop & Illustrator Vector Textures
There are times when using a image texture on your design is not the best option due the colors, position, or even the scale of the image. But maybe you still want to use the texture of that image because is just the right fit for your design. For those cases, you can extract the texture of your image. However, if it is too small, when you scale it up you may find some problems. Fortunately, there is a very easy way that you can still use the texture of that image and then color it and scale it up - or down - by making a vector texture. Today, I will show you how to easily extract the texture of a wood image and convert it to a vector format so you can freely color and scale the texture to be used on any of your designs.
Step 1
Open your wood image in Photoshop. It can be any kind of wood image, but if it contains cracks and visible wood grain the final texture will be much better.

Step 2
Go to Image > Adjustments > Desaturate.

Step 3
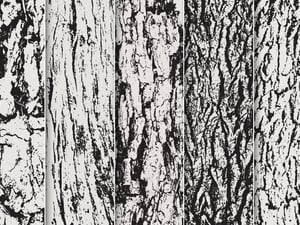
Go to Image > Adjustments > Levels and adjust the Shadows, Midtones and Highlights Input Levels until you get a good contrast between blacks and whites like in the example below.

Step 4
When you are happy with your end result, save the image file on your computer and open it in Illustrator.

Step 5
With your image selected, go to Window > Image Trace. Apply the following values and click OK.
Note: You may add more or fewer details to the wood texture by increasing or decreasing the Threshold value.

Step 6
Lastly, click the "Expand" button in the top toolbar.

Some Final Words:
Now you know how to easily make a vector texture from any wood image, you can scale, color and modify the vector texture on any way you like, just like any other vector object in Illustrator.


Comments