

by Tony Thomas
February 14, 2018
Tony creates pixel-perfect UI kits & icons. His pug, Wednesday, is Medialoot's beloved mascot.


How to Create a Glitch Text Effect with Photoshop
Houston we have a problem
This tutorial will teach you how to transform text in Photoshop using the Wave filter to create a realistic glitch distortion effect. There are tonnes of possibilities with the Wave filter, we are going to cover the Square waveform and specifically how to use it to create a glitch effect.
Before we start
If you want to save some time, be sure to check out Fault, our new glitch font on Medialoot which was created using this technique:

Step 1
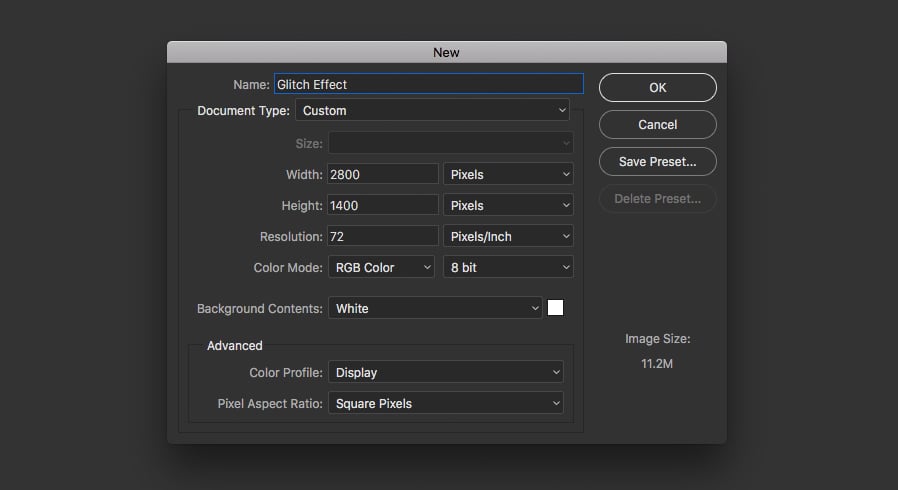
Begin by launching Photoshop and creating a new document. This effect needs to be fairly large in order to get all of the detail in, you can always reduce the size later but for now let's start with 2800 x 1400 px.
Step 2
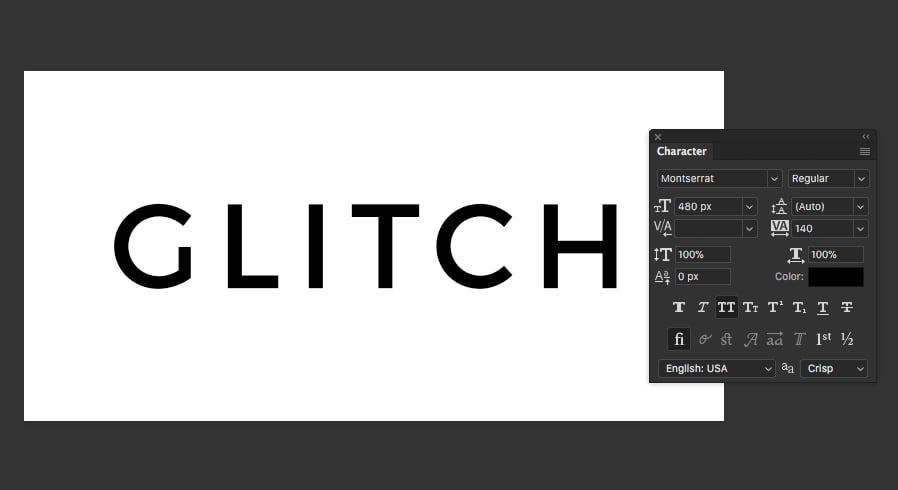
Use the Type tool to enter the word Glitch. A simple sans-serif typeface works well for this effect. Here I am using Montserrat at 480px with 140 letter spacing.
Step 2
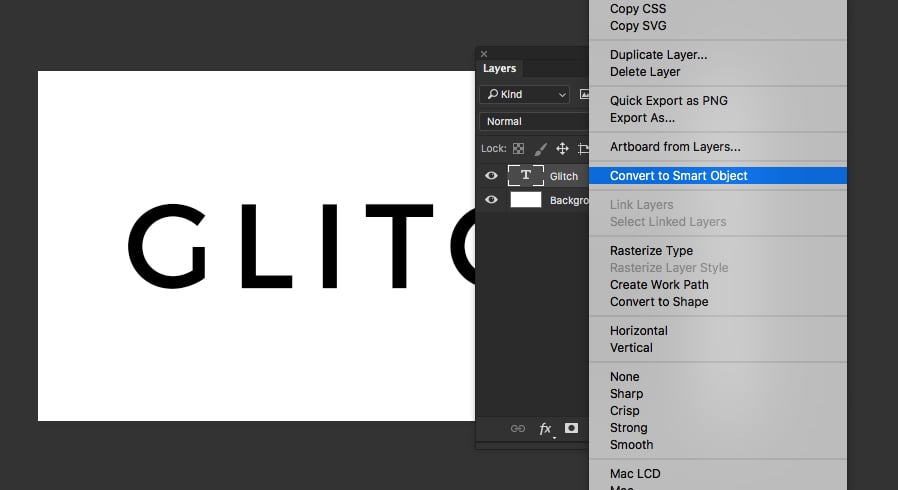
Right click on the text layer and choose Convert to Smart Object.
Step 4
Go to Filter > Distort > Wave and enter the following settings:
- Type: Square
- Number of Generators: 2
- Wavelength Min: 178 Max: 756
- Amplitude Min: 1 Max: 52
- Scale Horiz: 20% Vert: 1%

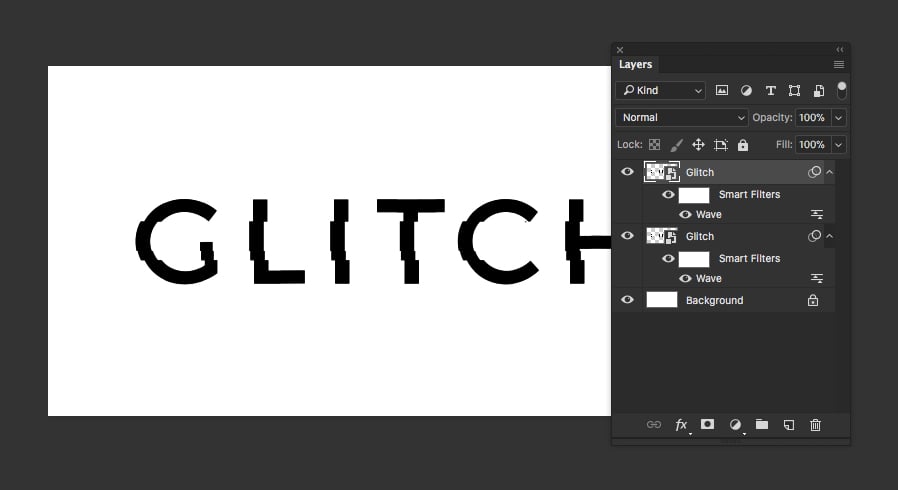
This is the first stage of the glitch effect, the idea is to get some large chunks as base to build upon. Feel free to tweak the effect slightly but don't make any drastic changes.

Step 5
Duplicate the Smart Object (CMD+J or CTRL+J) then expand the fx dropdown.
Step 6
Double click on the Wave filter to edit it, and modify the settings as follows:
- Type: Square
- Number of Generators: 2
- Wavelength Min: 97 Max: 372
- Amplitude Min: 1 Max: 283
- Scale Horiz: 10% Vert: 1%

These are the medium sized chunks. When combined with the base effect it should be starting to look very random and 'glitchy'.

Step 7
Duplicate the Smart Object again (CMD+J or CTRL+J).
Step 8
Double click on the Wave filter to edit it, and modify the settings as follows:
- Type: Square
- Number of Generators: 3
- Wavelength Min: 1 Max: 33
- Amplitude Min: 4 Max: 33
- Scale Horiz: 60% Vert: 1%

These are the fuzzy distortion lines which complete the effect. Experiment with the Horizontal Scale setting to get the amount of fuzziness looking right.

Step 9
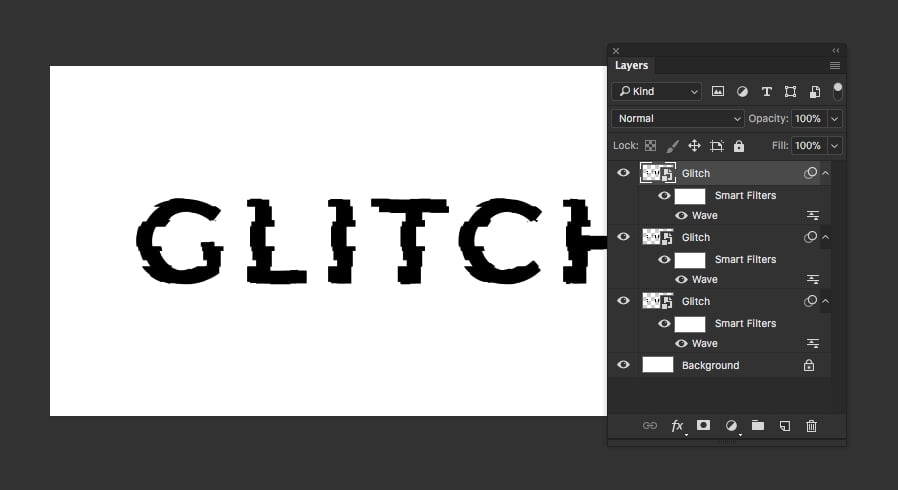
When you are happy with the effect, select all 3 Smart Object layers and group them. Name the group 'Glitch'. Fill the background with #242424.
(Optional) If your version of Photoshop does not support layer styles on groups, convert the group to a smart object.

Step 10
Double click on the group (or smart object) and add a White Color Overlay.


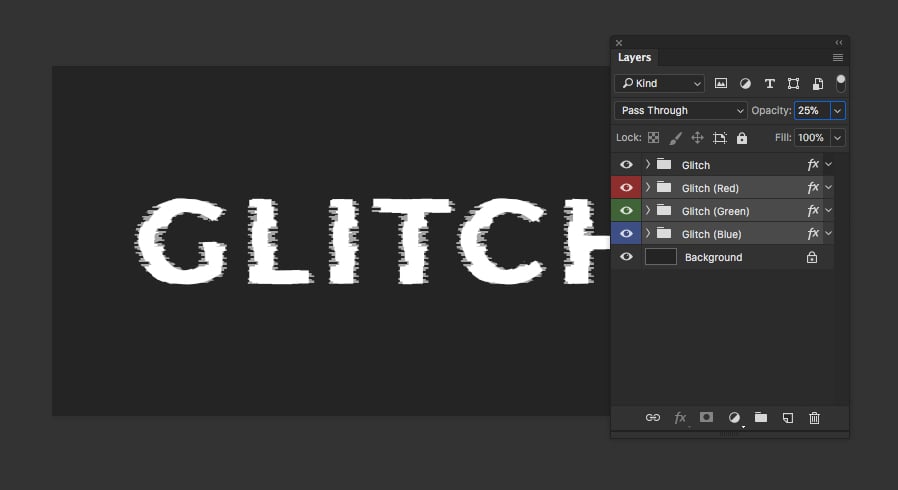
Step 11
Duplicate the Glitch group (or smart object) 3 times so that you have 4 groups in total. On the bottom 3 groups, label them Red, Green and Blue then set the Opacity of all 3 labelled groups to 25%.
Step 12
Double click on the Red group and change the Color Overlay to #ff2700.

Step 13
Double click on the Green group and change the Color Overlay to #00fa00.

Step 14
Double click on the Blue group and change the Color Overlay to #1833ff.

Step 15
Use the arrow keys to nudge the Red, Green and Blue groups randomly (move them around 10-20 pixels each)

Step 16
(Optional) To complete the effect, I am now going to add a cool glitch effect background. Download the Glitch Image Effect Generator and use it with this free image by Nasa on Unsplash.

Step 17
Finally copy and paste your glitch background image behind the text effect.

Conclusion
Thanks for reading, hopefully you have enjoyed following along with this tutorial and learnt something new about the Wave filter in Photoshop. There are tonnes of possibilities with the Wave filter, try using the Sine or Triangle waves for a completely different effect.


Comments