

by Diego Sanchez
November 15, 2022
Diego prevents carpal tunnel syndrome in designers worldwide by making incredible time-saving Photoshop actions and mock-ups.

Color Grading in Photoshop With Gradient Maps
Photoshop Post Processing
There are many different methods to change the mood of a photo. One of them is by replacing the original image colors with a more creative combination. Known as Color Grading, there are many different methods to make this effect in Photoshop. You can use luts, selective colors, channels, etc. But there is one easy and quick way to make a Color Grading in Photoshop using a single layer which will give you full control over the colors even after the effect is applied. So, today I will show you how you can make a color grading effect in Photoshop using a single adjustment layer called "Gradient Map".
Step 1
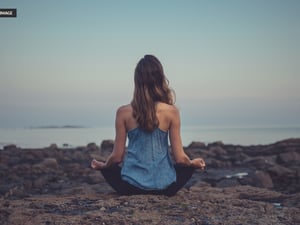
Open your image in Photoshop.

Step 2
Press the "D" key on your keyboard to reset the Foreground and Background colors.

Step 3
In the Layers panel click on the "Create New Fill or Adjustment Layer" icon and from the dropdown menu select "Gradient Map".

Step 4
In the Properties panel, click on the gradient thumbnail to edit the gradient.

Step 5
In the Gradient Editor click once right below the gradient miniature to add 1 color stop and be sure to set the Location to 50%.

Step 6
Select the first color stop (which will target the Shadows) and then click the color thumbnail to open the Color Picker.

Step 7
Pick any color you want and click OK. In this case, I will use #0a1133.

Step 8
Now select the second color stop (which will target the Midtones) and then click on the color thumbnail to open the Color Picker again.

Step 9
Pick any color you want and click OK. In this case, I will use #808080.

Step 10
Select the third color stop (which will target the Lights) and then click on the color thumbnail to open the Color Picker again.

Step 11
Pick any color you want and click OK. In this case, I will use #ffe3b2.

Step 12
Click OK in the Gradient Editor window.

Step 13
Lastly, in the Layers panel set the blend mode to "Soft Light" and bring down the Opacity to your liking, here I've set the Opacity to 70%.

A Final Note
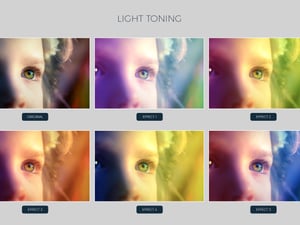
Now that you know how easily you can color grade any image in Photoshop. You can also try other gradient colors and blending modes like "Overlay", "Normal" or "Color" and play with the layer Opacity to get different results like in the following examples.


Comments