
Three Ways to Curve Text in Photoshop
Photoshop Text Effects
When you are working on a badge, poster or any other composition in Photoshop and you need to curve some of the text, Photoshop offer us many different ways to make. But depending on how you will use it and the curvature you want to give to your text some methods are better than others, and here I will show you three different methods to curve text in Photoshop so you can choose the one that better fit your design needs.
Method 1
Step 1
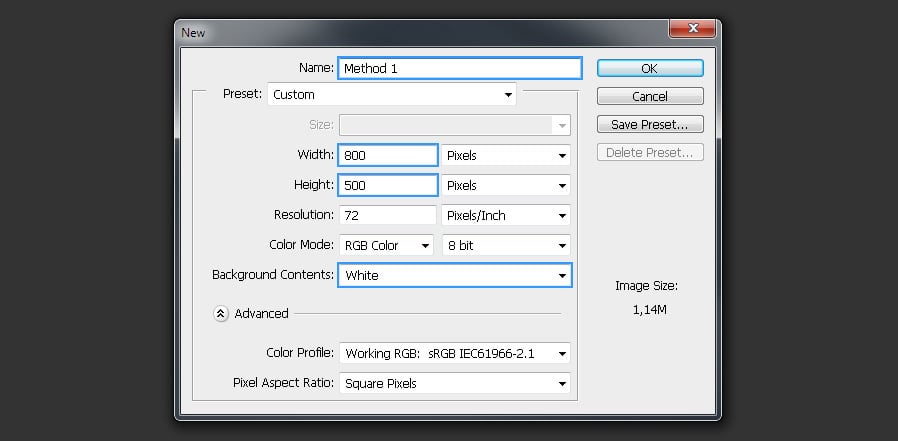
Open Photoshop and go to File > New. Set the document name as “Method 1”, a Width of 800 px, a Height of 500 px and select “White” for the Background Contents. Click OK.
Step 2
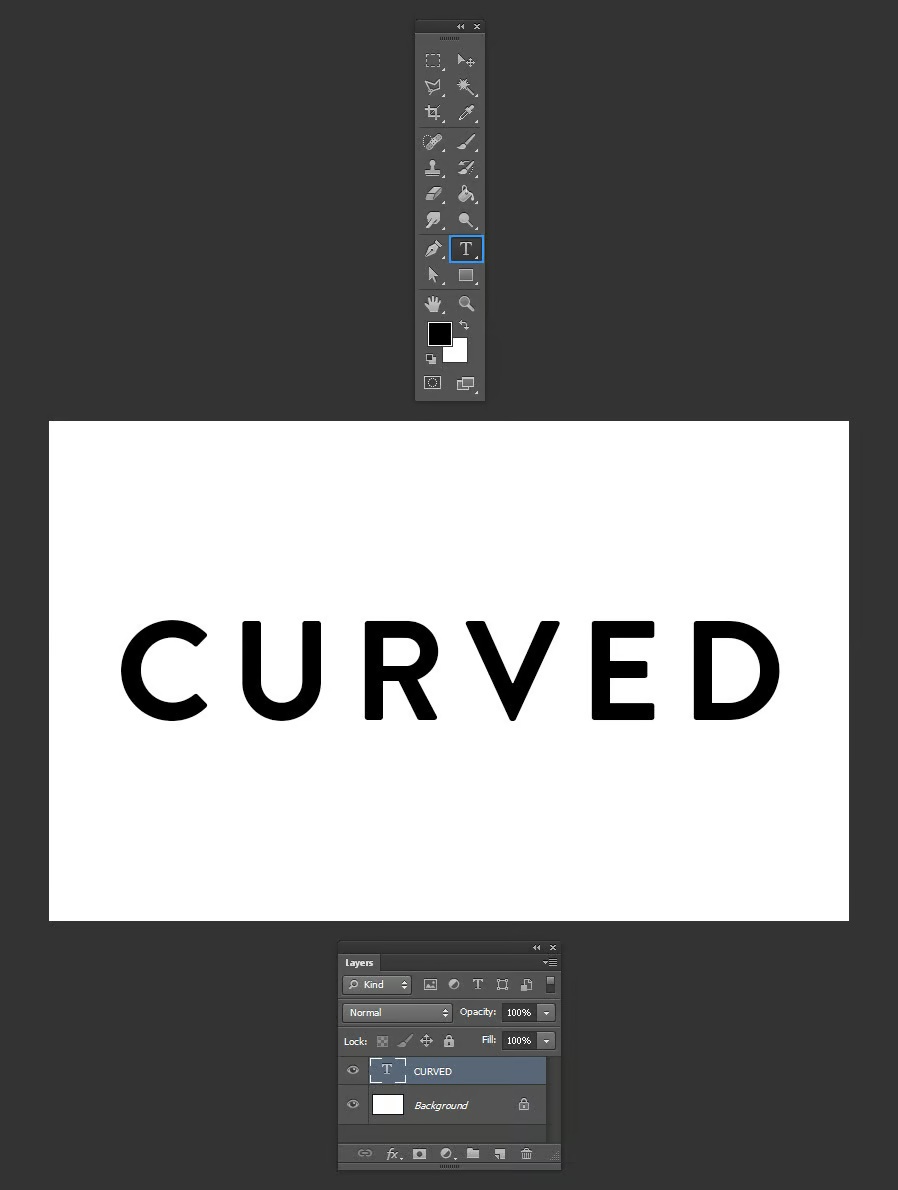
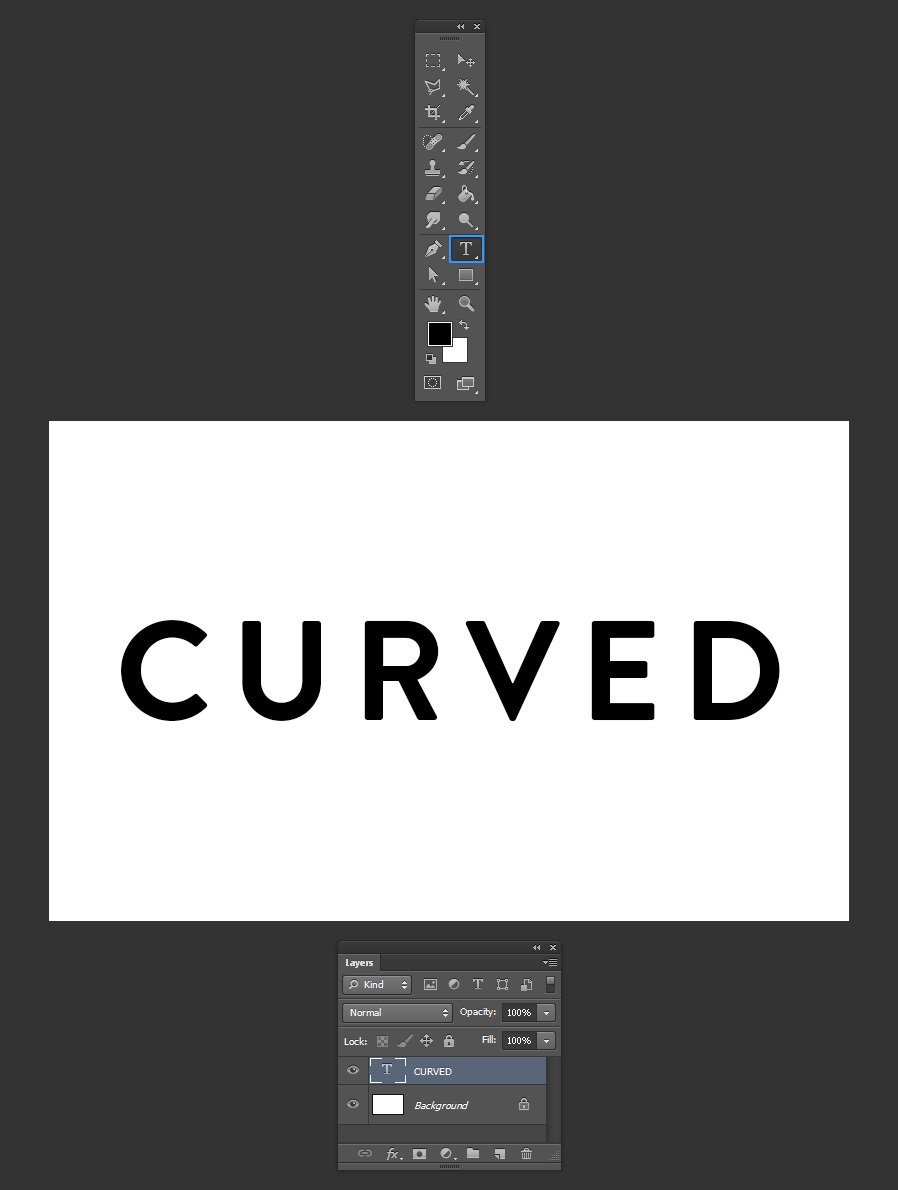
Select the Text tool (T) and type your text.
Step 3
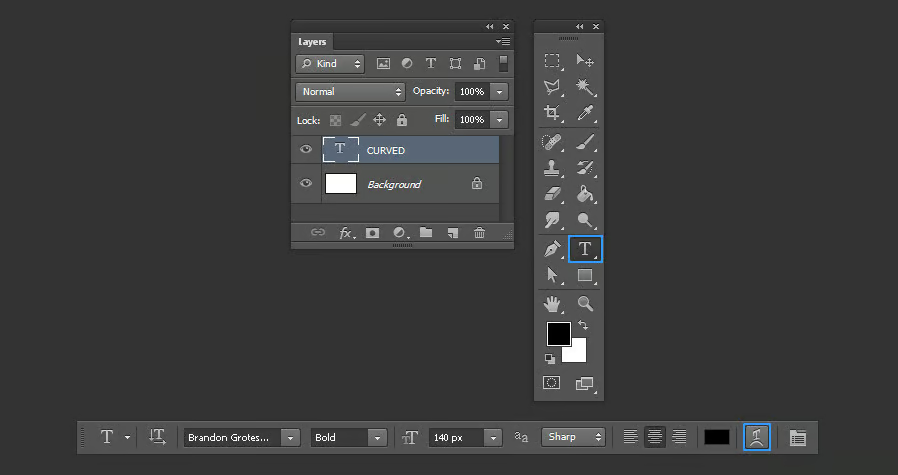
With the text layer selected and the Type tool (T) active, click on the “Create warped text” icon in the toolbar.
Step 4
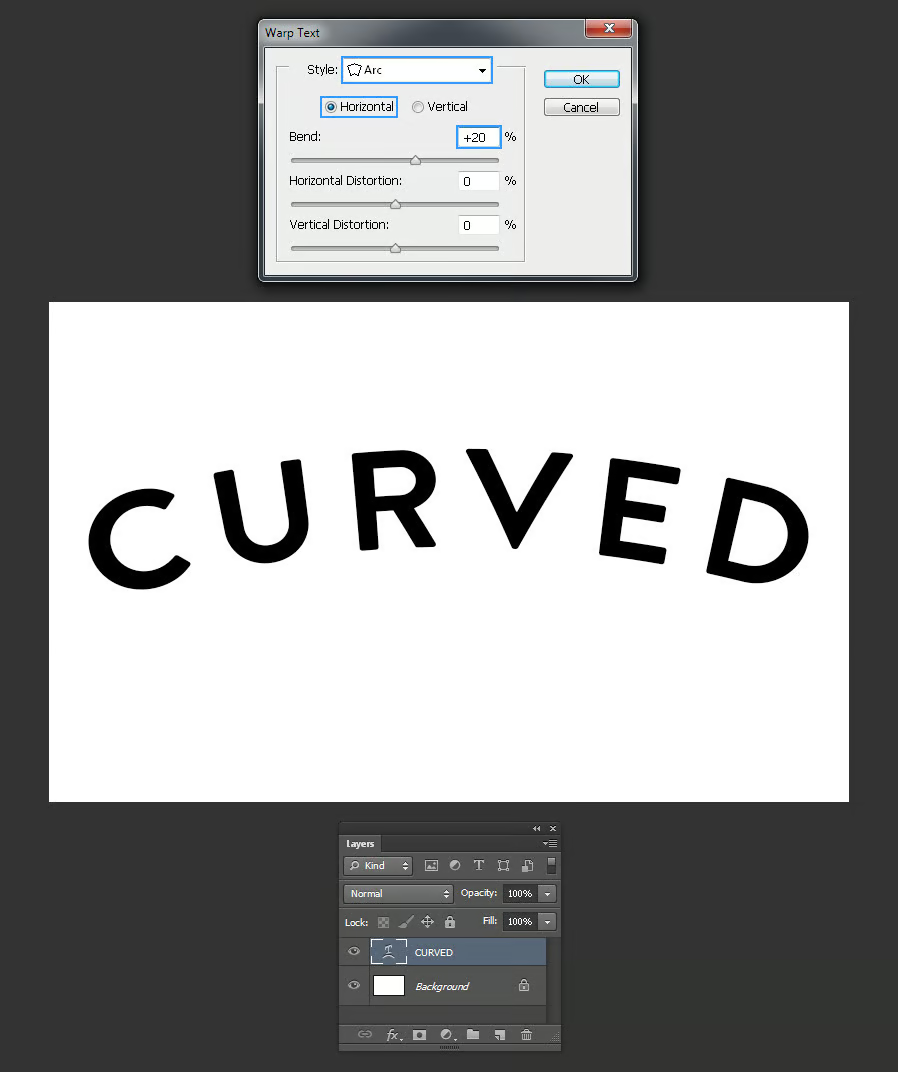
In the Warp Text window, select the “Arc” style, check the Horizontal option and set the Bend value to +20%. Click OK.
Method 2
Step 1
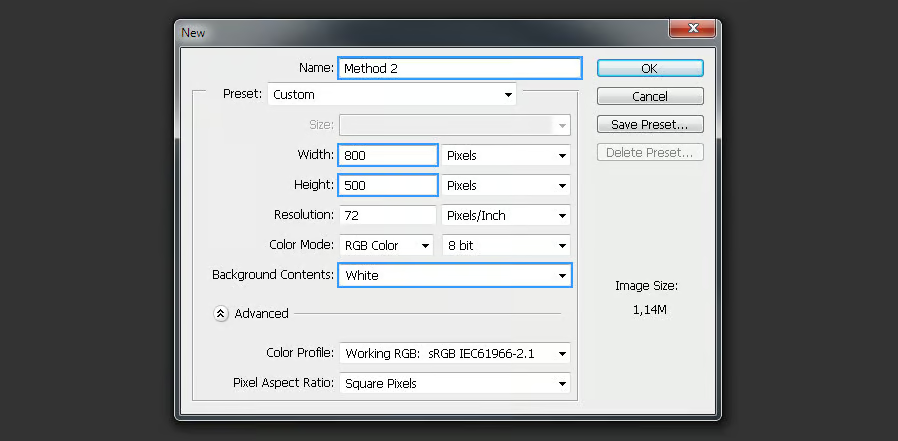
Open Photoshop and go to File > New. Set the document name as “Method 2”, a Width of 800 px, a Height of 500 px and select “White” for the Background Contents. Click OK.
Step 2
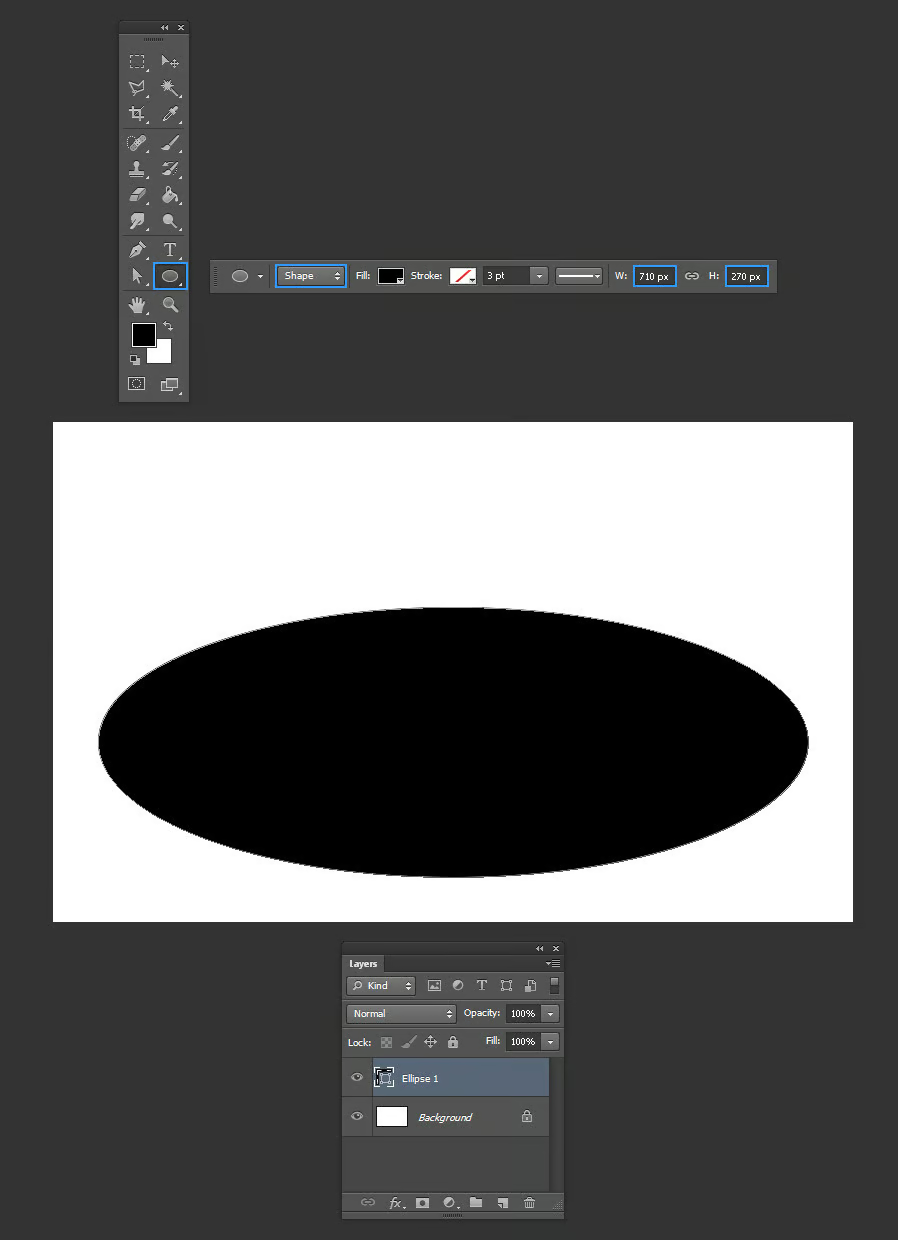
Select the Ellipse tool (U). Be sure to have the “Shape”mode selected in the toolbar and draw an ellipse of 710 px x 270 px.
Step 3
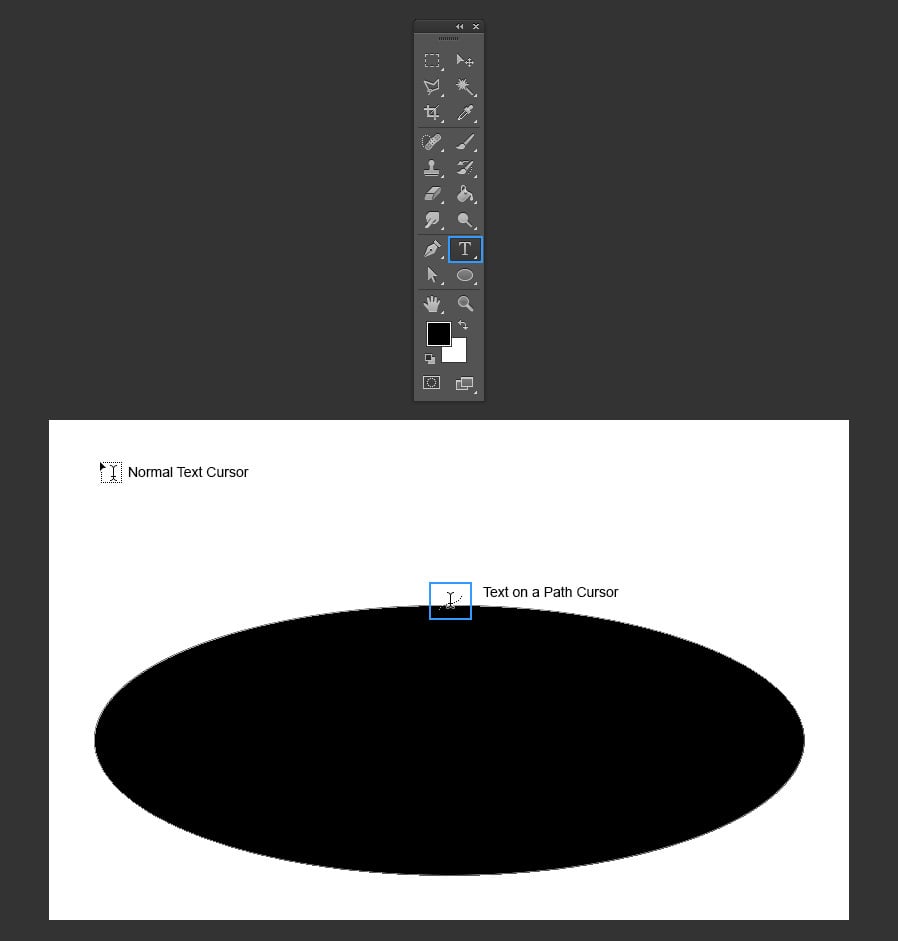
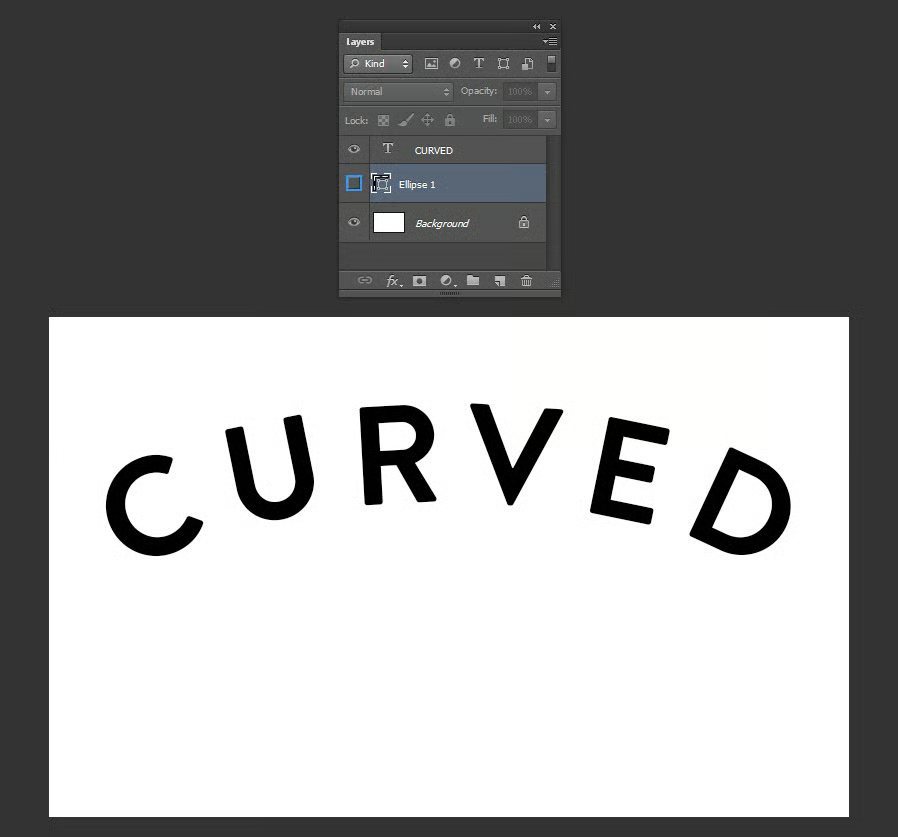
Select the Text tool (T) and click on the edge of the ellipse when you see the Text cursor change to the “Text on a Path” cursor.
Step 4
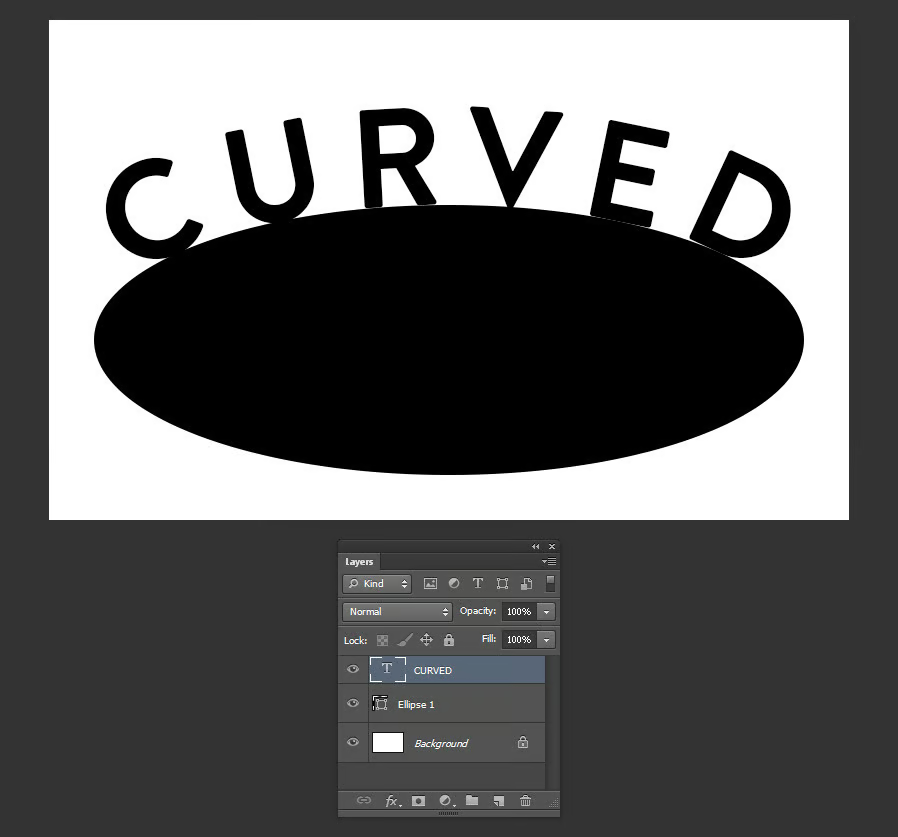
Type your text.
Step 5
Once you finish, simply hide the ellipse layer by clicking on the eye icon next to the layer name.
Method 3
Step 1
Open Photoshop and go to File > New. Set the document name as “Method 3”, a Width of 800 px, a Height of 500 px and select “White” for the Background Contents. Click OK.
Step 2
Select the Text tool (T) and type your text.
Step 3
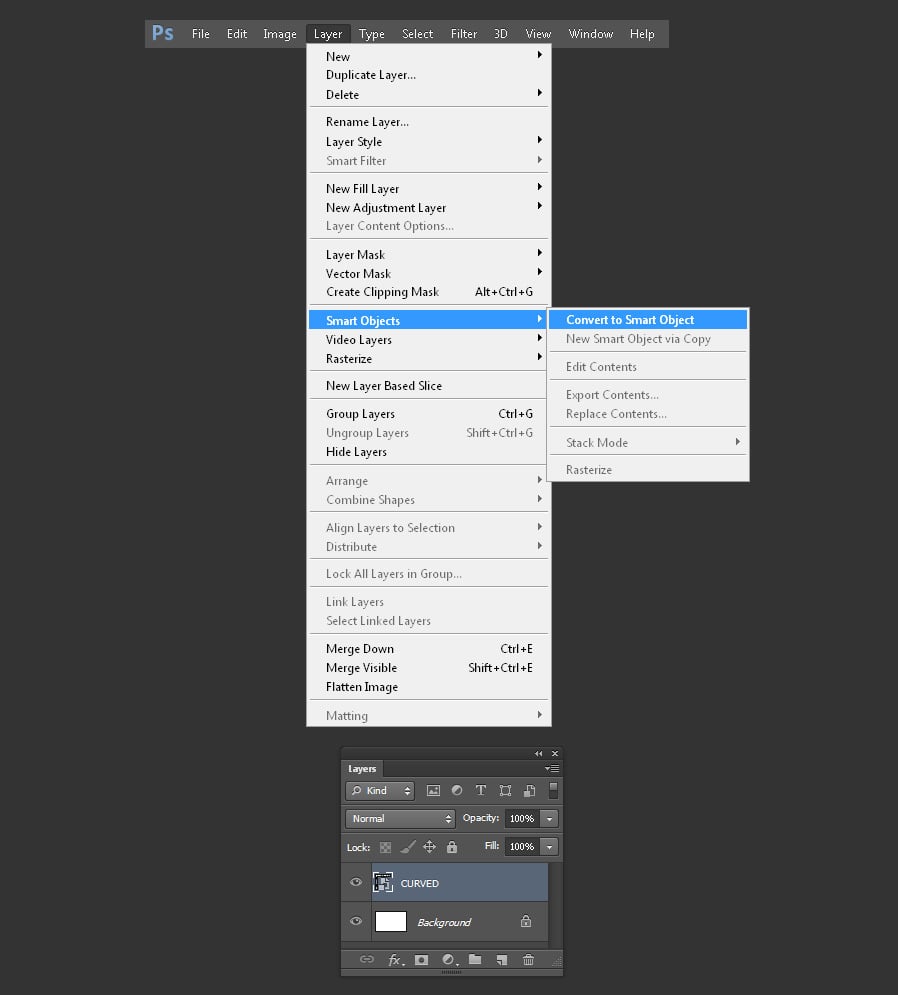
With the text layer selected go to Layer > Smart Objects > Convert to Smart Object.
Step 4
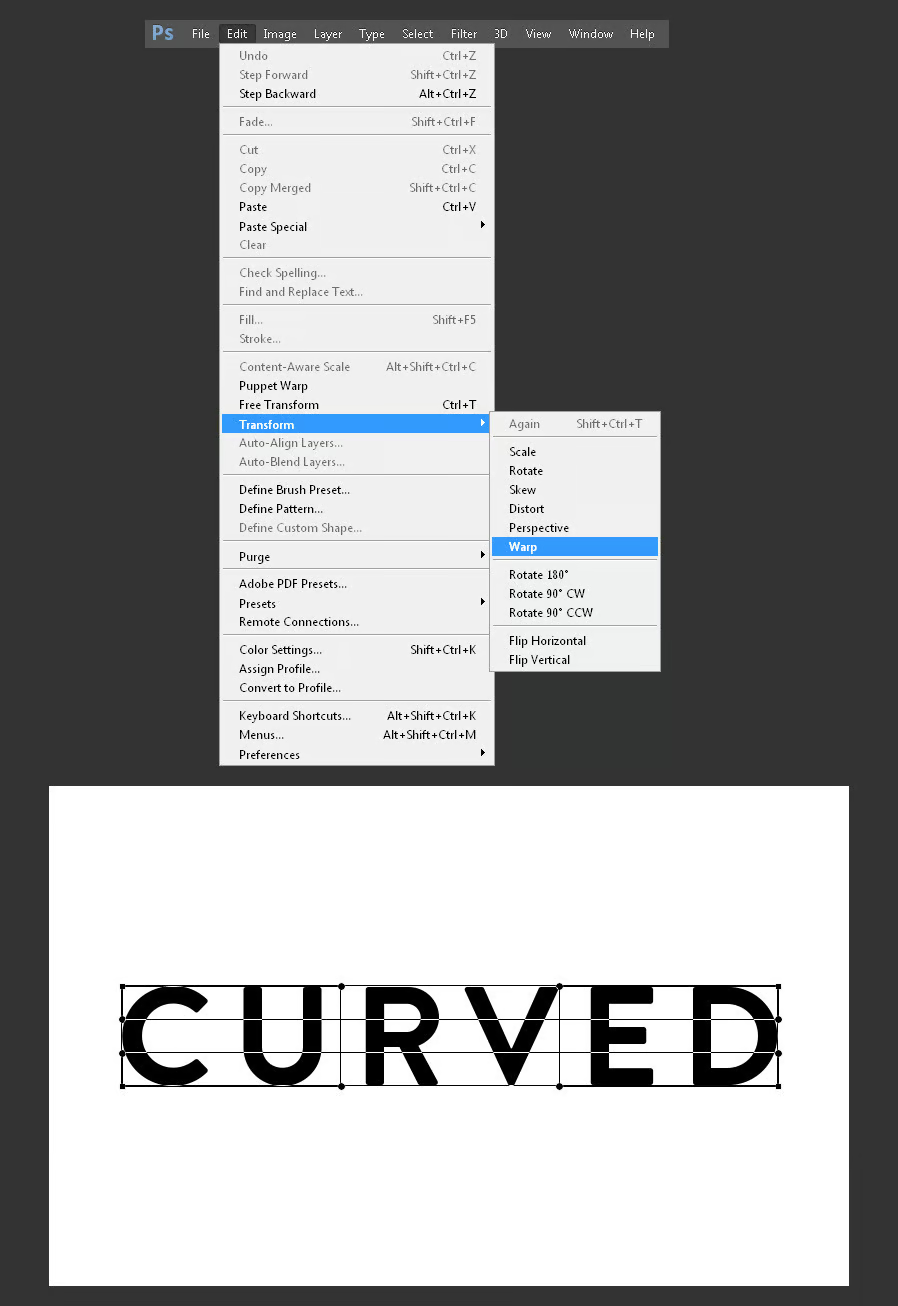
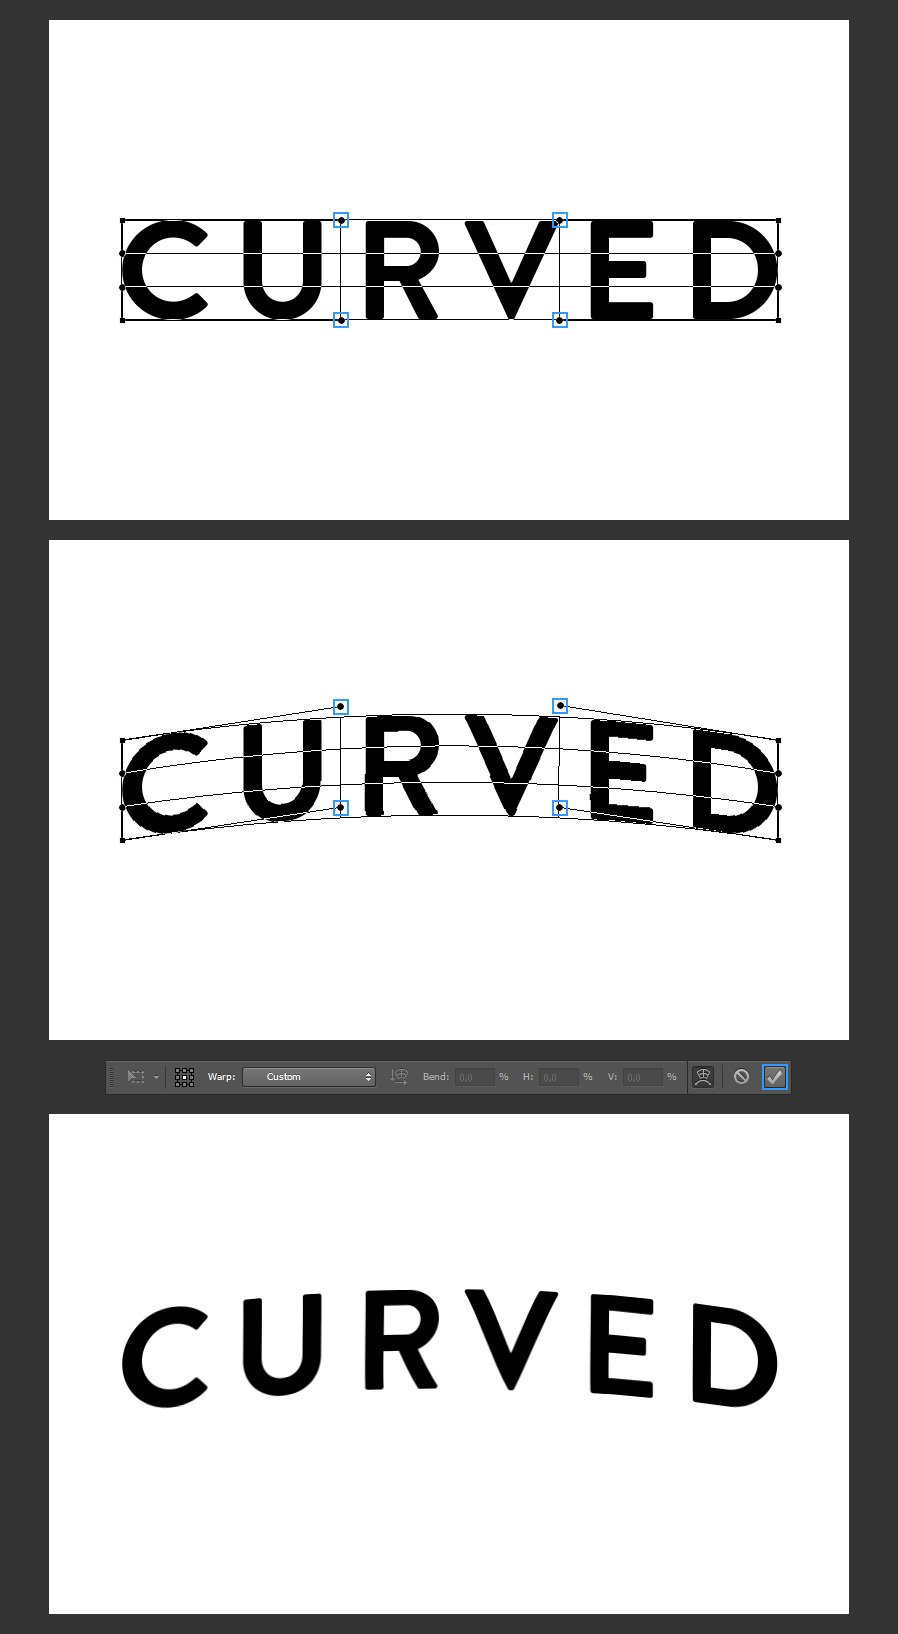
Go to Edit > Transform > Warp
Step 5
Click and drag over the anchor points of the warp grid. Once you finish, click the commit transform icon in the toolbar.






Comments