Photoshop Layer Blending Modes Explained
Photoshop Tools
Among many different ways you have at your disposal to create non destructive effects in Photoshop, the layer blending modes are for sure the most used ones. Each blend mode has different effects on how layers interact with each other and how pixels combine. The available blending modes may vary slightly depending on the version of Photoshop you are using, but here we will take a look at the common blending modes you can find in the Layers Panel.
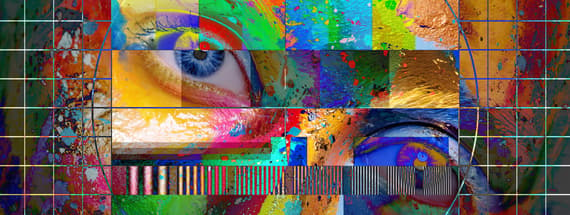
To better see how each blend mode affects the layer, I will use a simple "test screen" which contains colors and grayscale tones along a colorful image which will be used as the "base image" to better demostrate how each layer blend mode works.

Normal
This is the default mode, it doesn't apply any blending effect and displays the layer as it is.

Dissolve
This blending mode does not blend pixels neither, it creates a speckled effect, randomly replacing pixels with the base or blend color based on the opacity (which in this case is set to 50%).

Darken
Compares the pixels in each layer and selects either the base or blend color (whichever is darker) as the result.

Multiply
Multiplies the color information of the blend and base colors, resulting in a darker image. This one is useful for creating shadows.

Color Burn
Darkens the base color to reflect the blend color. It increases contrast and burns the colors.

Linear Burn
Darkens the base color to reflect the blend color by decreasing brightness and increasing contrast.

Darker Color
Very similar to the Darken blending mode it compares the total of all RGB channels values for the blend and base color in each layer and selects either the base or blend color (whichever is darker) as the result.

Lighten
Compares the pixels in each layer and selects the lighter pixels as the result. This one is useful for removing shadows.

Screen
Brightens the base color to reflect the blend color, resulting in a lighter image.

Color Dodge
Brightens the base color to reflect the blend color by increasing brightness and decreasing contrast.

Linear Dodge (Add)
Brightens the base color to reflect the blend color by increasing brightness, similar to Color Dodge but with a stronger effect.

Lighter Color
It does not produce a third color, which can result from the Lighten blending mode, but compares the total of all RGB channels values for the blend and base color and displays the higher value color.

Overlay
Combines Multiply and Screen modes. It increases the contrast of the underlying layers while preserving the highlights and shadows of the base layer.

Soft Light
Darkens or lightens the colors, depending on the blend color. A softer version of Overlay.

Hard Light
Increases contrast based on the blend color. It's stronger than Overlay.

Vivid Light
Burns or dodges the colors based on the blend color's brightness.

Linear Light
Combines Linear Dodge and Linear Burn modes.

Pin Light
Replaces the colors depending on the blend color.

Hard Mix
Creates a result color with the smallest channel values from the base and blend color channels.

Difference
Subtracts either the blend color from the base color or vice versa, depending on which has the greater brightness value.

Exclusion
Similar to Difference but with lower contrast.

Subtract
It looks at the color information in each RGB channel and subtracts the blend color from the base color. It darken pixels by substracting their brightness. In 8 and 16 bit images, any resulting negative values are clipped to zero.

Divide
This one looks at the color information in each channel and divides the blend color from the base color. It produces the opposite effect as Subtract.

Hue
Retains the luminance and saturation of the base color while adopting the hue of the blend color.

Saturation
Retains the luminance and hue of the base color while adopting the saturation of the blend color.

Color
Retains the luminance of the base color while adopting the hue and saturation of the blend color.

Luminosity
Retains the hue and saturation of the base color while adopting the luminance of the blend color.

Some Final Notes:
As you may see, each layer blending mode has unique applications but for sure they can be used creatively in Photoshop to achieve various effects and as an easy solution to enhance your projects.


Comments