How to Make the Adamski Effect in Photoshop
Photoshop Photo Effects
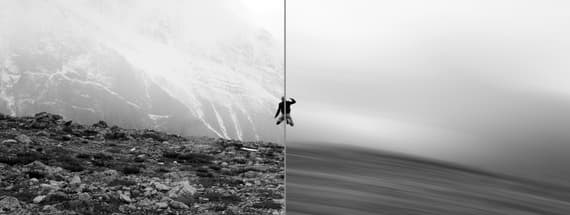
Josh Adamski is a photographer who himself defines his work as photo impressionism and whose style has become popular in recent years. Using blurring techniques and creating the illusion of movement, his images take on an abstract almost painterly tone. So today, I will show you how you can recreate his style in Photoshop in less than 5 minutes by taking advantage of the AI Generative Fill.
But before we start, and if you want to follow this tutorial exactly as described, please download the following free image from Pexels: Download.
Step 1
Open your image in Photoshop.

Step 2
Using your prefered method, make a selection of your subject or the area that you want to keep in focus. In this case I will first make a selection of the person, so go to Select > Subject.

Step 3
Then, using the Quick Selection Tool (Q) I simply add to the selection the rock he is standing on.

Step 4
With the selection active, go to Select > Select and Mask.

Step 5
Make any adjustments you need for your image and then in the Select and Mask properties sidebar under the "Output" field, select "New Layer" from the dropdown menu and click OK.

Step 6
Rename the layer to "Focus".

Step 7
Hide the "Focus" layer and make the Background layer visible again by clicking on the eye icon next to the layer's name.

Step 8
Be sure to have the Background layer selected, and with the Lasso Tool (L) make a quick selection around your choosed focus area.

Step 9
With the selection active, click the "Generative Fill" button in the contextual taskbar.

Step 10
Next, simply click the "Generate" button, wait a few seconds and pick any of the 3 options that Photoshop will give you to replace your selection with a generative fill of your background.

Step 11
Select both, the "Background" and the "Generative Fill" layers and go to Layer > Smart Objects > Convert to Smart Object.

Step 12
Next, go to Filter > Blur Gallery > Path Blur. Set any kind of path that fits your particular background, apply the following settings in the Path Blur options and click the OK button in the top toolbar.

Step 13
Lastly, simply turn on the "Focus" layer.





Comments