

by Diego Sanchez
January 24, 2018
Diego prevents carpal tunnel syndrome in designers worldwide by making incredible time-saving Photoshop actions and mock-ups.

How to Retouch Hair Perfectly in Adobe Photoshop
Photoshop Techniques
Retouching hair in a photograph might be one of the most complicated and time consuming tasks that designers face. Every hair is different and has its own challenges — and the method we use to make each hair look good will vary from one to another. There is no easy way to fix hair in a picture if we want to make it look just perfect; fixes must be done by hand, and one hair at a time.
But don't worry — there's a method we can apply to some of this madness. Although there are many details to take care of in a hair retouching task depending on each hair style, there are 2 common and most relevant aspects we have to look for when we have to fix hair in a picture: Removing Flyaway Hairs and Filling Hair Gaps. The methods I will show you here will cover these 2 main aspects of hair retouching and they could be apply it to any hair no matter the style and/or the color, and to show you exactly that I will use different images to cover each of the aspects of fixing hair in Photoshop rather than only one.
A good plan is to start from the outside (background) to the inside (hair) and in the way taking care of the middle (skin) and as a final step to take care of the empty zones if you want to give the hair a better appearance.
To make the tutorial easy to follow and to understand the techniques used here, I will only show you how to work on the different parts of the image rather than fixing only one single entire image.
Removing Flyaway Hairs
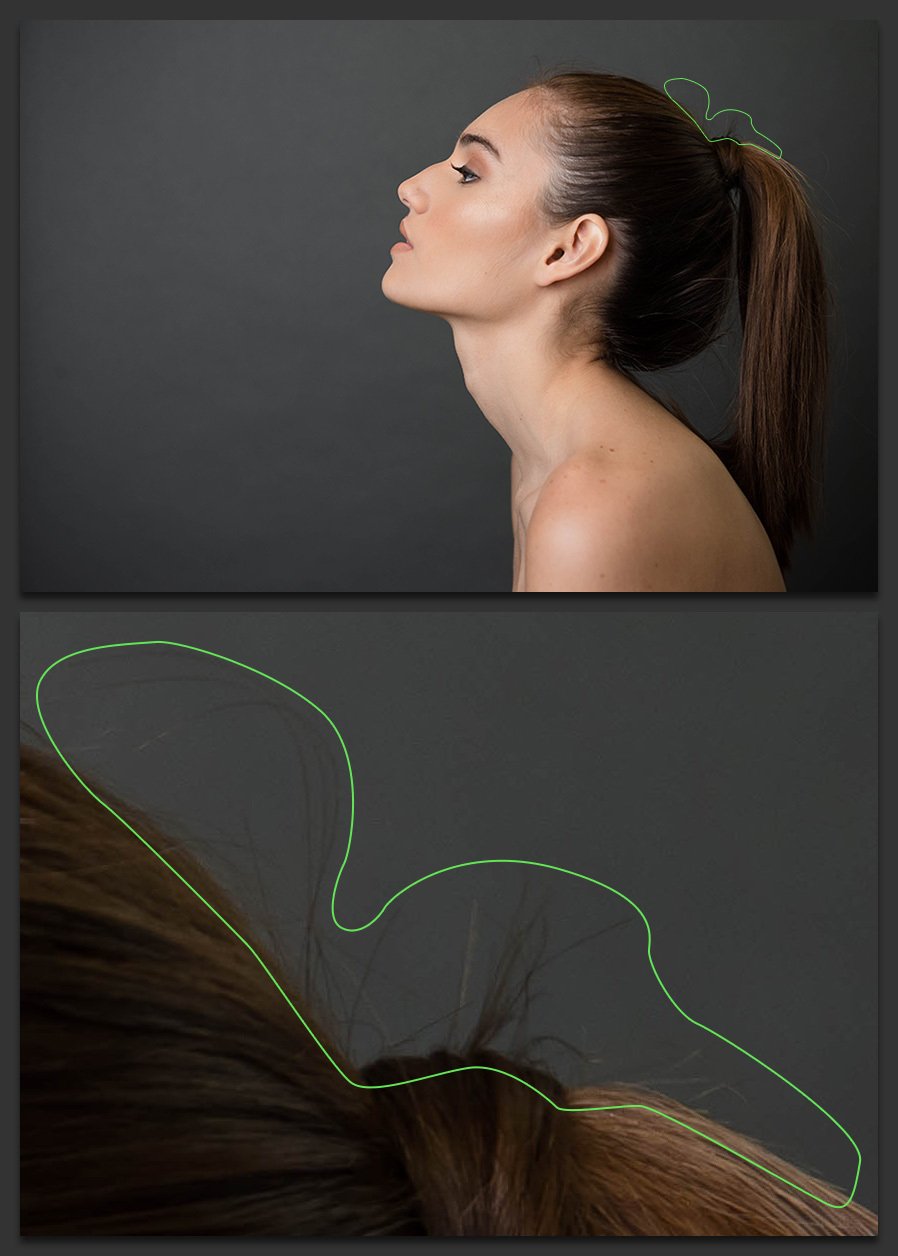
Over Background
Step 1
Open you image in Photoshop and locate the areas that you want to fix. In this case, I will show you how to fix the area marked with a green stroke. But the same procedure is used on all the images, it does not matter if it is a solid a blurred or a busy background.
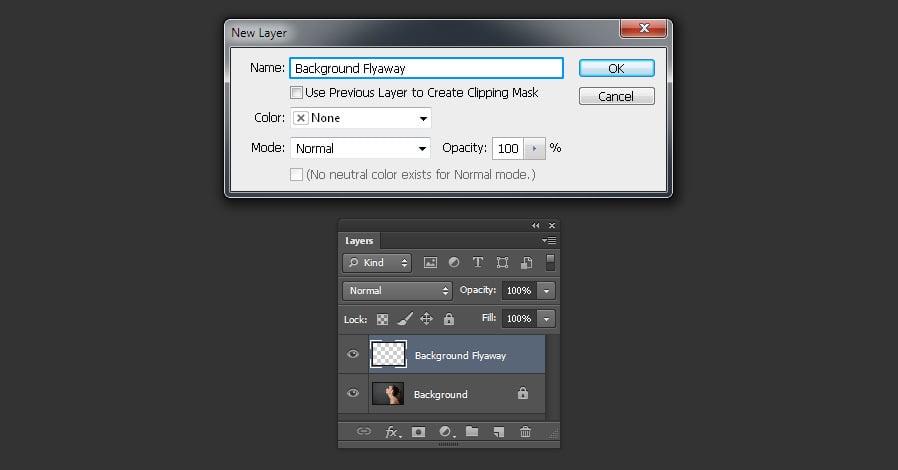
Step 2
Go to Layer > New > Layer. Name this layer as ‘Background Flyaway’ and click OK.
Step 3
Zoom in very close to the hair area you want to fix (between 300% and 400% should be enough).

Step 4
Select the Clone Stamp Tool (S). In the top bar click on the brush thumbnails and select a rounded brush. Set the Size to just 1px bigger than the size of a single hair in your picture (in this case is 7px) and bring down the Hardness to 95%.

Step 5
Still in the top bar tool panel, set the Mode of the tool to Normal, the Opacity to 100%, the Flow to 100%. Also be sure to have ‘Aligned’ selected and in the Sample dropdown menu select ‘Current & Below’.

Step 6
Be sure to have the ‘Background Flyaway’ layer active. Hold the Alt key in your keyboard and click on a near area of the flyaway hair you want to fix.

Step 7
Release the button and click over the hair to start painting over it and copying the background at the same time. Always try to follow the hair direction for a better effect.
Note: If the background looks a bit messy when you clone the area, do not worry, because you can always fix it later once you have fixed the hair.

Step 8
Repeat this process for all the flyaway hairs on the background, and remember to try to follow the hair direction.

Over Hair
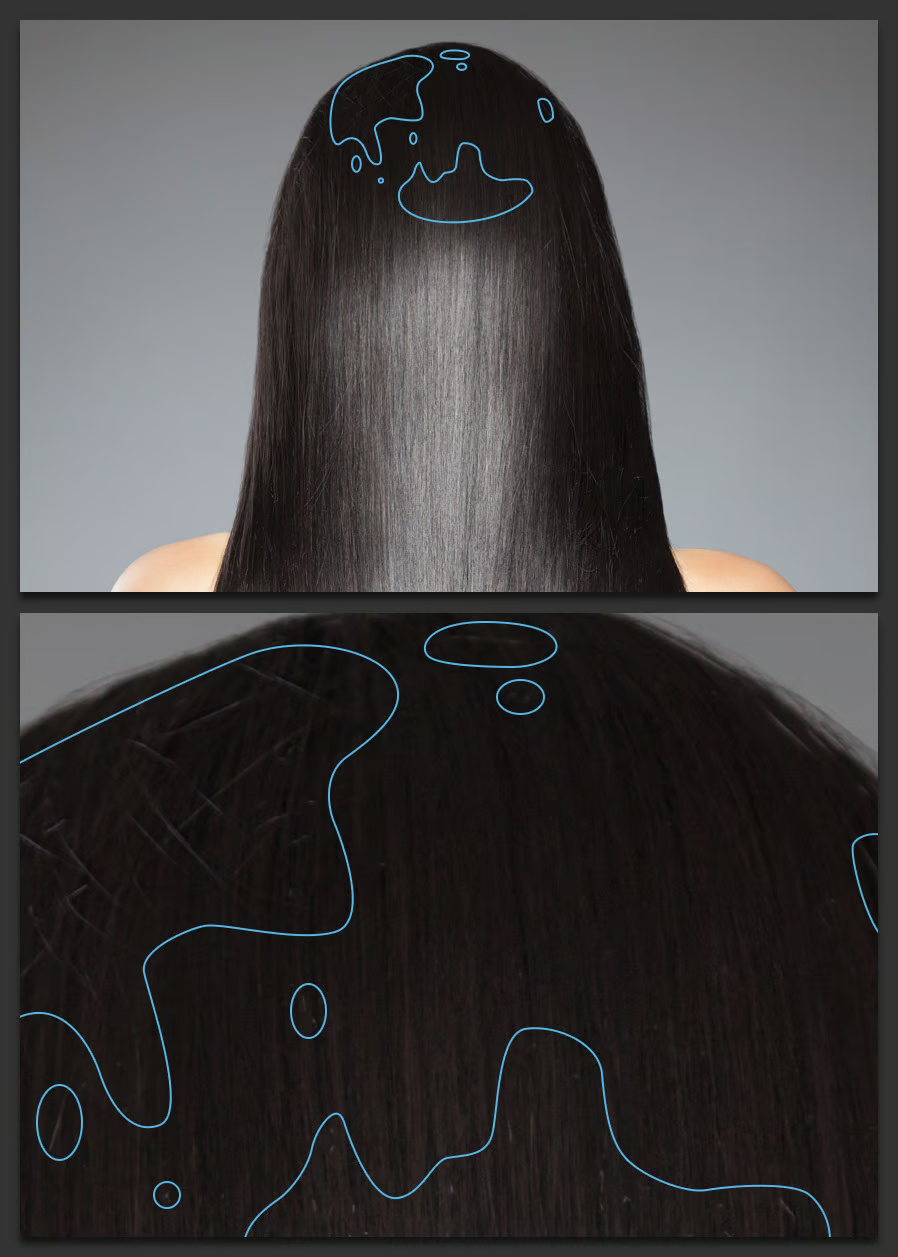
Step 1
Open your image in Photoshop and locate the areas that you want to fix. In this case I will show you how to fix the ones marked with a blue stroke.
Step 2
Go to Layer > New > Layer. Name this layer as ‘Hair Flyaway’ and click OK.

Step 3
Zoom in very close to your subject hair areas that you want to fix (between 400% and 500%).

Step 4
Select the Spot Healing Brush Tool (J) and in the top bar click on the brush thumbnail. Set the Size to just 1px bigger than the size of a single hair in your picture (in this case is 5px), set the Hardness to 95% and the Spacing to 1%.

Step 5
Still in the top toolbar of the Spot Healing Brush Tool, set the Mode to Normal, the Type to Content-Aware and be sure to have Sample All Layers selected.

Step 6
Be sure to have the ‘Hair Flyaway’ layer active. Making small strokes (from 5 to 10 px length) start painting over the flyaway hairs following that same hair direction.
Note: Sometimes you will need to make even smaller strokes if the surrounding area looks a bit misplaced.

Step 7
Repeat this process for all the flyaway hairs, and remember to make it with little strokes and following the hair direction.

Over Skin
Step 1
Open your image in Photoshop and locate those flyaway hair areas that you want to fix. In this case I will show you how to fix the one marked with a white stroke, but you may follow the same procedure for all of those areas where some flyaway hairs are present in your subject skin.

Step 2
Go to Layer > New > Layer. Name this layer as ‘Skin Flyaway’ and click OK.

Step 3
Zoom in very close to the hair area you want to fix (between 300% and 450% should be enough).

Step 4
Select the Healing Brush Tool (J) and in the top bar click over the brush thumbnail. Set the Size to 2px bigger than the size of a single hair in your picture (in this case is 7px), set the Hardness to 80% and the Spacing to 1%.

Step 5
Still in the top toolbar of the Spot Healing Brush Tool, set the Mode to Normal, the Source to Sampled, be sure to have Aligned selected and from the dropdown menu of Sample, select ‘Current & Below’.

Step 6
Be sure to have the ‘Skin Flyaway’ layer active. Hold the Alt key in your keyboard and click on a near area of the flyaway hair you want to fix.

Step 7
Release the button and click over the hair to start painting over it and copying the skin texture at the same time, but always making small strokes (between 5 and 10 px length) for a more accurate result. Remember to always try to follow the hair direction for a better effect.

Step 8
Repeat this process for all the flyaway hairs on the skin you wish to take out, and remember to try to follow the hair direction.

Filling Hair Gaps
Step 1
First open you image in Photoshop and locate those empty areas of your subject hair that you want to fill. In this case I will show you how to fill the area marked with a yellow stroke, but remember that the same procedure is used on any other areas you may want to fill.

Step 2
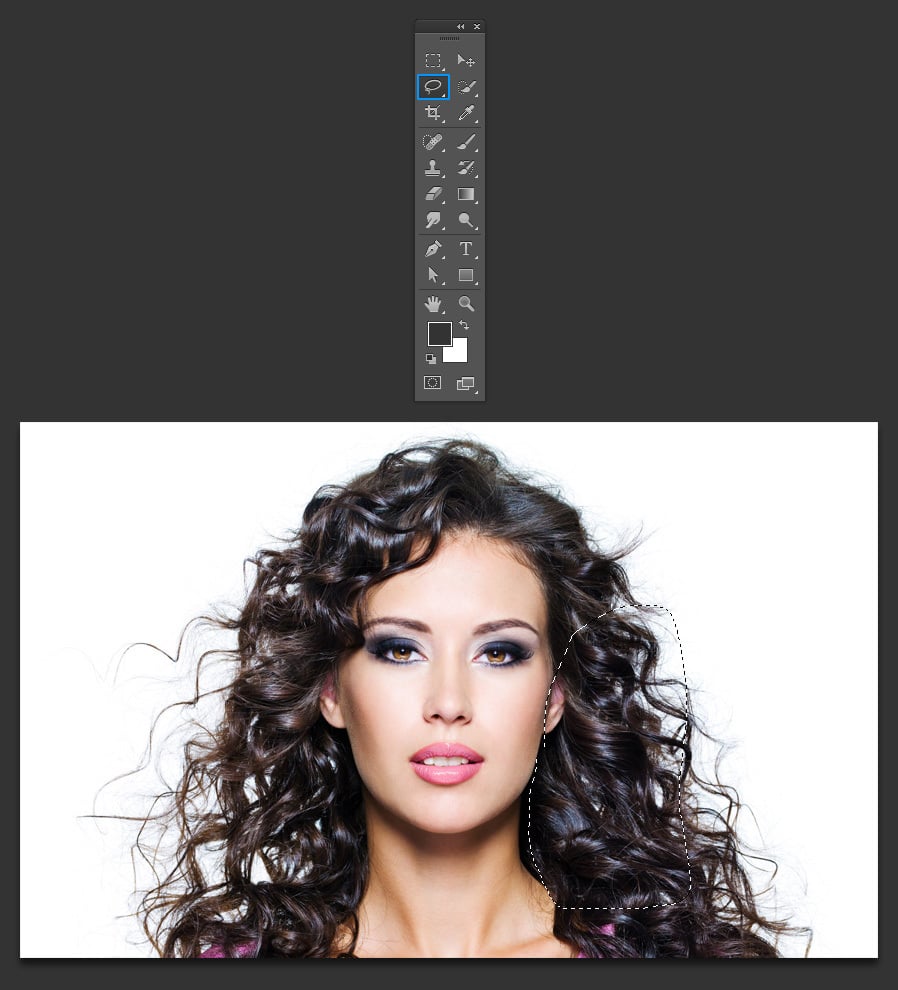
Select the Lasso Tool (L) and draw a selection around a full filled hair area of your subject that is a bit bigger than the area you want to cover.
Step 3
Go to Edit > Copy and then to Edit > Paste. Name this new Layer as ‘Gap Fill’.

Step 4
Change the copied hair direction in a way that follows the same direction of the hair zone that you wish to fill. In this case, I just went to Edit > Transform > Flip Horizontal.

Step 5
In the layers panel, set the Blend Mode of the ‘Gap Fill’ layer to Darken.

Step 6
Once you have the correct hair direction, position the copied hair over the area you want to fill.

Step 7
With the ‘Gap Fill’ layer active, hold Alt on your keyboard, and click over the ‘Add Layer Mask’ icon in the layers panel. This will add a filled layer mask to the current layer and the copied hair will not be visible.

Step 8
Zoom in a bit closer to the area you want to fill. Select the Brush Tool, and choose a small soft brush (the exact size will depend on your image, but in this case I will use a 15 px brush with the Hardness set to 25%). Be sure to have a White Foreground color.

Step 9
Click over the Mask thumbnail of the ‘Gap Fill’ layer and start painting with the white brush over the areas you want to fill with hair.

Step 10
Keep painting over the layer mask with a white brush over the empty areas to reveal the copied hair and fill the gaps.

Some Final Notes
The next time you need to fix hair in a picture, start from the Backround and then slowly going to the inside part of your subjetc (hair and skin). In the case you need to fix hair over some clothes, consider them as a background and use the technique described here for a better result, and remember to always make short strokes to get a better end result.


Comments