

by Diego Sanchez
December 05, 2023
Diego prevents carpal tunnel syndrome in designers worldwide by making incredible time-saving Photoshop actions and mock-ups.


How to Quickly Soften the Skin in Lightroom
Lightroom Post Processing
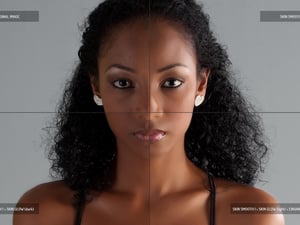
Lately, we have witnessed the rapid evolution of AI in various fields such as video, text, and graphics. There are many applications on the market that can be tried for free, and others that are paid. But we have also seen that many of the world-famous applications, such as Photoshop and Illustrator, have also incorporated the use of AI in their latest versions. Even Lightroom uses it, and it is in this application that we are going to see today how to soften facial skin easily, without making manual selections and even without changing any settings, all this, within Lightroom and obtaining excellent results and in less than 2 minutes.
But before we begin, please keep in mind that this tutorial only focuses on softening the skin, not how to remove wrinkles, skin imperfections, blemishes or the even the skin redness.
Step 1
Open your image in Lightroom.

Step 2
Go to the Develop tab.

Step 3
Click the "Masking" icon and wait a few moments for Lightroom to detect your subject.

Step 4
Click on the "Person 1" thumbnail.

Step 5
Under "Person Mask Options", select "Facial Skin" and click the "Create Mask" button.

Step 6
Lastly, and instead of the normal procedure of changing the different settings values, simple click on the "Custom" menu, and from the dropdown list select "Soften Skin".

Conclusion:
With the incorporation of AI in Lightroom, softening the subject skin is much simpler, the mask selection is very good and what previously took at least 15 minutes to do, you can now do it almost instantly and in this way focus your attention on other portrait retouching tasks that require more time, such as removing imperfections, adjusting lights and shadows, exposure, retouching the hair, etc.


Comments