

by Diego Sanchez
September 21, 2021
Diego prevents carpal tunnel syndrome in designers worldwide by making incredible time-saving Photoshop actions and mock-ups.


How to Make an Overlapping Square Pattern in Illustrator
Illustrator Patterns
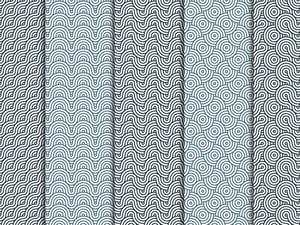
It's not infrequent that you as a designer might need a pattern (or three). Sometimes it's hard to find the exact perfect fit, so you need to create your own. So today we're going to learn how to make a pattern in Illustrator. There are a few tricky bits, but today you'll get the low down on how to do this quickly and easily, using some "secret" Illustrator tools that will absolutely speed up your workflow.
Step 1
Open Illustrator and make a new file at any size you want. In this case, I will make mine at 800 x 800 px.

Step 2
Be sure to have the Fill set to "none" and the Stroke to black. Select the Rectangle Tool (M) and click once over the artboard. Set the Width and Height to 100 px and click OK.

Step 3
Go to Window > Stroke and set the stroke Weight to 20 pt.

Step 4
Copy (Ctrl+C) and paste (Ctrl +F) the square 4 more times and place them as shown. Be sure that the corner snap to the corner of the next square.

Step 5
Go to Object > Expand and click OK in the Expand window.

Step 6
Go to Object > Path > Offset Path. Apply the following settings in the Offset Path window and click OK.

Step 7
Go to Select > All.

Step 8
Select the Shape Builder Tool (Shift+M) and click once in the following shapes.

Step 9
Go to Object > Ungroup.

Step 10
Select all the outer shapes and hit the delete key on you keyboard.

Step 11
Next, select the shapes we made with the Shape Builder Tool and hit the delete key on your keyboard.

Step 12
Press Ctrl + A on your keyboard to select all elements and go to Object > Transform > Rotate. Set the Angle to 45º and click OK.

Step 13
Pick the Direct Selection Tool (A) and delete the top, right, bottom and left anchor points as shown.

Step 14
Press Ctrl + A on your keyboard to select all elements and go to Object > Pattern > Make.

Step 15
Now simply click "Done" on the top toolbar.

Step 16
With our pattern already made, we can now see it on the Swatches Panel (Window > Swatches) ready to be used.

Step 17
To test how it works, delete all elements in the artboard and make any new shape that you want, in this case, I will make a simple square.

Step 18
With the square selected, just click once in the new pattern swatch in the Swatches Panel to apply it to our shape.


Comments