

by Diego Sanchez
December 02, 2019
Diego prevents carpal tunnel syndrome in designers worldwide by making incredible time-saving Photoshop actions and mock-ups.
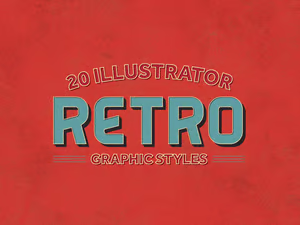
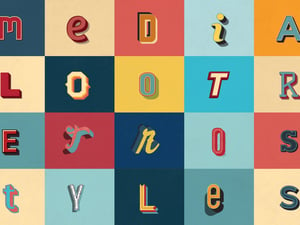


How to Make an Editable 3D Isometric Text in Illustrator
3D Effects in Illustrator
Complex effects are always a bit challenging to make, not to mention a time-consuming task if you don't know which tools to use (or even how to start). Often the simplest methods are the ones that work the best. Fortunately, Illustrator has a wide range of tools available to make the process of creating very complex effects a breeze. In this tutorial, you'll learn how easy is to make an Isometric 3D Text effect while keeping the text fully editable (all in less than 10 minutes).
Step 1
Open Illustrator and make a new file at any size you want. In this case, i will make mine at 1920 x 1080 px in RGB Color Mode with a 72 dpi resolution.

Step 2
Select the Type Tool (T) and type your text using any font you want. In this case, i will be using "Bahnschrift" at 300 pt.

Step 3
In the Toolbar, set the text fill to "None" by clicking on the "none" icon in the bottom right corner.

Step 4
With the text selected, go to Window > Appearance.

Step 5
In the Appearance window, click on the "Add New Fill" icon. Click on the Fill Color Thumbnail and set any color you want. In this case, i will be using #A83F92.

Step 6
With the Fill option selected, click over the "Add New Effect" icon and from the dropdown menu select 3D > Extrude & Bevel.

Step 7
In the 3d Extrude & Bevel window, set the Position to "Isometric Right", the Extrude Depth to 20pt and under Surface set the mode to "Diffuse Shading".

Step 8
Click and drag the light point to the bottom right as shown and set the "Ambient Light" to 0%.

Step 9
Lastly, under Shading Color select "Custom" from the dropdown menu and by clicking on the color thumbnail set any color you want. In this case, i will be using #F4BF19. Click OK to apply the 3D effect.

Step 10
We already have our Isometric 3D text ready, but to make it a bit more interesting, let's add one more effect. In the Appearance Panel, be sure to have the Fill selected and click over the "Add New Effect" icon. From the dropdown menu select Distort & Transform > Transform.

Step 11
In the Transform window, apply the following settings and click OK.

Step 12
A good idea, is to save this effect for a future use over any other new text without having to setup all the tools again. To do that, with the text selected, go to Window > Graphic Styles.

Step 13
Click on the top right icon and from the dropdown menu select "New Graphic Style". Give this style a name and click OK.

Step 14
With the effect finished and saved, you can now freely change the original text by using the Type Tool as you normally do.

Step 15
To use this effect over any other new text or object, simply select the text or the object (a square in this example) and click over the "Isometric" graphic style we have made.


Comments