

by Diego Sanchez
September 20, 2022
Diego prevents carpal tunnel syndrome in designers worldwide by making incredible time-saving Photoshop actions and mock-ups.


How to Make a Complex 3D Blending Effect in Illustrator
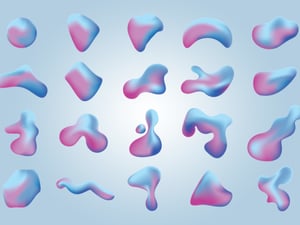
Illustrator Blend Effects
Illustrator has give us many different tools over the years to make our graphics easier and quicker to make. One of the tools that speeds up the drawing process is the Blend tool. Most of the time, this tool has been used to make text effects or to simply blend 2 or more colors of a drawing. But when using this effect with a premade graphic, it has even more potential. Today, I will show you how you can make an eye catching 3D effect in Illustrator using a simple square with a few lines and the powerful Blend effect.
Step 1
Open Illustrator and make a new file at any size you want. In this case, I will setup mine at 1800 x 1200 px.

Step 2
Select the Rectangle Tool (M) and click once over the artboard. Set the size Width and Height to 150 px and click OK.

Step 3
Select the Line Segment Tool (\) and make a line from side to side of the square as shown.

Step 4
Go to Window > Stroke. Set the stroke weight to 2 pt and be sure to have the following options applied.

Step 5
With the line selected, hold the Alt key (to make a copy of the line) and the Shift key to move the line about 15 px down as shown.

Step 6
Press Ctrl+D on your keyboard to repeat the "copy and move" command until you have a total of 9 lines as shown.

Step 7
Select all the lines and press Ctrl+C (to copy the lines) and Ctrl+F (to paste them in place).

Step 8
Go to Object > Transform > Rotate. Set the angle to 90º and click OK.

Step 9
Go to Select > All and then to Object > Group.

Step 10
Again, go to Object > Transform > Rotate. Set the angle to 45º and click OK.

Step 11
Copy (Ctrl+C) and Paste in place (Ctrl+F) all the elements.

Step 12
Move the copied elements to the right about 400-500 px.

Step 13
Select all the elements by pressing Ctrl+A on your keyboard and go to Object > Blend > Make.

Step 14
Go to Object > Blend > Blend Options. Apply the following settings and click OK.

Step 15
As for this tutorial we will be using 2 different paths. We need 2 blended objects, so copy and paste the blended object.

Step 16
Select the Pencil tool (or any other tool you feel comfortable drawing with) and make your paths. In this case, I will make 2 separate paths for you to better see the effect.

Step 17
Select the first path and one of the blended objects and then go to Object > Blend > Replace Spine.

Step 18
Lastly, select the other path along with the second blended object and go to Object > Blend > Replace Spine.

A Final Note
Now that you know how easily you can make complex blend effects in Illustrator, you can modify your path even after you made the effect. Simply select the Direct Selection Tool (A) and modify the path as you normally do in Illustrator. The blend effect will follow the new modified path.


Comments