
How to Make a 3D Depth Text Effect in Illustrator
Illustrator Text Effects
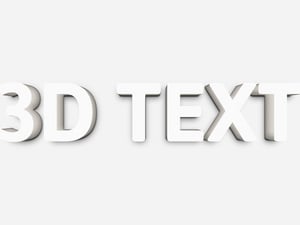
There are many different methods to achieve certain effects in Illustrator. And often what it seems to be an intricate effect can be quickly reproduced if you know which tools to use. If you need a quick depth effect on your text, then this tutorial is just right for you. Today, I will show you how easily you can give a 3D Depth Effect to your text using nothing but the default Illustrator tools.
Step 1
Open Illustrator and make a new file at any size you want. In this case, I will setup mine to 900 x 900 px.

Step 2
Select the Rectangle Tool (M) and draw a rectangle using any color that you want covering your whole canvas area.

Step 3
Select the Type Tool (T) and type your text using any font that you want. For this tutorial, I will be using Montserrat Black at 200 pt.

Step 4
Give your text the same color as the one you used for your background.

Step 5
With the text selected, go to Effect > 3D > Extrude & Bevel. Click on the "More Options" button, apply the following settings and click OK.Note: At this point you can also

Step 6
Go to Object > Expand Appearance.

Step 7
Pick the Direct Selection Tool (A) and select each of the top faces of your letters.

Step 8
Go to Edit > Copy.

Step 9
With the selection still active, hit the Delete key on your keyboard to delete the faces of your letters.

Step 10
Go to Edit > Paste in Place.

Step 11
Go to Object > Compound Path > Make.

Step 12
Lastly, select all the objects on your artboard (except the background) and go to Object > Clipping Mask > Make.






Comments