

by Diego Sanchez
June 18, 2024
Diego prevents carpal tunnel syndrome in designers worldwide by making incredible time-saving Photoshop actions and mock-ups.


How to Easily Transfer a Color Palette From one Image to Another in Photoshop
Photoshop Post-Processing
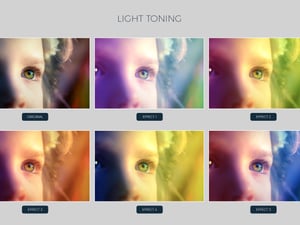
There are times when you find the perfect photo for your design but it just doesn't have the colors you are looking for. Fortunately, in Photoshop, you can easily transfer the color palette from one image to another using various techniques (some of them a bit more time-consuming). Today, I will show you a very easy method to do it in less than 5 minutes.
But before we begin, and if you want to follow this tutorial as described, please download the following free images from Pexels which will be used as our Source and Target images:
Target Image: Download
Source Image: Download
Step 1
Open your Target image in Photoshop.

Step 2
Go to Filters > Neural Filters.

Step 3
In the left list, under "Color" turn on the "Color Transfer" effect.

Step 4
Select the "Custom" option.

Step 5
Click on the "folder" icon next to the "Select an Image" dropdown menu.

Step 6
Locate the Source image on your computer and click the "Use this Image" button.

Step 7
Under "Color space" select the RGB option.

Step 8
Adjust the HSB values to your liking. In this particular case, I will set the Saturation to +15 and the Brightness to -5.

Step 9
Lastly, under "Output" select "New Layer" from the dropdown menu and click OK in the Neural Filters window.

Step 10
If you feel the effect is too intense, bring down the new effect layer opacity until you are happy with the final result.


Comments