
by Tony Thomas
May 05, 2020
Tony creates pixel-perfect UI kits & icons. His pug, Wednesday, is Medialoot's beloved mascot.


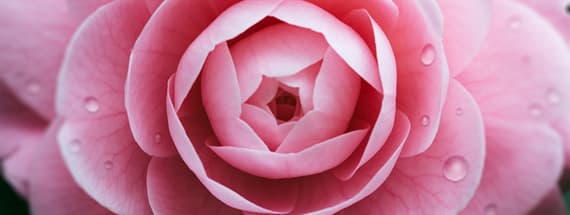
How to Create Rain Droplets for Petals in Photoshop
No need to wait for rain
This tutorial will show you how a quick and easy technique to create rain droplets in Photoshop, which can then be added to petals or even other objects such as cold aluminium drink cans and glass surfaces.
Step 1
Open your base image in Photoshop, I am using this free image from Unsplash, and I resized it to 3000 x 2000 pixels. You are free to use a different image, but beginners may feel more comfortable following along with the same image for practice.

Step 2
Zoom into your image onto a single petal and use the Ellipse Tool to draw a white circle shape.

Step 3
Open the Properties window and click on the small Masks icon at the top left.
Enter 0.5 px for the Feather value, this will just soften the edges slightly.

Step 4
Reset the swatches to default (D key) and then switch them (X key).
Double click on the circle layer to bring up the Layer Style window.
Add a Gradient Overlay using a default Foreground to Background gradient with the settings shown below.
Also add a small black Drop Shadow using the settings shown below.

Step 5
Use the Ellipse Tool to draw another circle for the highlight on the droplet, it should be roughly 50% of the first circle and positioned near the top.

Step 6
In the Properties window set the Feather value to around 5 px, a smaller value will make the highlight more noticeable and a larger value will soften it more.

Step 7
Double click on the highlight circle layer and being up the Layer Style window.
In Blending Options, set the Fill Opacity to 50%.
Then add a white Color Overlay, using Soft Light 100%.
This is done to allow some of the underlying image to show through and not be pure white.

Step 8
Group the two circle layers and name them Droplet.

Step 9
Duplicate the Droplet group.
Turn off visibility for one of the group layers and keep it safe.

Step 10
On the visible group layer, press CMD+T or CTRL+T to show Transform Controls.
Use the handles to distort the droplet, try to make it follow the perspective of the petal.

Step 11
Duplicate the invisible group, and make it visible.
Use the Transform Controls again to create a smaller droplet and move it slightly away from the original.
You will also want to tweak the Feather value for the highlight circle as we have made it smaller, a value such as 3.5 px will make it more visible again.

Step 12
Duplicate the invisible group again and make it visible (we are going to be doing this step a lot).
Show the Transform Controls again but this time click the Warp icon, this will allow you to distort the shape of droplet even more.

Result & Conclusion
Keep repeating the last few steps to add more and more droplets to your petals. Here is what I managed to do in a few minutes, it certainly isn't perfect but you can tweak the droplets by reducing the opacity of the groups, or make them more noticeable by duplicating them on top of each other.


Comments