
by Diego Sanchez
October 10, 2023
Diego prevents carpal tunnel syndrome in designers worldwide by making incredible time-saving Photoshop actions and mock-ups.

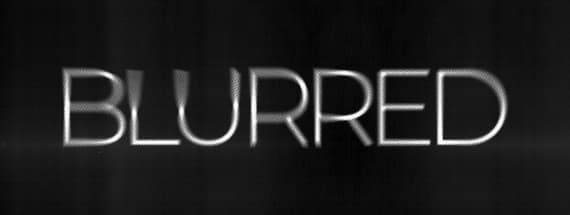
Easily Make a Blurred Halftone Text Effect in Photoshop
Photoshop Text Effects
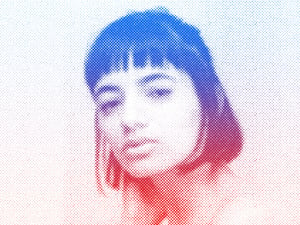
You probably saw many different designs that use a halftone effect, adding a touch of retro charm and contemporary style to various artworks and graphics. Halftone patterns have an innate ability to infuse depth and character into your creations, and when combined with the magic of blurring, they can take your text effects to a whole new level. So today, I will show you how easily you can make a blurred halftone text effect in Photoshop using only the default Photoshop tools that you can use on any of your graphic creations.
Step 1
Open Photoshop and make a new file at any size you want. In this case I will make mine at 3000 x 2000 px.

Step 2
Select the Horizontal Type Tool (T) and using any font that you wish, type your text. For this tutorial I will be using Montserrat Light.

Step 3
With the text layer selected, go to Layer > Smart Objects > Convert to Smart Object.

Step 4
Go to Filter > Blur Gallery > Path Blur.

Step 5
Drag the 2 anchor points of the default path to the right side of your text as shown.

Step 6
Click once on the left anchor point and in the tool settings panel, set the "End Point Speed" to 0 px.

Step 7
Now, click once on the right anchor point and in the tool settings panel, set the "End Point Speed" to about 200 px.

Step 8
We will now create a new curved path. To do that, click once on your text to add a new anchor point as shown.

Step 9
Again, click once over your text to add another anchor point.

Step 10
One more time, click to add a third anchor point as shown and then click again over the anchor point to finish adding anchor points.

Step 11
Select the first anchor point of the recently created path and in the tool settings panel set the "End Point Speed" to 290 px.

Step 12
Lastly, select the third anchor point of the new path. In the tool settings panel set the "End Point Speed" to 25 px and click the OK button in the top toolbar.

Step 13
With the text layer selected, press "Ctrl+Alt+Shift+E" on your keyboard to make a merged copy of the layers.

Step 14
Lastly, with the merged copy layer selected, go to Filter > Pixelate > Color Halftone. Apply the following settings and click OK.

Some Final Tips:
Now that you know how to make a blurred halftone effect in Photoshop, you can make any kind of Path Blur combinations that you want to make an unlimited number of text distortions and then play with different Halftone settings to achieve new effects.


Comments