

by Diego Sanchez
July 02, 2018
Diego prevents carpal tunnel syndrome in designers worldwide by making incredible time-saving Photoshop actions and mock-ups.


Create Trippy Spirographs in Photoshop
Photoshop tools
Making Spirographs in Photoshop might seem a bit complicated, but it's actually easier than you think if you use the right tools. With a very few simple commands, you can create very complex designs in a matter of minutes and then apply the effects and colors you wish.
Once you finish your Spirograph, there are many place where you can use them, such Diplomas, funny dollar bills, as a wallpaper for your computer or as a subtle background on your website. The uses are infinite and so the designs you can achieve just by changing the starting shape or by changing the settings in the rotation and scale.
Step 1
Open Photoshop and create a new file. It could be any size you want, but I will setup mine to 1200 x 800 px.

Step 2
Select the Ellipse Tool (U), and in the toolbar set the Mode to Shape, the Fill to None and the Stroke to 2pt with any color you want (I will be using black).

Step 3
Draw an ellipse in the middle of the canvas.

Step 4
Press Ctrl+T on your keyboard. In the top toolbar set the Rotation to 10º and hit Enter on your keyboard to commit the transformation.

Step 5
Press Ctrl+J to duplicate the ellipse layer.

Step 6
Now, press Ctrl+Shift+Alt+T on your keyboard to repeat the last transformation, which in this case is a 10º rotation.

Step 7
Repeat the same process (Ctrl+J and Ctrl+Shift+Alt+T ) until you get a full circle.

Step 8
Simply as that you can create an Spirograph, but to make things a bit more interesting, let´s do another one using more variations. First, repeat the steps 1 to 3 of this tutorial but place the ellipse a bit to the right and top of the canvas.

Step 9
Press Ctrl+T on your keyboard. In the top toolbar set the Anchor Point to be the Bottom Left, change the Width to 95%, the Rotation Angle to 15º and hit Enter on your keyboard to commit the transformation.

Step 10
Press Ctrl+J to duplicate the ellipse layer.

Step 11
Now, press Ctrl+Shift+Alt+T on your keyboard to repeat the last transformation, which in this case is a decrease of the size to 95% in Width, and a 15º rotation with the anchor point set to the bottom left side.

Step 12
Repeat the same process (Ctrl+J and Ctrl+Shift+Alt+T ) until you are satisfied with your Spirograph.

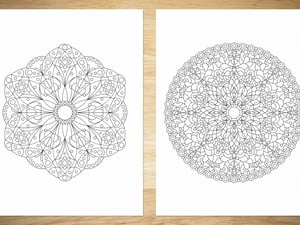
Some Final Words
As you may see, creating an spirograph in Photoshop is rather simple and you do not need an advanced knowdelge level to make them. Now experiment with different shapes, scales, rotation angles and rotation anchor points to make unique spirographs to use them on a wide range of designs.


Comments