

by Diego Sanchez
November 30, 2018
Diego prevents carpal tunnel syndrome in designers worldwide by making incredible time-saving Photoshop actions and mock-ups.


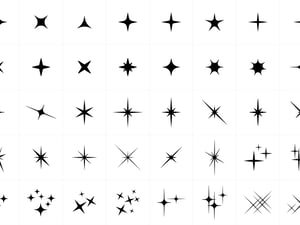
Create a Sparkle PNG Overlay in Just 3 Minutes
Add sparkles to any image
There are many different ways to make sparkles in Photoshop. Some techniques are more complex and time consuming, but that's not why we're here today. This Photoshop tutorial will get you sparkling in under three minutes.
The best way to use this technique is to start with a big document, so you can later reduce the size of your sparkles at the size you want, or if you already know the sparkle size you will need, you can work directly with that dimensions. In this case, and to make the tutorial easy to follow, we will work with a document size of 800 x 800 px, but you are free to make the document at any size you want. We will use only native Photoshop tools so there is no need to download any extra resources.
Step 1
Open Photoshop and make a new document with a size of 800 x 800 px.

Step 2
Go to Edit > Fill. Under Contents select “Black” from the dropdown menu and click OK.

Step 3
Set the foreground color to # f8f8f2.

Step 4
Select the Brush Tool (B) and go to Window > Brush.

Step 5
In the brush panel, select the Soft Round brush and apply the following settings:

Step 6
Go to Layer > New > Layer. Name this layer as “Horizontal” and click OK.

Step 7
With the brush selected, click once over the center of the canvas.

Step 8
Go to Filter > Blur > Motion Blur. Set the angle to 0º, the Distance to 200 pixels and click OK.

Step 9
Go to Layer > Duplicate Layer. Set the name of this layer to “Vertical” and click OK.

Step 10
Go to Edit > Transform > Rotate. In the top toolbar set the angle to 90º and click on the checkmark icon to commit the transformation.

Step 11
Go to Layer > Merge Down. Rename this layer to “Sparkle 1”.

Step 12
Again go to Layer > Duplicate Layer. Set the name of this layer to “Sparkle 2” and click OK.

Step 13
Go to Edit > Transform > Rotate. In the top toolbar apply the following settings and click on the checkmark to commit the transformation.

Step 14
Go to Layer > New > Layer. Set the name of this new layer to “Center Bright” and click OK.

Step 15
Select the Brush Tool (B) and go to Window > Brush.

Step 16
In the brush panel, select the Soft Round brush and apply the following settings:

Step 17
With the brush selected, click once over the center of the canvas.

Step 18
Hold the Ctrl key on your keyboard and select all layers except the Background.

Step 19
Press the “V” letter on your keyboard once and then go to Select > All.

Step 20
In the top toolbar, click on the Align Vertical Centers icon and then on the Align Horizontal Centers icon.

Step 21
Go to Select > Deselect.

Step 22
Hide the Background layer by clicking on the eye icon next to the layer’s name. Now simply save this file as a .PNG and use it over any image you want.


Comments