

by Diego Sanchez
May 16, 2018
Diego prevents carpal tunnel syndrome in designers worldwide by making incredible time-saving Photoshop actions and mock-ups.
Create a Misty Fog Brush In Photoshop
Photoshop Natural Brushes
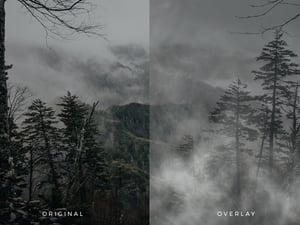
There are many different ways to create brushes in Photoshop, all of them are valid but some are better than others. In this tutorial, you will learn how easily you can create a misty fog brush in Photoshop in a matter of minutes. By adding some misty fog to your photographs, you can give to your images the illusion of a cold weather or simply add dimension to a more flat landscape.
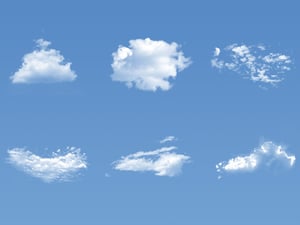
Before we start, if you want to follow this tutorial exactly as described, please download the following image from Pexels: Download
Step 1
Open the clouds image in Photoshop.

Step 2
Press ‘D’ on your keyboard to reset the Foreground and Background colors.

Step 3
Using the Lasso Tool (L) draw a selection around the cloud you want to use as a fog brush. It does not need to be exact, just a rough selection with the entire cloud in it.

Step 4
Press Ctrl+C on you keyboard to copy the selection and then go to File > New and click OK. When you create this new file, it will already have the correct dimensions of the selection, so you just need to click OK on the New Document window.

Step 5
Press Ctrl+V to paste the copied cloud into the new document.

Step 6
Select the Background layer and go to Edit > Fill. From the dropdown under ‘Contents - Use’ select ‘Black’ and click OK.

Step 7
Go to Window > Channels to show the Channels Panel, and select the most contrasting channel for the cloud, which in this case is the Red Channel.

Step 8
Click and Drag the Red Channel to the ‘new channel’ icon in order to duplicate it.

Step 9
Go to Image > Adjustment > Levels. Drag the Shadow Input level slider to the right until you only see the cloud with no background noise on it. In this case, a value of 35 will work well.

Step 10
Hold the Ctrl key on your keyboard, and click over the ‘Red Copy’ channel.

Step 11
With the selection still active, go to Layer > New > Layer. Name this layer as ‘My Brush’ and click OK. This will bring you back to the Layers Panel with the selection in a new layer.

Step 12
Go to Edit > Fill. In the Fill window, select ‘Black’ under the Contents section, be sure to have the Mode set to ‘Normal’ and the Opacity to 100% and click OK.

Step 13
Hide the other 2 layers by clicking on the eye icon next to the layer name.

Step 14
With the selection still active, go to Image > Crop.

Step 15
Go to Edit > Define Brush Preset. Give the brush a name (I will be using ‘Fog’) and click OK.

Step 16
Now that we have our Fog brush created, let´s add a few more features to it. Select the Brush Tool (B) and go to Window > Brush to display the Brush Settings Panel.

Step 17
Check the ‘Shape Dynamics’ option, and apply the following settings:

Step 18
Now check ‘Scattering’ and set the Scatter to about 70%.

Step 19
Finally, check the ‘Transfer’ option and set the ‘Opacity Jitter’ to 55% and the Flow to 15%.

Some Final Words
Now that you created the fog brush, you can adjust it to your liking changing the opacity, flow, size, spacing, etc and use it over any kind of image to apply a misty fog effect.


Comments