
by Jenn Coyle
July 14, 2014
You can find Jenn doodling and blogging, drinking beer, or running around Philly.
How to Install and Use Web Fonts on Your Site
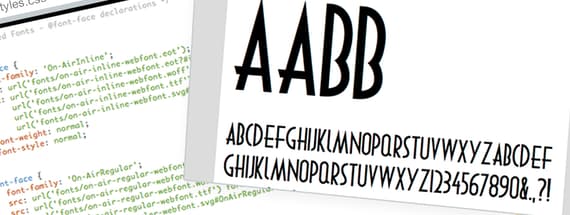
We have some awesome web fonts here at Medialoot. If you’d like to use them on your site, here’s a quick guide at how to get them installed. I’ll be using our On Air Desktop and Web Font, which comes with two styles.
Please note that you’ll want to be at least a bit familiar with HTML and CSS before following along.
Quick Note About Medialoot Fonts
When you unzip the Medialoot Resource, you will see a folder called Web Font, and within it is a bunch of font files, some html files, and any other files to make the previous of the font look nice. On Air, for example has a ‘specimen_files' folder that is a javascript plugin.

For On Air and most of our web fonts, there are four different files for each style: .eot, .svg, .ttf, and .woff. Why do we include four different fonts? Well, browsers don’t always speak the exact same language, so we need to make sure we support as many browsers as possible to make the viewing experience for your web users as similar as possible.
Step 1: Upload the Font Files to your Site/Server
The first thing you’ll want to do is upload the font files to your server. Where you do so is up to you, but I recommend either in the same folder as your .css file or perhaps in a folder titled ‘fonts’ and that folder should be in the same location as your .css file. Keeping these files close to your .css file makes it easier to map to them when we edit the css.
For this quick guide, I’m going to put them in a folder called ‘fonts’ in the same location as my css folder. Note that this is different from the setup in our downloadable On Air file, but I think it’s useful to see how we map to the fonts.
Step 2: Add the @font-face to Your CSS
Next, open up your css file. For every style we want to add (in this case there are 2), we’re going to create a separate @font-face selector in the CSS file. What this does is create the name of our font within the CSS file, so that when we use this font, it will know where to find the font files and allow your users' browsers to load them and display them. Put the @font-face selectors at the top of the CSS file before any other css.
To declare the @font-face selector, we’ll specify the name of the family, the urls of all of the different font files, and the weight and style. See below for example of what we use with On Air.
@font-face {
    font-family: 'On-AirInline';
    src: url('fonts/on-air-inline-webfont.eot');
    src: url('fonts/on-air-inline-webfont.eot?#iefix') format('embedded-opentype'),
         url('fonts/on-air-inline-webfont.woff') format('woff'),
         url('fonts/on-air-inline-webfont.ttf') format('truetype'),
         url('fonts/on-air-inline-webfont.svg#On-AirInline') format('svg');
    font-weight: normal;
    font-style: normal;
}

@font-face {
    font-family: 'On-AirRegular';
    src: url('fonts/on-air-regular-webfont.eot');
    src: url('fonts/on-air-regular-webfont.eot?#iefix') format('embedded-opentype'),
         url('fonts/on-air-regular-webfont.woff') format('woff'),
         url('fonts/on-air-regular-webfont.ttf') format('truetype'),
         url('fonts/on-air-regular-webfont.svg#OnAirRegular') format('svg');
    font-weight: normal;
    font-style: normal;
}
Note that the url listed is a relative url. Since the fonts directory is in the same directory of the css file, I don’t need any slashes or dots before the word ‘fonts’. If you’re not locating your fonts in the same place as I've done, you’ll want to do a little bit of research on relative urls to get these urls correct.
Step 3: Use the Font throughout your CSS
Now, we can simply use these fonts in any of our other CSS selectors. For example, if I wanted all of my h1s to use the On Air Regular style, I would do this in my css:
h1 {
    font-family: 'On-AirRegular';
}
If I then wanted my h2s to use the inline style, I could do:
h2 {
    font-family: 'On-AirInline';
}
It’s a good idea to specify what fonts to use if the user’s browser doesn’t support these custom fonts. To do this, add onto the list of fonts within the font-family. Here’s an example h1 where I’d like to use On-AirRegular first and foremost, but if not, use Helvetica, or Arial, or the installed default sans-serif.
h1 {
     font-family: 'On-AirRegular', Helvetica, Arial, sans-serif;
}
And there you have it. As long as you’re linking to the CSS within your HTML file, all of your h1s should start displaying in the On Air Regular font. If you’re looking for more information, you can see the w3schools.com CSS3 @font-face Rule.
More Medialoot Web Fonts
We have lots more web-ready fonts available. You can view them all here. Below are some of our favorites.

Simple Times - Web Font Kit
Simple Times is a clean hand written serif web font. The download includes everything you need to embed this font into your web project.
View Resource >
Awake Sans: Free Web Font
Awake is a highly legible sans-serif typeface that has been designed to be well suited to any purpose, from big and bold display headlines, to body copy. Inspired by both geometric and classic roman proportions, it has an interesting blend of mechanical and humanist traits.
View Freebie >
Pebble - Curvaceous Web Font
Pebble is a chunky, curvaceous web font. Pebble is great for big, bold headlines.
View Freebie >
Asche Desktop & Web Font
This unique sans serif desktop and web font is inspired by vintage industrial logo-types, and makes for a powerful headline font. It includes all common glyphs including lower and uppercase characters, numbers and symbols.
View Freebie >
SketchGeometric Webfont
New to the Sketch font series, this freebie is a hand drawn geometric web font, great for headlines and use in font collages.
View Freebie >
Comments