
by Diego Sanchez
June 13, 2023
Diego prevents carpal tunnel syndrome in designers worldwide by making incredible time-saving Photoshop actions and mock-ups.
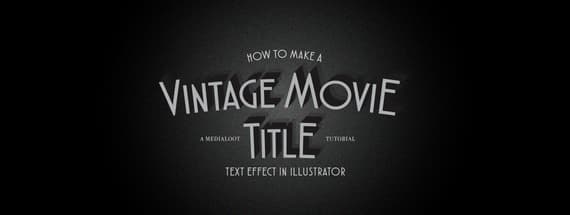
How to Make a Vintage Movie Title Text Effect in Illustrator
Illustrator Text Effects
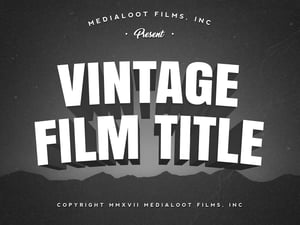
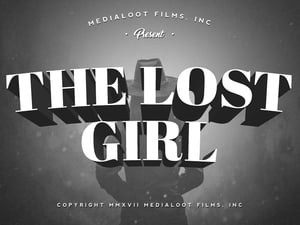
When it comes to creating a compelling movie title effect, many designers may immediately turn to Photoshop as their go-to tool. However, Illustrator can be just as effective, particularly when it comes to achieving a vintage or retro aesthetic. Today, I will show you how easy it is to create a vintage movie title text effect in Illustrator with a very simple technique and just a few default Illustrator tools. With this method you can achieve a stunning result that captures the essence of classic cinema. Follow along and learn how to transform a flat text into a movie title with a touch of nostalgia and charm.
Step 1
Open Illustrator and make a new file at any size you want. In this case, I will make mine at 1200 x 800 px.

Step 2
Select the Rectangle Tool (M) and draw a rectangle covering the whole artboard using a black color.

Step 3
With the rectangle selected, go to Window > Gradient. Select the Radial Gradient and set the first stop color to #666666 and the second stop color to #000000.

Step 4
Go to Effect > Texture > Grain. In the Grain window apply the following settings and click OK.

Step 5
Select the Type Tool (T) and type your text using any font you want. In this case, I will use Atlantic Cruise at 200pt.

Step 6
Set the fill and stroke of the text to "none" in the Tools Panel.

Step 7
Go to Window Appearance and click 3 times on the "Add New Fill" icon.

Step 8
Select the first fill layer and set the color to #C9CACC.

Step 9
Select the second fill color layer and set the color to #262424.

Step 10
With the second fill layer selected, click on the "Add New Effect" icon and from the dropdown list select Distort & Transform > Transform.

Step 11
In the Transform Effect window apply the following settings and click OK.

Step 12
Select the third fill color layer and again set the color to #262424.

Step 13
With the third fill layer selected, click on the "Add New Effect" icon and from the dropdown list select Distort & Transform > Transform.

Step 14
In the Transform Effect window apply the following settings and click OK.

Step 15
Click on "Opacity", set the Blending Mode to "Multiply" and bring down the Opacity to 30%.

Step 16
Select the rectangle we used for the background and go to Edit > Copy and then to Edit > Paste in Front.

Step 17
Go to Object > Arrange > Bring to Front.

Step 18
With the copied background selected, go to Window > Gradient. Select the first stop color and set the Location to 70%.

Step 19
With the copied rectangle selected, go to Window Appearance. Click on "Opacity" and set the Blending Mode to "Hard Light".

Step 20
Lastly, you can add a few minor texts to the composition to complete the Vintage Movie Title.


Comments