

by Tony Thomas
July 21, 2015
Tony creates pixel-perfect UI kits & icons. His pug, Wednesday, is Medialoot's beloved mascot.

How To Make A Seamless Texture in Photoshop (Redux)
An easier way to make seamless textures
For this tutorial I wanted to revisit the topic of making seamless textures in Photoshop and share with you a new, incredibly simple technique which makes the entire process much easier than before. It even works on some textures which I would have called 'un-tileable' previously.
Step 1
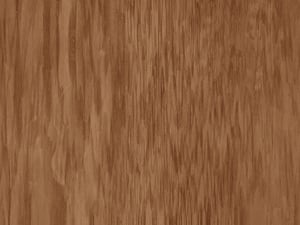
For this tutorial I am using antique-wood-8.jpg (free download) from the Antique Wood Textures set on Medialoot. Please note, although this method evens out textures, the source image that you choose to use still needs to be of a high quality, and relatively balanced to begin with.
Open the texture in Photoshop and use the Crop tool with a square aspect ratio and 2000 pixels for both the width and height. The Delete Cropped Pixels option should be checked.
Step 2
In my previous article I shared the standard method for creating tileable images in Photoshop, which is to use the Offset filter and then blend the edges together with the Clone tool. Before we try the new method, let's just test the Offset filter first to see what we would be working with here.
Go to Filter > Other > Offset and enter +1000 pixels for both the Horizontal and Vertical options and hit OK. 
Now, even if you are a wizard with the Clone tool these seams aren't going to be easy to iron out: 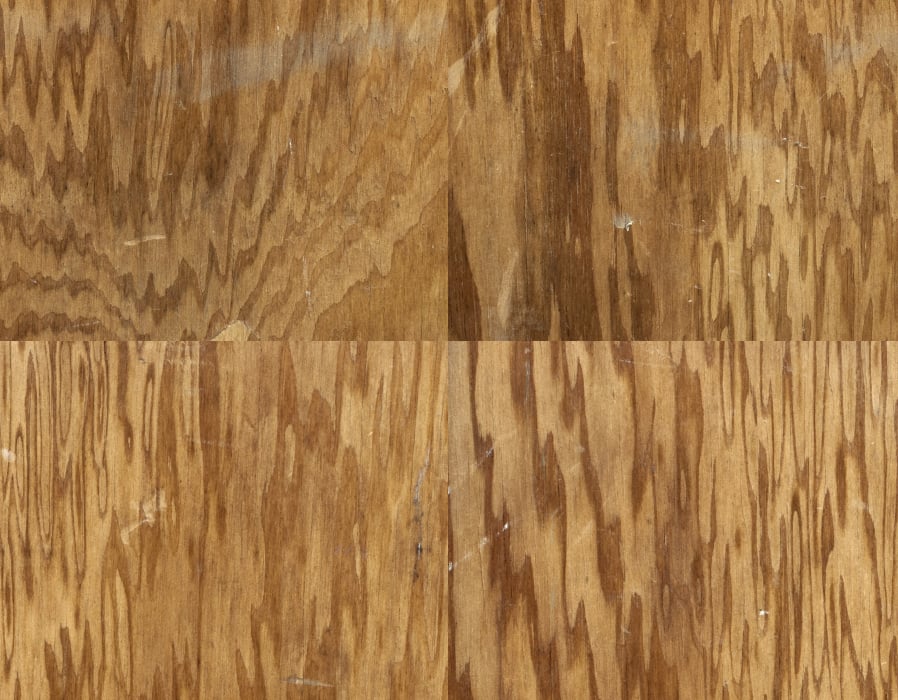
Step 2 (Again)
So let's forget that, undo the Offset filter and start again. Instead, duplicate the background layer and set the Opacity of the top layer to 50%.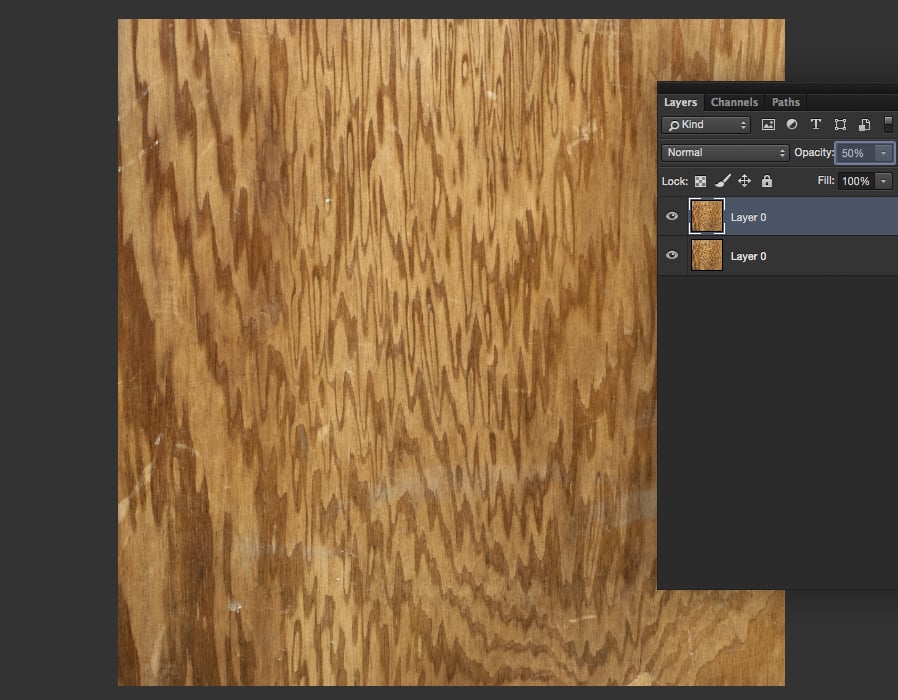
Step 3
With the top layer selected, go to Edit > Transform and click Flip Horizontal and then also Flip Vertical.
Step 4
Select both layers and merge them together (CMD+E or CTRL+E).
Step 5
Now let's try that Offset again. As if by magic, the result is now much better than compared to the earlier attempt. The seams are still visible, but they look like can be easily blended together.
Step 6
Use the Clone tool with round brush at around 100 px and 30% Hardness. Select an appropriate source by holding down the ALT key and clicking on the area you want to use. Then clone the texture using a wavy line from left to right covering the seam.
Step 7
Repeat the last step, this time for the vertical seam.
Step 8
Still using the Clone tool, tidy up any anomalies in the texture, or distinctive elements that appear more than once and give away the fact that the texture has been duplicated.

Step 9
To restore some of the texture's original quality and mask the Cloning, apply a Sharpen filter 1-2 times until desired effect is achieved.
Step 10
This is also a good time to make any final tweaks, for example some subtle Levels adjustments.
Step 11
Finally, go to the Edit menu and select Define Pattern.. give your pattern a name and hit OK.
Result & Conclusion
Here is the seamless texture in action at 25% zoom. It's hardly noticeable at all where the seams are. 
The beauty of this technique is that it takes so much of the manual work out of creating seamless textures. This method works on almost any texture, and delivers great results. The drawback to flipping and overlaying the texture is that it will visually change the texture slightly.


Comments