

by Diego Sanchez
January 04, 2018
Diego prevents carpal tunnel syndrome in designers worldwide by making incredible time-saving Photoshop actions and mock-ups.

How to Make a Pattern in Illustrator
Illustrator Tools & Tips
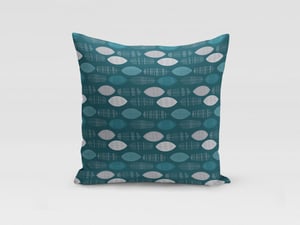
Patterns are a great way to decorate websites, backgrounds, iPhone cases, and anything else that needs more than a white backdrop. But to be able to use the same pattern on many different elements or objects — and make sure it doesn't look like Minecraft — vectors are a must. They allow us to scale to any size without worrying about losing quality.
Creating a seamless pattern used to be a difficult and labor intensive task. But ever since Illustrator CS6 built in seamless vector patterning, making a repeating pattern that doesn't look blocky is so easy that every new Illustrator user can make complex patterns. In this post you will learn how to make a new one and change a few options to enhance it.
Step 1
Open Illustrator and go to File > New. Name the new document as ‘Pattern’, set the size to 600 x 600 px and click OK.

Step 2
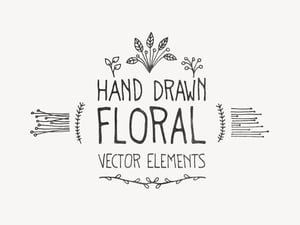
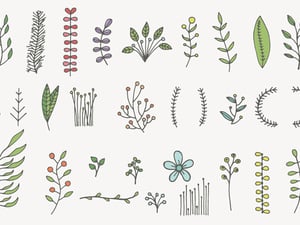
Paste or draw the elements you want to use on the new repeating pattern anywhere over the canvas. As I will be using only a few elements from the ‘Hand Drawn Floral Vector Elements’ set that you can download here at Medialoot, I will just paste those into the document.

Step 3
Roughly arrange the elements in the way you want them to appear in the pattern. You do not need to be precise at this point, just arrange the elements to have a better idea on how they will look.

Step 4
Go to Select > All.

Step 5
Go to Object > Pattern > Make. At this point, an information window will show up letting you know that the new pattern has been added to your Swatches Panel. Click OK on this window to proceed.

Step 6
At this point, you have all of your pattern options visible inside the Pattern Options Panel. Also, in the top of your document you will have a gray bar with ‘Save a Copy’, ‘Done’ and ‘Cancel’ options for the pattern we are working on.

Step 7
In the Pattern Options Panel, give the pattern any name you wish, I will name this one as ‘Floral’.

Step 8
From the ‘Tile Type’ dropdown menu select ‘Brick by Column’ so we make our pattern a bit more dynamical.

Step 9
As the intention is to make a pattern that looks more dynamic, with elements flowing rather than looking obviously repeated, making the Tile size a bit smaller than our elements is a must. To do this, just enter small values than the current ones you have under the Width and Height fields. As the current values in this Tile size are 425 x 570 px (approximately) in this case, I will set the Width to 390 px and the Height to 500 px.

Step 10
As you may notice some elements overlap with others. This is acceptable depending on how you want to make your pattern, but in this case, we will make a pattern with all elements with space between them so you can have a better idea on how to make a repeating pattern in Illustrator. Get the Selection Tool (V) and move/rotate/scale the elements around until you notice there are no overlaps. While you do this, you will see that the repeating copies of your pattern will change.

Step 11
Once you are happy with the end result, simply click ‘Done’ on the top bar, and your pattern will be saved to your Swatches Panel with all the changes you have made.

Step 12
To test the recently created pattern, go to Select > All and hit the Delete key in your keyboard in order to delete all the elements we used to create the pattern.

Step 13
Select the Rectangle Tool (M) and click once over the canvas. Set the Width and Height to 600 px and click OK.

Step 14
Be sure to have the recently created square selected and Open your Swatches Panel (under Window > Swatches).

Step 15
Click over the ‘Floral’ pattern to apply it to the square.

Step 16
If you feel your pattern is too big or too small, you can easily change the scale of it. Just right click over the square we created and from the dropdown menu select Transform > Scale. Set your desired scale values, but be sure to have the ‘Transform Elements’ deselected (to avoid scaling the shape) and clik OK.

Some Final Notes
If you want to change something in your pattern (like colors, scale, strokes, etc) just double click over the pattern in your Swatches Panel and Illustrator will switch to the Pattern Editor Mode. Once you have made all the changes you wish, just click ‘Done’ on the top gray bar and your pattern will be updated.


Comments