

by Tony Thomas
December 23, 2014
Tony creates pixel-perfect UI kits & icons. His pug, Wednesday, is Medialoot's beloved mascot.


Vector Pokémon Faces
Free
How to Create a Vector Rustic Wood Texture with Illustrator
Realistic vector wood grain effect without tracing bitmap images
This tutorial will guide you step by step through the process that I personally like to use to create rustic looking, vector wood grain patterns in Illustrator. This is my preferred method because it doesn't rely on tracing bitmap textures, and the result is much more realistic than most other vector wood pattern effects.
Warning: your eyes may need to take a rest to readjust after the first part of this tutorial.Step 1
Start by creating a new 800 x 800 pixel blank document in Illustrator.
Step 2
Draw two straight vertical lines on the left and right sides if the canvas, set the fill to none, stroke to black and stroke weight 4pt.
Step 3
Use the Blend tool between the two vertical lines, select specified steps and set the amount to 100.
Step 4
Go to the Object menu and select Expand. Use the default settings and click OK.
Step 5
Select the Bloat tool and double click the icon or press Enter to bring up the tool options. In the options window set the width to 100px, height 200px, Intensity 5% and turn off the Simplify option.
Step 6
Using the Bloat tool, randomly create bulges in the pattern by dragging the cursor down in vertical lines across the canvas.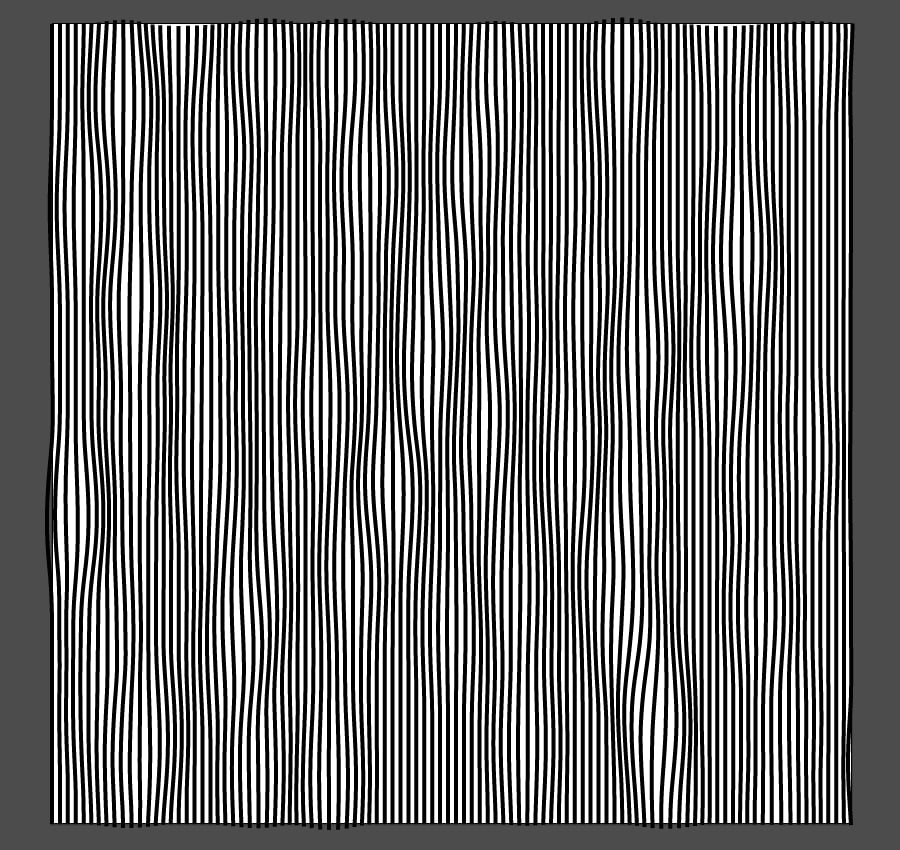
Step 7
Switch the Bloat tool for the Pucker tool and use the same options to randomly pucker the lines.

Step 8
Now select the Twirl tool, the Twirl Rate should be 40 by default, so just increase the intensity to about 10% and randomly create some knots in the pattern.

Step 9
Reverse the direction of the Twirl Rate to -40 and create some more knots. Slightly overlapping knots in the opposite direction creates a realistic wood grain effect. If required you can repeat any of the last few steps now in order to tweak your pattern.

Step 10
When you are happy with your wood grain pattern, go to the Effect > Sketch menu and apply a Graphic Pen Photoshop Filter. Set the Stroke Length to 15, Light/Dark Balance to 25 and Stroke Direction Vertical.
Step 11
Select Expand Appearance from the Object menu to flatten the effect.
Step 12
Because the Graphic Pen effect is a bitmap filter, we need to trace the image now to convert it back to vectors. Start with the Silhouettes Image Trace preset and customize it as shown in the image below. Click Expand when you are happy with the trace.
Step 13
Draw a new rectangle that fills the canvas and place it on a layer below the wood grain effect. Set the color of the rectangle to #7d6154.
Step 13
Set the fill color of the wood grain to slightly darker brown #543f3a.
(Optional) Step 14
If you want to add some subtle lighting to the pattern, create a new rectangle layer with a black to white gradient fill, set the Blending Mode to Soft Light and Transparency to around 25%.

Result
Your eyes should now have successfully readjusted from staring at the black and white lines, so feel free to take a step back and admire your beautiful vector wood grain texture. Of course every time you do this the result should be unique, you can also use varying shades of color to emulate different types of wood.


Comments