
by Diego Sanchez
August 15, 2023
Diego prevents carpal tunnel syndrome in designers worldwide by making incredible time-saving Photoshop actions and mock-ups.
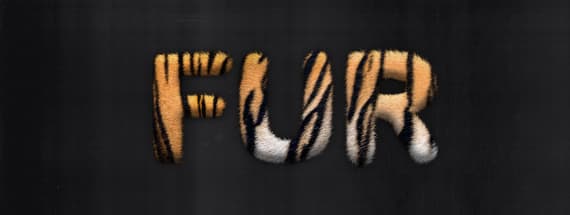
Easily Make a Fur Text Effect in Photoshop
Photoshop Text Effects
When you want to make a fur text effect in Photoshop, there are many different techniques you can use. One particularly effective and visually stunning method involves utilizing animal textures and brush settings to replicate the realistic look and feel of fur. Today, I will show you a very simple method to combine text and textures, setup a brush (to replicate the softness, direction, and density of fur), and use layer styles using only the default Photoshop tools. From soft and fluffy to wild and untamed, the possibilities are endless as you explore different animal fur patterns and customize the outcome to suit your creative vision.
Step 1
Open Photoshop and make a new file at any size you want. In this case I will make mine at 1600 x 1200 px.

Step 2
Select the Horizontal Type Tool (T) and type your text using any font you want. I will be using Arial Rounded with the size set to 565 pt.

Step 3
With the text layer selected, press Ctrl+G on your keyboard to make a new layer group.

Step 4
With the layer group selected go to Layer > Layer Style > Bevel & Emboss.

Step 5
In the Bevel & Emboss panel, apply the following settings.

Step 6
Check the Drop Shadow effect and apply the following settings.

Step 7
Click on the "+" icon right next to the Drop Shadow effect to add a new Drop Shadow.

Step 8
In the new Drop Shadow effect, apply the following settings and click OK in the Layer Style window.

Step 9
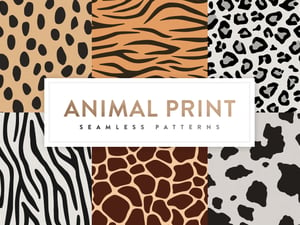
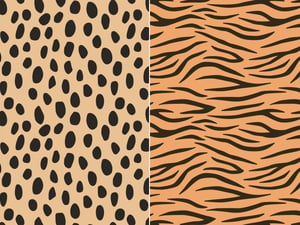
Go to File > Place Embedded. Locate the animal fur you want to use over your text on your computer and click the "Place" button.

Step 10
Resize and position the fur covering your whole text as shown and hit the Enter key on your keyboard to commit the changes.

Step 11
With the fur texture layer selected, go to Layer > Create Clipping Mask.

Step 12
In the Layers Panel, select the text layer and click on the "Create a New Layer" icon. Rename this layer to "Furry".

Step 13
Select the Brush Tool (B) and pick the "Dune Grass" brush from the brushes panel.
Note: If you don't see the Dune Grass brush, just load the "Legacy Brushes" from the brushes window.

Step 14
With the Dune Grass brush selected, go to Window > Brush Settings.

Step 15
Under "Brush Tip Shape" apply the following settings.

Step 16
Check the "Shape Dynamics" option, and apply the following settings.

Step 17
Next, check the "Scattering" option and apply the following settings.

Step 18
Now simply check the "Smoothing" option and close the Brush Setings window.

Step 19
Lastly, with the brush still selected and while you are in the "Furry" layer, paint around the contour of your text as shown.

Some Final Tips
Now you know how to make a Fur Text Effect in Photoshop, you can try different animal textures, change a few brush settings, and play with different layer styles to get the exact effect you are looking for like in the samples below.


Comments