

by Tony Thomas
October 05, 2015
Tony creates pixel-perfect UI kits & icons. His pug, Wednesday, is Medialoot's beloved mascot.

Create a Lightbulb Icon with a Retro Misaligned Print Effect in Illustrator CS6+
Don't worry, it's intentional
This tutorial will teach you how to create a lightbulb icon completely from scratch in Adobe Illustrator, and give it a retro offset/misaligned print effect.
Step 1
Launch Illustrator and create a new 400 x 400 pixel document.

Step 2
Draw a circle shape roughly in the center of the canvas.- X: 552 px
- Y: 138 px
- Width: 100 px
- Height: 100 px

Step 3
Draw a rectangle slightly overlapping the bottom section of the circle.- X: 578 px
- Y: 217 px
- Width: 48 px
- Height: 40 px

Step 4
Select both shapes and use the Pathfinder window to Unite the two objects:
Step 5
Use the Direct Selection tool to highlight the two newly created vector points where the circle and rectangle intersected, and set the Corners radius as high as it will allow (53.59 px).

Step 6
Draw another rectangle directly below the existing shape.- X: 578 px
- Y: 257 px
- Width: 48 px
- Height: 30 px
- Corners: 0/0/4/4

Step 7
Draw an oval shape overlapping the rectangle.- X: 583 px
- Y: 279 px
- Width: 38 px
- Height: 16 px

Step 8
Select the rectangle shape and move it to the top of the layers list CTRL_SHIFT+] or CMD+SHIFT+], then copy it to the clipboard CTRL+C or CMD+C.
Step 9
Highlight both the rectangle and oval shapes and use the Pathfinder window to Subtract the rectangle from the oval.
Step 10
Paste in Place CTRL+SHIFT+V or CMD+SHIFT+V to restore the rectangle.
Step 11
Now let's add a bit of color the lightbulb, use #F2E1C0 for the top section, and #CCCCCC and #999999 for the base.
Step 12
Select all elements and Copy then Paste in Place to duplicate them. With only the duplicated elements selected, remove the fill colors and set the stroke width to 4 pt and color #F2E1C0.
Step 13
Draw a small rounded rectangle with one straight corner and the rest fully rounded:- X: 587 px
- Y: 204 px
- Width: 12 px
- Height: 12 px
- Corners: 6/6/0/6
- Stroke: 2pt #F2E1C0

Step 14
Duplicate the shape and nudge it 18 pixels to the right, then switch which corner isn't rounded.- X: 605 px
- Y: 204 px
- Width: 12 px
- Height: 12 px
- Corners: 6/6/6/0
- Stroke: 2pt #F2E1C0

Step 15
Hold down the Shift key and draw 3 straight lines with a 2pt #F2E1C0 stroke as shown in the image below.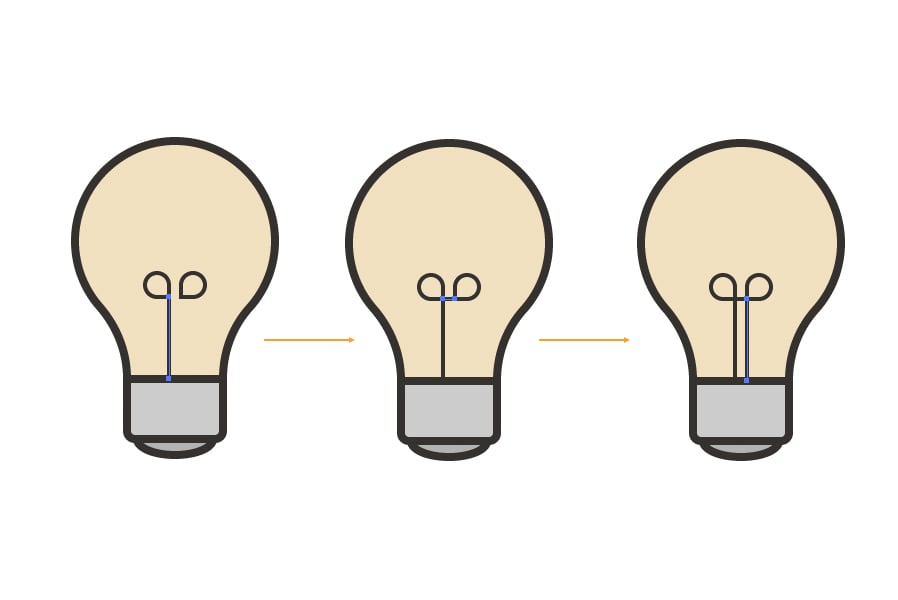
Step 16
Hold down the Shift key and draw another 3 straight lines with a 2pt #F2E1C0 stroke as shown in the image below.- X: 584 px
- Y (Line 1): 266 px
- Y (Line 2): 272 px
- Y (Line 3): 278 px
- Width: 36 px
- Height: 0 px

Step 17
Hold down the Alt and Shift keys to draw a perfect circle with the Oval tool, starting from the middle of the light bulb. Then double click the circle to enter isolation mode and use the Direct Selection tool to highlight the bottom and left points then hit the Delete key to remove them.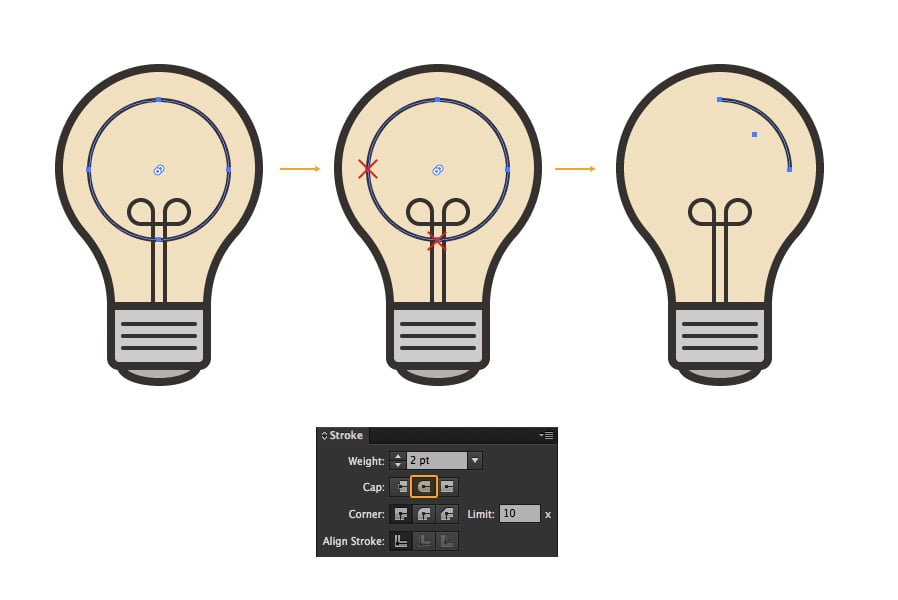
Step 18
Draw another rounded rectangle above the lightbulb.- X: 599 px
- Y: 100 px
- Width: 6 px
- Height: 24 px
- Corners: 3
- Stroke: 2pt #F2E1C0

Step 19
Highlight the rounded rectangle and with the Rotate tool active, hold down ALT and click in the middle of the light bulb to bring up the Rotate dialog. Enter 36° and click Copy.
Step 20
Press CTRL+D or CMD+D to repeat the last step 8 times. Then delete the 3 bottom-most shapes.

Step 21
To add some color to these rays of light, group them all together and copy them to the clipboard, then remove the stroke and set the fill to #F2E1C0.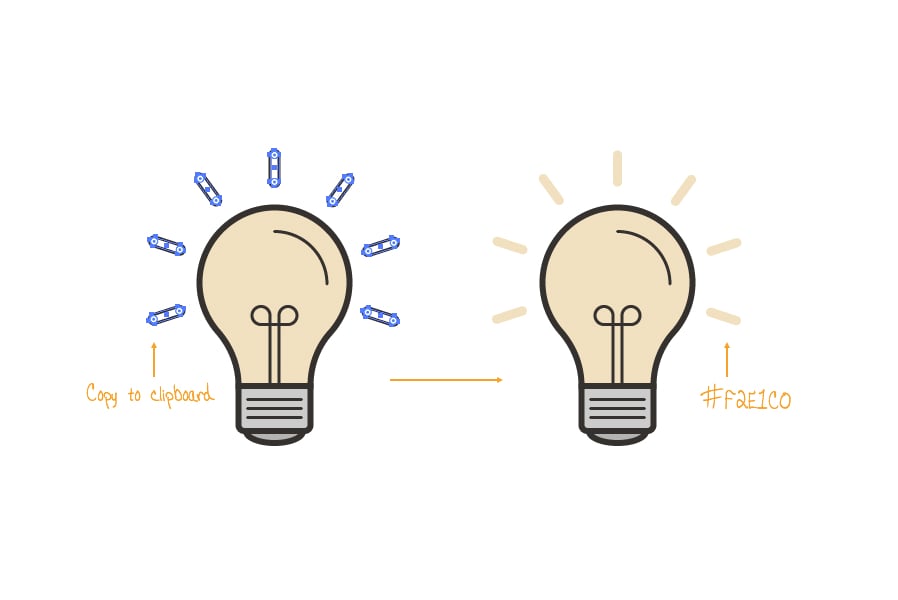
Step 23
Paste in Place to restore the versions with strokes above the fills.
Step 24
Carefully select all layers that have a solid color fill (do not select any layers with strokes), group them together, move to the bottom CTRL+SHIFT+[ or CMD+SHIFT+[ and then use the arrow keys to nudge the color fills down 4 pixels and left 4 pixels.
Result & Conclusion
Finally, add a subtle light gray background #EDE9E6 and here is the result: Hopefully you have enjoyed following along with this tutorial and creating your own hipster lightbulb. To recap, we covered various techniques for creating custom vector icons in Illustrator; including combining shapes, manipulating rounded corners and separating fills and strokes from each other.


Comments