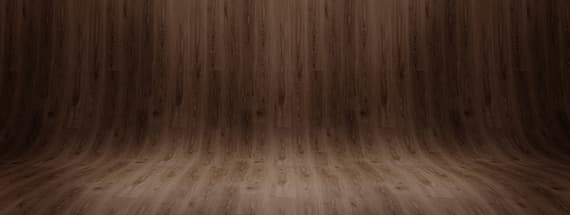
Create a Curved Wood Presentation Background in Photoshop
Smooth, textured backdrop for product mockups
This tutorial will teach you how to take a flat seamless wood texture and sculpt it into a curved presentation backdrop ideal for product mockups. The effect is achieved by using Gradients, Shape Layers, Blending Modes and the Warp Transform tool.
Step 1
Launch Photoshop and create a new document 3000 x 2000 pixels.
Step 2
Double click on the Background layer to unlock it and rename it 'Texture'.
Step 3
Add a Pattern Overlay layer style to the Texture layer using this free sample from the Seamless Wood Textures - Vol 1 pack.
Step 4
Enter Transform mode by pressing CMD+T (Mac) or CTRL+T (Windows) and increase the width and height to 200%. Press Enter to confirm changes.
Step 5
Right click the layer and choose Convert to Smart Object.
Step 6
Enter Transform mode again and this time reduce the width and height to 50%.
Step 7
Drag two new horizontal guides onto the canvas at 1400 and 1700 pixels.
Step 8
Go to Edit > Transform > Warp. This next part can be a little tricky, you will need to grab the points shown in the image below and drag them down in a straight line. However, as you move one point the others will be affected, so expect to do a lot of tweaking. The goal is to get the two horizontal lines to match the guides and keep the vertical lines as straight at possible. The result should look something like this:

Step 9
Drag two vertical guides onto the canvas at 1500 px and 4500 pixels.
Step 10
Enter Warp Transform mode again, and this time drag the bottom left and bottom right points out to meet the vertical guides. Try to keep the edges as straight as possible. If needed, resize the whole layer afterwards to hide any gaps and fill the entire canvas.
Step 11
Next we need to add some lighting, gradient layers can be used to produce shadows. Create a new Gradient Fill layer (Layer > New Fill Layer > Gradient...), set the Blending Mode to Soft Light and the Opacity to 50%.
Step 12
Start with the default Black to White Linear gradient and edit it so that it goes from white to black(Location: 25%) then back to white. Also check the Dither option.

Step 13
Set the foreground colour to black and create another new Gradient Fill Layer and set the Blending Mode to Soft Light.
Step 14
Choose the default foreground colour to transparent gradient preset, change the Style to Radial, Scale to 250% then check the Reverse and Dither options.

Step 15
Shadows done, we can now add some highlights using shape layers. Draw a white ellipse near the bottom of the canvas.- W: 2400 px
- H: 350 px
- X: 300 px
- Y: 1585 px

Step 16
In the Properties panel select the Masks option at the top, and change the Feather settings to 90 px to blur the edges of the ellipse.
Step 17
Set the Blending Mode to Soft Light.

Step 18
Draw another ellipse, partially off canvas at the top.- W: 1800 px
- H: 2038 px
- X: 600 px
- Y: -689 px

Step 19
Change the Feather settings to 90 px again.
Step 20
Set the Blending Mode to Soft Light and the Opacity to 25% for a more subtle result as if the light is being reflected from the 'floor' onto the 'wall'.
Result & Conclusion
Here is the result, as you can see the texture now appears to be smooth and curved. This technique can be used on almost any texture that is either high enough resolution or seamless. Warp Transform in Photoshop is a very powerful tool that allows you to freely manipulate bitmap and vector layers, and this is a prime example of what can be achieved with it.


Comments