

by Diego Sanchez
July 11, 2018
Diego prevents carpal tunnel syndrome in designers worldwide by making incredible time-saving Photoshop actions and mock-ups.
Make a Pastel Effect in Lightroom
Lightroom Effects
The pastel effect (soft color with a pastel tone) can be used on any type of photos, but this particular effect tends to works well on outdoor or portraits photos. If we define it as a soft shade of color (desaturated primary colors) we see that pastels aren’t elaborate, they simply provides a clean and subtle look to your photo.
Today you will learn how to make a Pastel Effect in Lightroom easily and in just a few steps. If you want to follow this tutorial exactly as described, please download the following image from Pixabay: Download. If you want to use your own photo to follow this tutorial, please consider that you may need to change a bit the values given in this tutorial according to the image you are working on.
Step 1
Open the image in Lightroom and go to the Develop tab.
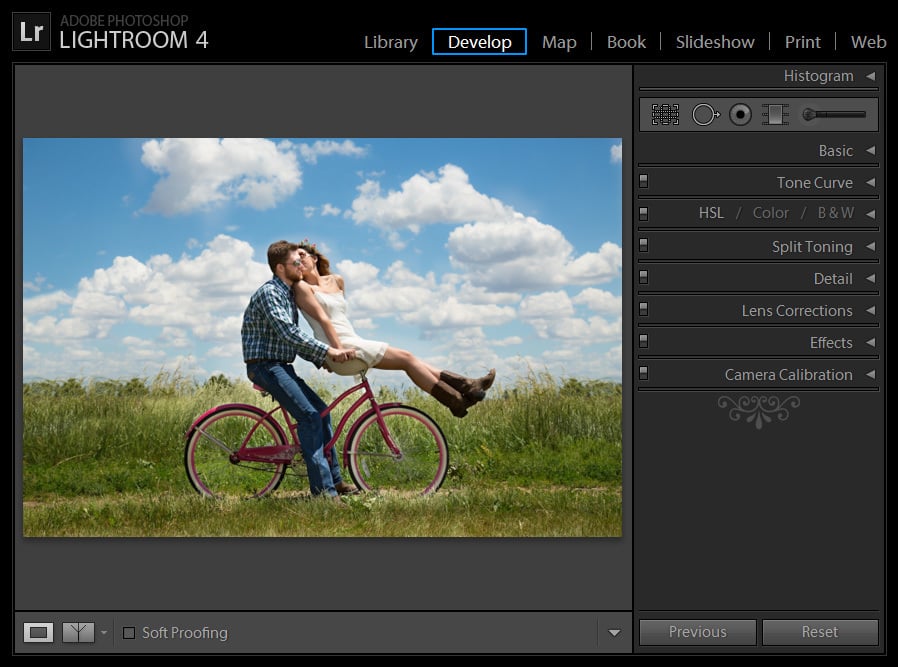
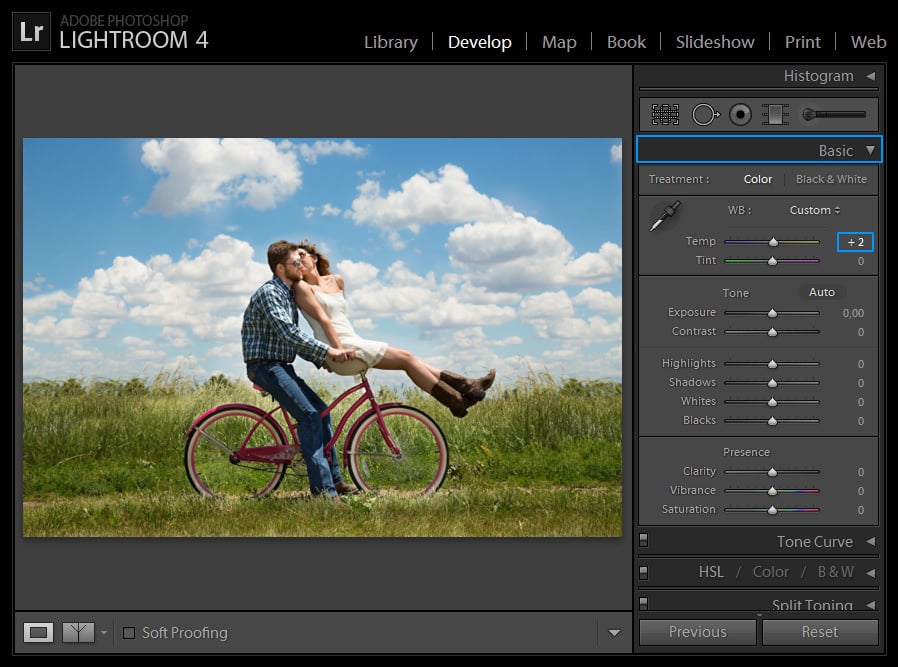
Step 2
In the ‘Basic’ tab, set the Temp value to +2.
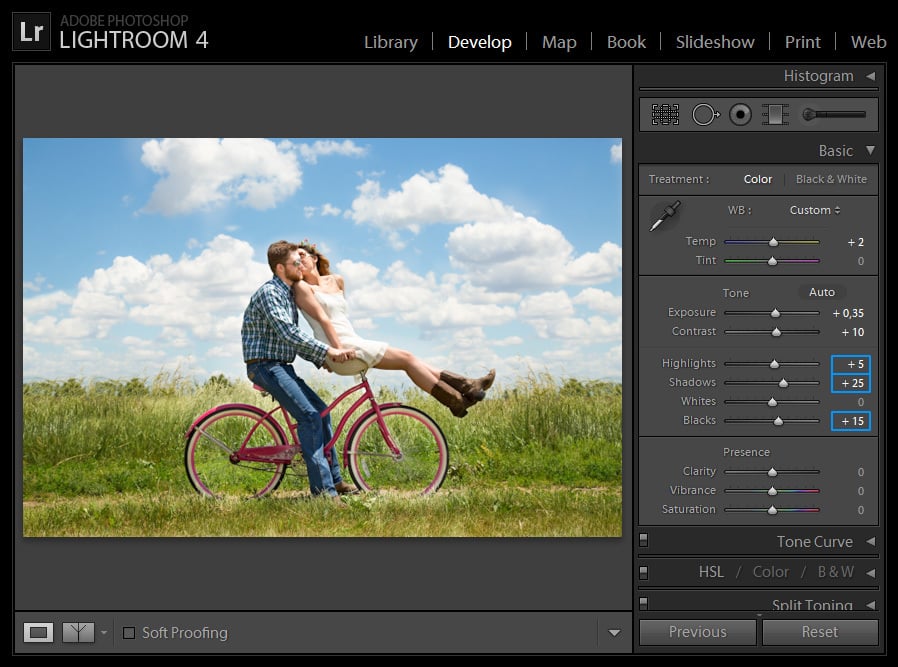
Step 3
Under ‘Tone’, set the Exposure to +0,35 and the Contrast to +10.

Step 4
Set the Highlights to +5, the Shadows to +25 and the Blacks to +15.
Step 5
Under the Presence options of the Basic tab, set the Vibrance to -10 and decrease the Saturation a bit to -15.

Step 6
In the ‘Tone Curve’ tab click and drag the bottom anchor point up, until you get a value of 0/9%.

Step 7
Now, drag the top anchor point down until you reach the 100/98% values. Tip: to better control the anchor point, hold the Alt key on your keyboard while you drag the point.

Step 8
Go to the ‘Split Toning’ tab and set the Highlights values to: Hue 35 / Saturation 35.

Step 9
Under the Shadows values of the Split Toning tab, set the Hue to 210 and the Saturation to 65.

Step 10
Finally, if you want to recover a bit of the Reds, simply go to the ‘Camera Calibration’ tab and under the Red Primary values, set the Saturation to +25.


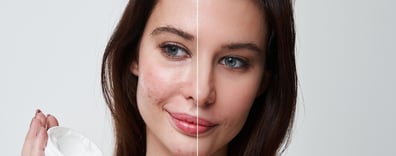
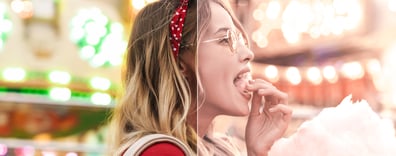
Some Final Words
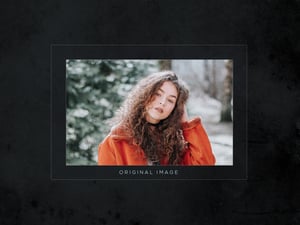
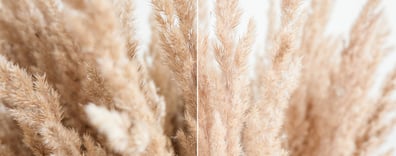
If you plan to use this effect on various photos, a good idea is to save these settings as a Preset so the next time you want to edit a photo you already have all the basic settings already made and all you have to do is some minor adjustments according to your photo (if needed). Here are 2 examples of the Pastel Effect using the exact same settings we used on this tutorial applied to different images.


Comments