

by Diego Sanchez
May 21, 2018
Diego prevents carpal tunnel syndrome in designers worldwide by making incredible time-saving Photoshop actions and mock-ups.


How to Simulate Perfect Film Grain in Photoshop
From Digital to Film Photographs
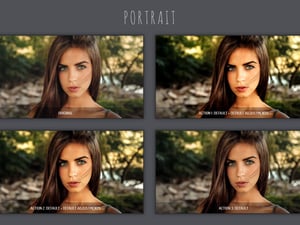
Through the years, photography has evolved into the digital age, and it is very rare to see those photographs made with film. However, there is something that makes us miss that old noise / grain effect in chemically revealed photos and we want to give that effect to our digital photographs.
Sometimes, when we have to do a photo retouching work and in the process replace a background or remove elements from a photograph, to end with a decent result we must also imitate the grain of the original image. There are endless ways to do this, but today I am going to show you how you can imitate the grain easily in Photoshop, in very simple steps and with the possibility of easily adjusting it without having to redo the process.
Step 1
Open you image in Photoshop.

Step 2
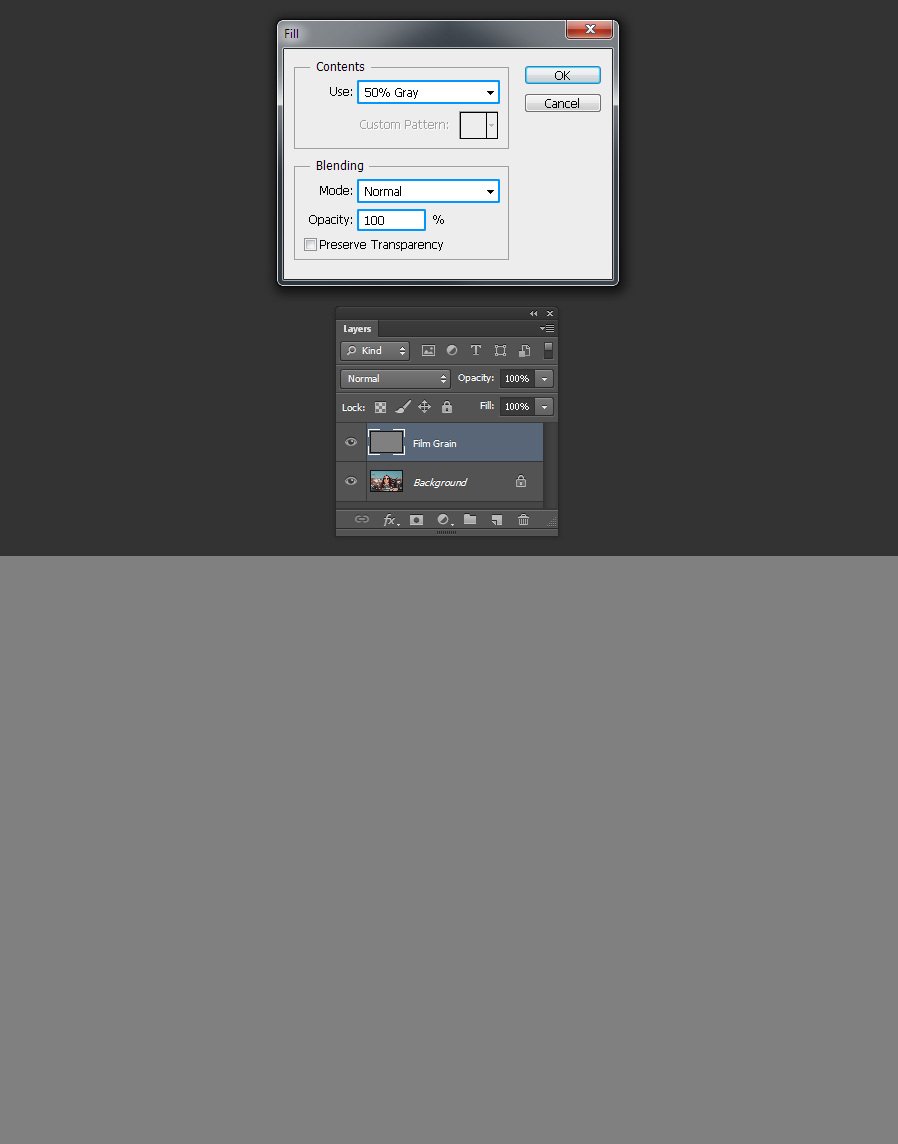
Go to Layer > New > Layer. Name this layer as ‘Film Grain’ and click OK.

Step 3
Go to Edit > Fill. Under ‘Contents’ select ‘50% Gray’ and be sure to have the Mode set to ‘Normal’, the Opacity to 100% and the ‘Preserve Transparency’ option unchecked.
Step 4
Go to Layer > Smart Objects > Convert to Smart Object.

Step 5
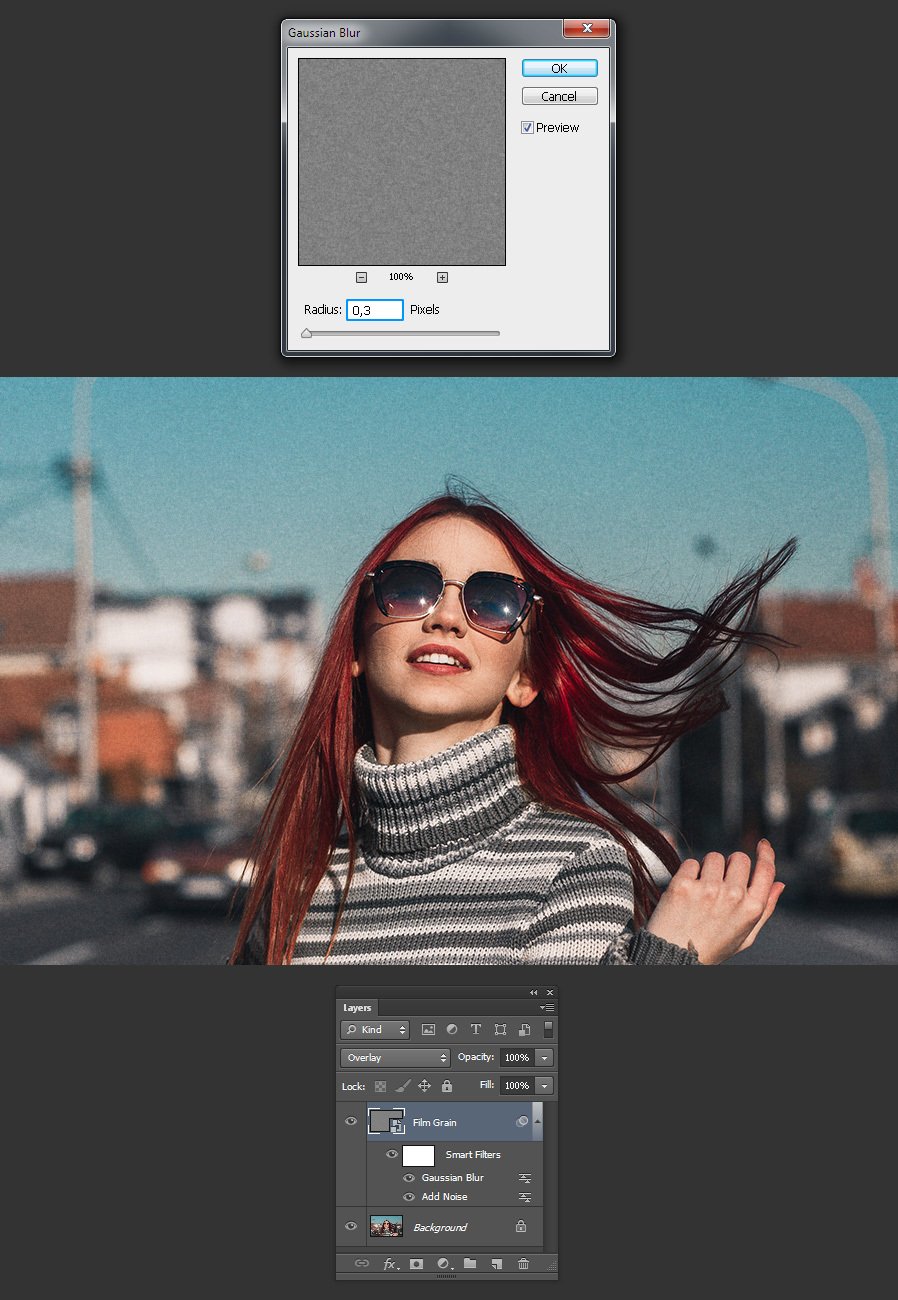
With the ‘Film Grain’ layer selected, set the blend mode to ‘Overlay’.

Step 6
Go to Filter > Noise > Add Noise. Set the desired amount of grain you want (I will be using 4,3% for a more noticeable effect). Choose the ‘Gaussian’ distribution, be sure to check ‘Monochromatic’ and click OK.

Step 7
With the ‘Film Grain’ layer still selected, go to Filter > Blur > Gaussian Blur. Depending on how much grain you added in the previous step you may set the radius with more or less pixels. Set the radius amount you wish and click OK. In this case, I will be using only 0,3 Pixels.
Some Final Tips
As we did our grain effect in a Smart Object, we can easily change the values of the grain and blur amount simply by double clicking on the effect name under the ‘Film Grain’ layer. This is a great advantage because, although it is a simple process, there is no need to make all the steps again if we wish to make some adjustments to our effect.


Comments