
How To Make a Pop Live Text Effect in Illustrator
Illustrator Text Effects
Transforming a plain black text into a more eye catching graphic sometimes requires a lot of work depending on the effect that you want to use to make it more interesting. But most of those "complex" effects that you saw are in fact easy to reproduce if you use the right tools. So today, I will show you how easy is to make a layered Pop effect in Illustrator in less than 10 minutes while keeping the text live for you to edit it later and using only the powerful Appearance panel.
Step 1
Open Illustrator and make a new file at any size you want. In this case I will make mine at 1300 x 850 px.

Step 2
Select the Type Tool (T) and type your text using any font that you want. Here I will be using "CocoSharp Extrabold" at 500 pt.

Step 3
Set both the Fill and Stroke to "none".

Step 4
With your text selected, go to Window > Appearance.

Step 5
Click on the "Add New Stroke" icon and set the color to Black and the Weight to 8 pt.

Step 6
Select the Fill layer and click on the down arrow button to open the swatches panel.

Step 7
Click on the Swatch Libraries Menu icon and from the dropdown menu select Patterns > Basic Graphics > Basic Graphics_Dots.

Step 8
In the "Basic Graphics_Dots" panel, select the "10 dpi 30%" fill.

Step 9
Click on "Opacity" in the Appearance panel. Set the blending mode to "Multiply" and the opacity to 30%.

Step 10
Click on the "Add New Stroke" icon and set the color to Yellow and the Weight to 10 pt.

Step 11
Click on the "Add New Effect" icon and from the dropdown menu select Distort & Transform > Transform.

Step 12
Apply the following settings and click OK.

Step 13
Click on the "Add New Fill" icon and set the color to Cyan.

Step 14
Again, click on the "Add New Fill" icon and this time set the color to Magenta.

Step 15
Click on the "Add New Effect" icon and from the dropdown menu select Distort & Transform > Transform.

Step 16
Apply the following settings and click OK.

Step 17
Again, click on the "Add New Fill" icon.

Step 18
With the new fill layer selected, click on the down arrow button to open the swatches panel.

Step 19
Click on the Swatch Libraries Menu icon and from the dropdown menu select Patterns > Basic Graphics > Basic Graphics_Lines.

Step 20
In the "Basic Graphics_Dots" panel, select the "6 lpi 30%" fill.

Step 21
Click on the "Add New Effect" icon and from the dropdown menu select Distort & Transform > Transform.

Step 22
Apply the following settings and click OK.

Step 23
Again, click on the "Add New Effect" icon and from the dropdown menu select Distort & Transform > Transform.

Step 24
Lastly, apply the following settings and click OK.

Some Final Words:
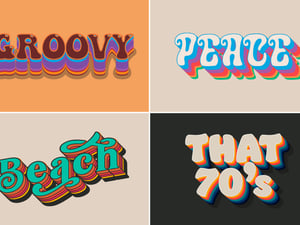
Now that you know how to make a Pop live text effect in Illustrator, you can change the text and font as you normally do in Illustrator without having to make the whole effect again like in the following example.







Comments