How to Add a Depth of Field Blur Effect in Photoshop
Enhance your photos with depth of field
This quick and easy tutorial will show you how to use the Select and Mask tools in Photoshop combined with the Lens Blur filter to create a depth of field style blur effect on your favourite photos.
Step 1
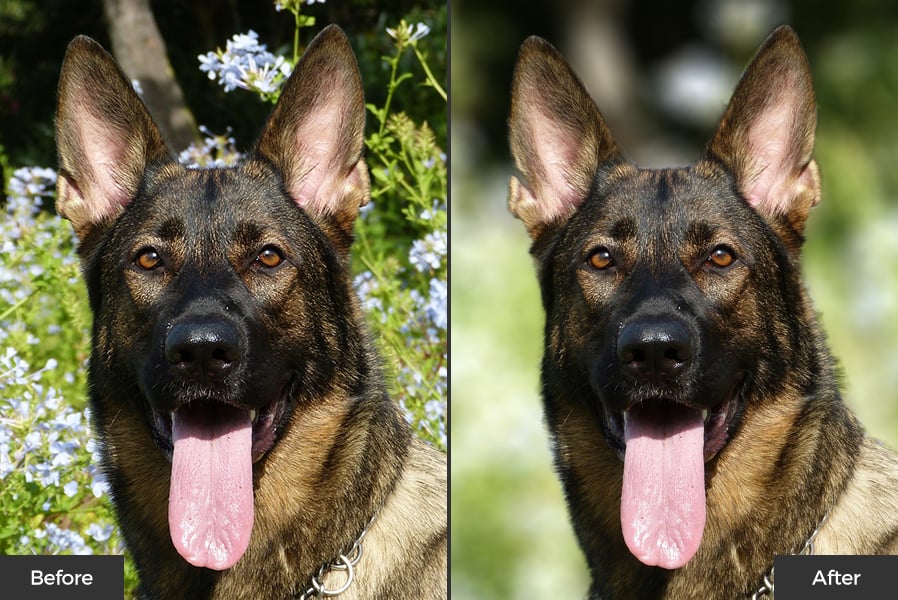
Start by opening your image in Photoshop. I am using this image of a German Shepherd from Pixabay. Please note that this technique will only work with images that have clear separable foreground and background elements. This image is perfect because the dog is in the foreground and the plants are in the background.
Step 2
Double click on the background layer to unlock it, and give it the name 'Background'.
Step 3
Press CMD+J or CTRL+J to duplicate the layer. Rename the top layer to 'Foreground' and select it as the active layer.
Step 4
Go to the Select menu and choose Select and Mask... set the preview mode to Overlay, and choose Masked Areas from the indicates dropdown. In the Output Settings choose Layer Mask.
If your version of Photoshop does not have the Select and Mask feature, you can use Refine Edges instead, although the process will be different to what is shown below.
Step 5
Using the Quick Selection tool create a rough selection of the dog, if you make a mistake hold down the Alt key to remove areas from the selection.
Step 6
Switch to the Refine Edge tool and go around the edges of the selection, focusing on the fur.
Step 7
When you are happy with the selection, click OK to confirm. Select the Background layer as the active layer.
Step 8
Go to Filter > Blur > Lens Blur... and enter the following settings:
- Radius: 85
- Blade Curvature: 100
- Rotation: 0
- Brightness: 2
- Threshold: 100
You can experiment with these settings if you want to adjust the amount of blur. Click OK to confirm.
Step 9
You may notice that although the blur looks very nice, there is a noticeable halo around the dog. This is because we have blurred the dog's fur, and it is bleeding into the background. The easiest way to fix this is to hide it behind the foreground layer.
Step 10
Enter Transform mode (CMD+T or CTRL+T) and hold down the Alt and Shift keys whilst you reduce the size of background layer. Do this until none of the halo is visible any more.
Step 11
Crop the document to the new background size.
Result & Conclusion
There we have it, the final result is a beautiful depth of field blur effect isolating the foreground from the background. You can really see the difference in the before and after comparison below.


Comments