Ocean - Flat UI Kit
Free
3 Simple Techniques to Create a Diffuse Shadow in Photoshop
Say no to long shadows
Diffuse shadows are a type of box shadow which give the illusion of more depth than a regular drop shadow. This effect is achieved by making the shadow smaller than the source object and offsetting it in the direction of a light source. This tutorial will cover 3 different methods for creating diffuse shadows in Photsohop depending on the situation.
Technique 1: Feather
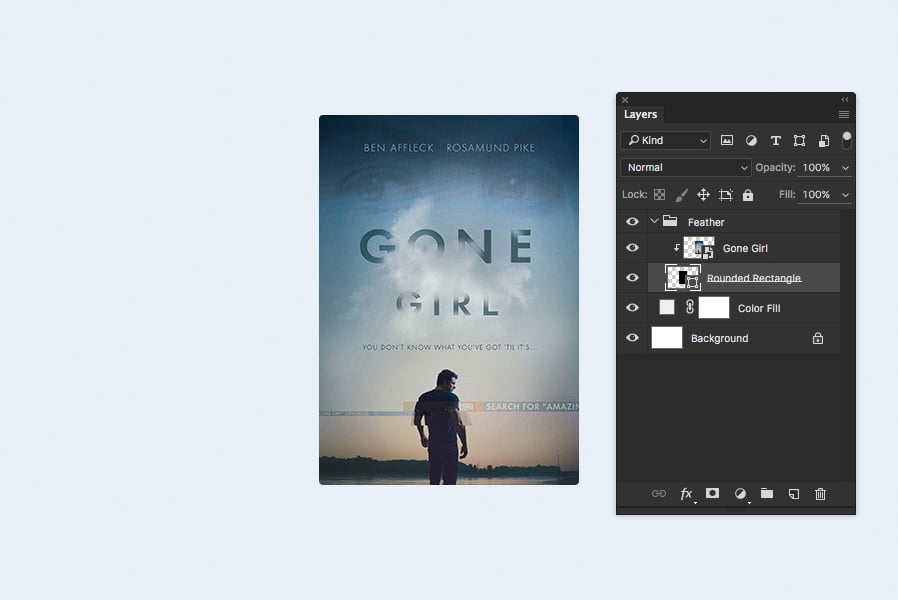
This technique is the quickest and easiest, it doesn't offer as many options as the other methods and it only works on vector layers, but it does give you complete manual control over the size, amount of blur and offset.Step 1
Select the layer that you want to cast the shadow, with this technique it must be a vector shape layer.
Step 2
Duplicate the layer and select the version that is lower down in the layers panel. Rename this layer to 'Shadow'.
Step 3
Enter Transform Mode (CTRL+T or CMD+T), set the anchor point to the bottom center and enter 80% into the W and H fields.
Step 4
Nudge the 'Shadow' layer down 20 pixels. (This is for a simple 90° shadow as shown in the example below, you can get creative with the direction and distance if desired)
Step 5
Open the Properties window and enter the amount of blur you want in the Feather field.
Step 6
Set the opacity of the 'Shadow' layer.
Step 7 (Optional)
Link the original shape and 'Shadow' layers together so that when you move one, the other follows.
Result

Technique 2: Drop Shadow
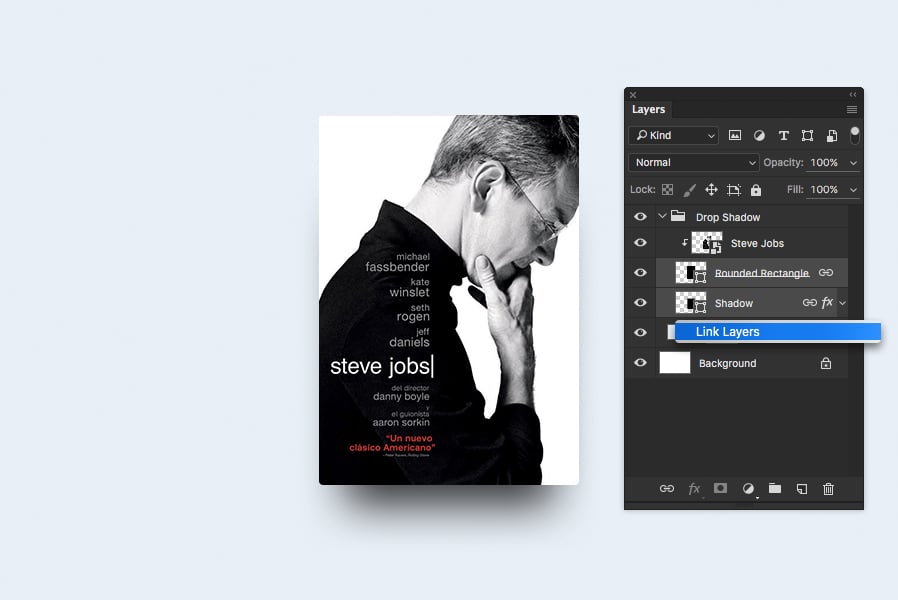
This technique is great for those who feel more comfortable using the Layer Styles interface, and like the options that it offers including Global Light, Spread, Contour and Noise.Step 1
Select the layer that you want to cast the shadow, with this technique it can be a bitmap, vector or any other kind of layer.
Step 2
Duplicate the layer and select the version that is lower down in the layers panel. Rename this layer to 'Shadow'.
Step 3
Enter Transform Mode (CTRL+T or CMD+T), set the anchor point to the bottom center and enter 80% into the W and H fields.
Step 4
Add a Drop Shadow Layer Style to the 'Shadow' layer with 90° angle, 20px Distance and 50px Size. (This is for a simple 90° shadow, you can get creative with the angle, distance and size if desired)

Step 5 (Optional)
Link the original shape and 'Shadow' layers together so that when you move one, the other follows.
Result

Technique 3: Smart Object
This technique is most suited to more complex shapes including bitmap images and groups of multiple layers. It requires creating a Smart Object, which may be overkill for simple shapes but will save you time in the long run with objects that change size and/or shape regularly.Step 1
Select the layer or layers that you want to cast the shadow, with this technique it can be a group or multiple bitmap and vector layers.
Step 2
Convert the group or layer(s) into a Smart Object.
Step 3
Duplicate the Smart Object and select the version that is lower down in the layers panel. Rename this layer to 'Shadow'.
Step 4
Add a Color Overlay Layer Style to the 'Shadow' layer with color #000000 and Opacity 100%.
Step 5
Enter Transform Mode (CTRL+T or CMD+T), set the anchor point to the bottom center and enter 80% into the W and H fields.
Step 6
Nudge the 'Shadow' layer down 20 pixels. (This is for a simple 90° shadow as shown in the example below, you can get creative with the direction and distance if desired).
Step 7
Apply a Guassian Blur filter to the 'Shadow' Smart Object with 25px Radius.
Step 8
Set the opacity of the 'Shadow' layer.
Step 9 (Optional)
Link the original Smart Object and 'Shadow' Smart Object layers together so that when you move one, the other follows.
Result


Comments