
by Tony Thomas
November 03, 2015
Tony creates pixel-perfect UI kits & icons. His pug, Wednesday, is Medialoot's beloved mascot.
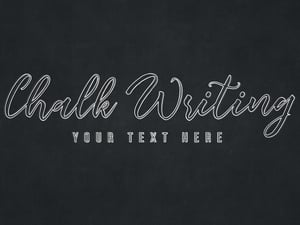
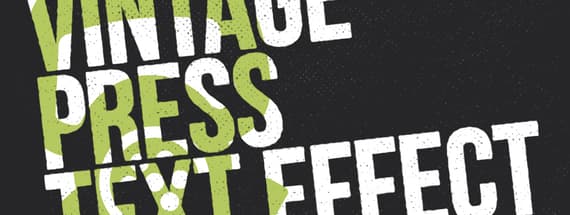
Create a Vintage Press Text Effect in Photoshop
Retro and grungy letter press inspired effect using textures
This tutorial will show you how to use Smart Objects, Filters, textures and Clipping Masks in Photoshop to a create a retro letter press style text effect.
Step 1
Launch Photoshop and create a new document, width 900 pixels and height 600 pixels.
Step 2
Go to the Layer menu and select New Fill Layer > Solid Color.. click OK and then enter #262627 in the Color Picker

Step 3
Type your text onto the canvas using Bebas Neue Regular.- Size: 180 px
- Vertical Spacing: 136 px
- Alignment: Left
- Color: #ffffff

Step 4
In order to round the edges of the text slightly, apply a Stroke layer style aligned to the outside:- Size: 2 px
- Position: Outside
- Opacity: 100%
- Color: #ffffff


Step 5
To make the text look rougher around the edges, first convert the layer to a Smart Object and then go to the Filter menu and select Distort > Ripple...- Amount: 35%
- Size: Medium


Step 6
Drop in this free texture sample from the Gentle Press Effects set and resize it to fill the canvas, whilst holding down the Shift key to constrain proportions.
Step 7
Place the texture layer above the text Smart Object in the Layers panel and create a Clipping Mask.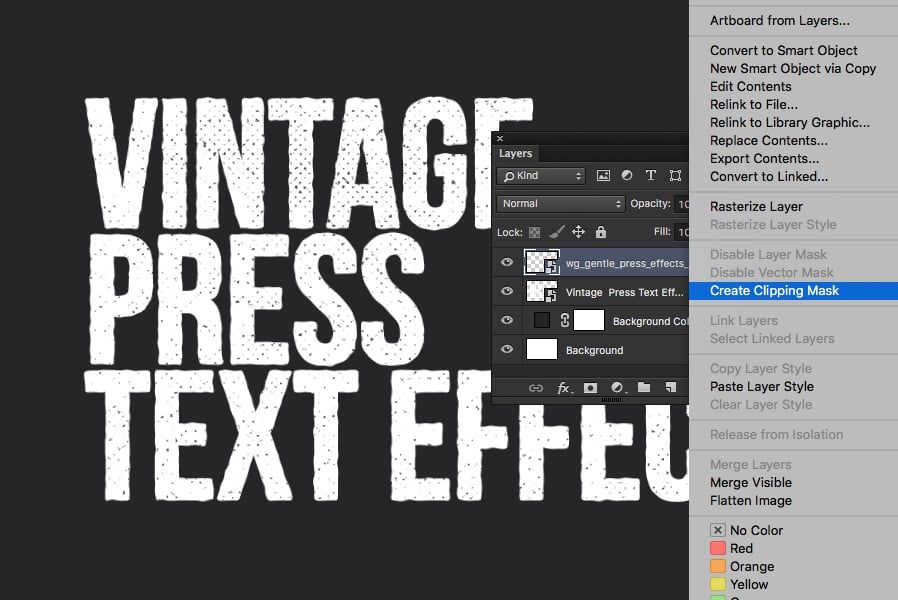
Step 8
Apply a black Color Overlay to the texture layer:- Color: #000000
- Opacity: 100%

Step 9
Set the Opacity of the texture layer to 50%
Step 10
Duplicate the texture layer, change the Opacity to 15%, and move it down in the Layers panel so that it sits below the text Smart Object layer and above the Color Fill layer.
Step 11
Change the Color Overlay from black to white (#ffffff) on the duplicated texture layer.

Step 12
Now we can draw or drop in our custom shape. I am using the Gas Mask icon from the Signia - Vector Icon Pack. Set the fill color to #b4c95f.
Step 13
Move the shape layer between the top texture layer and text Smart Object layer, which will automatically add it to the Clipping Mask already set up.
Result & Variations
Feel free to experiment with the last step and try out different shapes and color fills:


Comments