

by Tony Thomas
July 06, 2017
Tony creates pixel-perfect UI kits & icons. His pug, Wednesday, is Medialoot's beloved mascot.

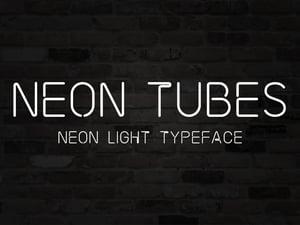

How to Make a Neon Font with Illustrator and Glyphs App
Design your own custom neon font
This tutorial will show you how we created our popular Neon Tubes font, from drawing the letterforms in Illustrator to turning them into a font using Glyphs app. If you don't have access to Glyphs, don't worry you can use whichever font creation application you want.
Step 1
Launch Illustrator and create a new document. It needs to be pretty huge, 16000 x 4600 pixels is the size I recommend.

Step 2
As you can see the document is almost as wide as Illustrator will allow. This is because we are going to draw each glyph very large and we need space for as many as possible in the same document and ideally all in a horizontal line.

Step 3
Show Rulers (CMD+R) if they are not already visible and reset the zero point roughly 1/3rd of the way down from the top of the artboard. Then draw 3 guides at 0, -430 and -840 pixels.

Step 4
Let's start with the letter A, draw a triangle with a 55pt black stroke, and align the triangle to the bottom guide but exceed the top guide slightly as it will become shorter in the next step.

Step 5
Select the top point of the triangle and increase the corner Radius to 43 px or until it meets the top guide.

Step 6
Draw a Rounded Rectangle where you would like the crossbar of the A to be. Overlap the rectangle on one side of the triangle. Before moving onto the next step, draw some guides here so that we can reference the A crossbar later.

Step 7
Use the Pathfinder to subtract the rounded rectangle from the triangle.

Step 8
Select the two new corner points we have created and increase the corner Radius to 60 px.

Step 9
Use the Direct Selection Tool (A) to select the bottom segment of the triangle and hit the Delete key to remove it and complete the A shape.

Step 10
For the letter B, start with two rectangles one stacked on top of the other. Use the top, bottom and center (-430px) guides for alignment.

Step 11
Select the top left and bottom left corners of the rectangles and increase the Radius to 40 px. Select both top and bottom right corners on both rectangles and increase the Radius to maximum.

Step 12
Use the Pen Tool (P) to create two new points on the paths, then use the Direct Selection Tool (A) to select the newly created path segments and hit the Delete key to remove them as shown below.

Step 13
For the C shape, draw a new rectangle with the same 55pt black stroke.

Step 14
Increase the Radius for all corners to the maximum. (Note: this is also the O letter and can be used as a base for other letters such as the G)

Step 15
Draw a new rectangle overlapping the area of the C you want to remove. Then select both shapes and use the Pathfinder the subtract the smaller rectangle.

Step 16
Select the leftover points and hit the Delete key to remove them and complete the C shape.

Step 17
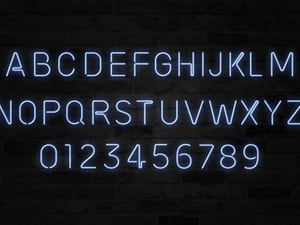
These are the basic techniques for creating letters. The same principles can be used for all of the letters and numbers. Try to use basic geometric shapes whenever possible to build the glyphs, in some case you will need to go freeform and use the Pen Tool for example the S.

Step 18
Copy and paste the guides to create another line of letters when needed. When you have drawn all of the letters and numbers, Select All.

Step 19
Go to Object > Path > Outline Stroke to finalise the glyphs. This action cannot be reversed so I recommended making a duplicate file at this stage incase you need to make changes later.

Step 20
Open your font editor of choice and create a new document. I am using Glyphs App for Mac.

Step 21
Enter the basic information for your font, including the Family Name and Designer etc.

Step 22
Head over to the Metrics settings in the Masters tab and set the Cap Height to 840 and x-Height to 430. These are the same values we used for the guides in Illustrator.

Step 23
Copy the A glyph in Illustrator and paste it into the A glyph in your font editor. If you get an message like this in glyphs app, choose Correct Bounds.

Step 24
Set the left and right spacing metrics to 50.

Step 25
Repeat steps 23-24 for all of the letters, numbers and any other glyphs you created.

Step 26
Go to File > Export, choose a destination and export your font as an OTF file. If you are an Adobe user, saving the font to Library > Application Support > Adobe > Fonts automatically installs it for Adobe apps and allows you to test it whilst avoiding system caching.

Conclusion
Open Illustrator again, type out some text and choose your new font from the list. Congratulations you have created your very own font!

Creating a custom font is something that used to scare me a lot, and the first few times I tried it I learned a lot, but also got so confused. Learning to draw fonts with font editors wasn't something I was interested in. I wanted to use Illustrator and there weren't many resources available explaining how to do this. Hopefully this tutorial will be helpful for somebody taking their first steps into font creation.
And for those of you just want to download the font, you can do so here:
Download Neon Tubes Font


Comments