

by Diego Sanchez
July 15, 2019
Diego prevents carpal tunnel syndrome in designers worldwide by making incredible time-saving Photoshop actions and mock-ups.
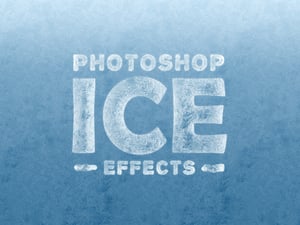


How to Make an Ice text Effect in Photoshop for That Freezing Feeling
Ice Effect with Layer Styles
Some techniques to make an ice effect in photoshop makes use of textures and layer masks while others (like the one you will learn here) are quick and easy to make using layer styles. The advantage of making effects with layer styles is that you can reuse them over any other element you want without having to make the effect again and apply it with a single click of the mouse.
In this tutorial I will show you how to make an Ice Text Effect in Photoshop from scratch using only the default Photoshop tools that you can later use in other text, raster or shape layers.
Step 1
Open Photoshop and make a new file at any size you want. In this case it will be set to 1800 x 1200 px.

Step 2
Go to Layer > New Fill Layer > Gradient. Name this layer as “Background Gradient” and click OK.

Step 3
Click on the gradient thumbnail of the Gradient Fill Window.

Step 4
In the Gradient Editor set the left stop color to #23638f, the right stop color to #c9e5f8 and click OK.

Step 5
Apply the following values in the Gradient Fill window and click OK.

Step 6
Using the Type Tool (T) type your text with a big font size. In this case I will be using Berlin Sans at 800 pt.

Step 7
With the text layer active, go to Layer > Layer Style > Blending Options. Under “Advanced Blending” set the Fill Opacity to 0%.

Step 8
Select “Bevel & Emboss” from the Styles list. From the dropdown “Gloss Contour” menu select the “Cone - Inverted” thumbnail and apply the following settings.

Step 9
Select “Texture” from the styles list and click on the pattern thumbnail.

Step 10
From the thumbnails window, click on the Gear icon and from the dropdown menu select “Rock Patterns”.

Step 11
Select the “Black Marble” pattern and apply the following settings.

Step 12
Select “Inner Glow” from the styles list and apply the following settings.

Step 13
Lastly, select “Outer Glow” from the styles list and apply the following settings.

Step 14
To save this layer style for a future use, click on the “New Style” button. Give the style a name, be sure to check “Include Layer Effects” and “Include Layer Blending Option” and click OK.

Step 15
Finally, click OK in the Layer Style Panel to apply the ice effect to the text layer.

Some Final Words
As you may see, making an ice effect using layer styles in Photoshop is a simple process, and from this point you can make any variations you want, like changing the Bevel & Emboss colors, the overall texture, etc. and achieve a unique style to use on your designs. And the next time you want to apply the Ice Effect to another layer, simply go to Window > Styles (to display the styles) and click on the Ice Style thumbnail we just created.


Comments