

by Diego Sanchez
November 07, 2017
Diego prevents carpal tunnel syndrome in designers worldwide by making incredible time-saving Photoshop actions and mock-ups.


How To to Install Photoshop Brushes the Right Way
Photoshop tools
Photoshop brushes are a very versatile tool for both new users and experts as well. This handy tool is not only for replicate physical media like paints, but also can be used to apply textures, patterns, lights, etc. The process to install brushes in Photoshop is very simple, and in addition to simply drag and drop the ".abr" file inside the Photoshop screen here I will show you 2 other ways to do it.
Method 1
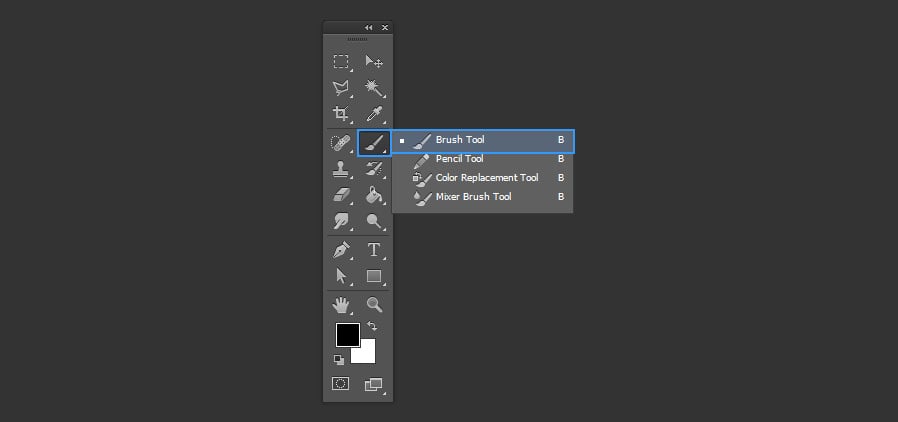
Step 1
Open Photoshop and select the Brush tool (B).
Step 2
In the Brush toolbar on the top left of your screen, click on the brush thumbnail in order to display your currently installed brushes.

Step 3
Click over the gear icon in the top right corner of the brushes thumbnail list and from the menu select "Load Brushes"

Step 4
Locate your brush file, select it and click on "Load"

Step 5
Now, if you click again in the thumbnail of the Brush toolbar you will see that your new brushes were installed.

Method 2
Step 1
Open Photoshop and go to Edit > Presets > Preset Manager

Step 2
In the Preset Manager window, select the Brushes from the dropdown menu and click on "Load"

Step 3
Locate your brush file, select it and click on "Load"

Step 4
Now, if you select your Brush tool and you click in the thumbnail of the Brush toolbar you will see that your new brushes were installed.


Comments