

by Diego Sanchez
May 02, 2018
Diego prevents carpal tunnel syndrome in designers worldwide by making incredible time-saving Photoshop actions and mock-ups.


How to Design an Elegant Event Flyer in Photoshop
Marketing Materials
There are so many different types of marketing materials you could invest your time in, and you've got to make each effort count. One of the most effective ways to let new potential customers know more about you is with a flyer. Small, punchy, but just enough space to wow them with your design. Which is what this tutorial is for.
Today, you will learn how to properly setup a guide template in Photoshop and how to design an elegant event flyer. For this tutorial, we will be making a 4.0” x 6.0” flyer with a 0,125” bleed using the following assets:
- Grunge Stained Paper Textures
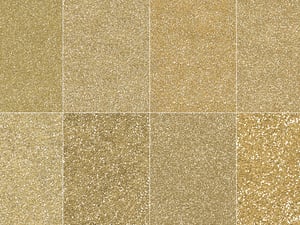
- Seamless Glitter Textures
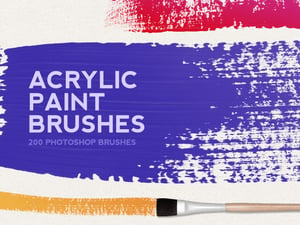
- 200 Acrylic Paint Photoshop Brushes
- Rocks picture
- Lato font
Step 1
Open Photoshop and go to File > New. Name the file as ‘4x6 Flyer’, set the Width to 4,25” (1275 px), the Height to 6,25” (1875 px), the resolution to 300dpi and be sure to have the Color Mode set to CMYK Color and click OK.

Step 2
To start placing guides to mark the Trim Size, go to View > New Guide. Set the Orientation to Vertical, the Position to 0,125” and click OK.

Step 3
Again, go to View > New Guide. Set the Orientation to Vertical, the Position to 4,125” and click OK.

Step 4
One more time, go to View > New Guide. This time, set the Orientation to Horizontal, the Position to 0,125” and click OK.

Step 5
Finally, go to View > New Guide. Set the Orientation to Horizontal, the Position to 6,125” and click OK.

Step 6
Now that we have the Trim Size guides ready, it is time to start designing our flyer. Go to File > Place. Select the ‘Stained Paper 5’ texture from the Grunge Paper Textures set and click Place.

Step 7
Go to Edit > Transform > Rotate 90º CW.

Step 8
Drag the texture corners to fill the entire canvas and hit the Enter key on your keyboard to commit the changes.

Step 9
In the Layers Panel, set the Blend Mode of the texture layer to Multiply, and bring down the Opacity to 40%.

Step 10
Go to Layer > New > Layer. Name this layer as ‘Glitter Brush’ and click OK.

Step 11
Select the Brush Tool (B) and in the Brush Panel select the ‘Paint Brush 50’ from the Acrylic Brush Set.

Step 12
Set the brush size to 950px and be sure to have the Opacity and Flow set to 100%.

Step 13
Click once over the canvas to paint a brush stroke.

Step 14
Double click over the ‘Glitter Brush’ layer to display the Layer Style Panel, apply the following settings under ‘Bevel & Emboss’, ‘Pattern Overlay’ and ‘Drop Shadow’ and click OK.

Step 15
Press ‘X’ on your keyboard to invert the Foreground and Background colors. Select the Polygon Tool (U) and click once over the canvas. In the Create Polygon window, set the Width to 705 px, the Height to 792 px, the Sides to 3 and click OK.

Step 16
Go to Edit > Transform > Rotate 90º CCW.

Step 17
Double click over the ‘Polygon 1’ layer to display the Layer Style Panel, apply the following settings under ‘Drop Shadow’ and click OK.

Step 18
With the ‘Polygon 1’ layer selected, bring down the layer Opacity to 70%.

Step 19
Press ‘X’ on your keyboard to invert the Foreground and Background colors. Select the Polygon Tool (U) and click once over the canvas. In the Create Polygon window, set the Width to 651 px, the Height to 732 px, the Sides to 3 and click OK.

Step 20
Go to Edit > Transform > Rotate 90º CCW.

Step 21
Go to File > Place. Locate and select the Rocks picture on your computer and click Place.

Step 22
With the picture layer selected, go to Layer > Create Clipping Mask and move the picture to cover the whole black triangle.

Step 23
Bring down the Opacity of the picture layer to 20%.

Step 24
In a new layer, and using your preferred method, create any geometric shape that you like using a 4px stroke for the main shape, and 2 px stroke for the inner lines. Here I will be using an hexagon with some lines inside it.

Step 25
Double click over the ‘Shape 1’ layer to display the Layer Style Panel, apply the following settings under ‘Pattern Overlay’ and click OK.

Step 26
To finish our background, we will add one more instance of the brush we used. Go to Layer > New > Layer. Name this layer as ‘Black Brush’ and click OK.

Step 27
Select the Brush Tool (B) and with a black color, click once over the canvas using the same ‘Paint Brush 50’ brush from the Acrylic Brush Set and with the same settings for Size (950 px), Opacity (100%) and Flow (100%).

Step 28
With the ‘Black Brush’ layer selected, go to Edit > Transform > Rotate 90º CCW. And place the brush stroke near the bottom of the canvas as shown.

Step 29
Select the Text Tool (T) and type the event name using Lato Hairline for the first word and Lato Light for the second word with a size of 150px and with a black color for both words as shown.

Step 30
Add the event date using Lato Light for the month and Lato Hairline for the day at a size of 70px as shown.

Step 31
Now add the event time using Lato Hairline for the number and Lato Light for ‘PM’, both with a 70 px size and a black color.

Step 32
Using a font size of 50 px and with a black color, type the special guests names using Lato Light for the Names and Lato Hairline for the Surnames of the left column guests, and do the opposite for the right column guests (Lato Hairline for Names and Lato Light for Surnames).

Step 33
Use Lato Light for the ‘///’ and ‘\\\’ and Lato Regular for ‘ the most elegant event in n.y.c.’ text at a size of 40 px and black color.

Step 34
Add another text line for the tickets availability using Lato Regular at a 32 px size with black color.

Step 35
Finally, add some information at the bottom using Lato at 30 px with a black color altering the Regular and Light variations to make the text more interesting.

Step 36
Select the Line Tool (U) and draw a 100 px line using a black color and with a Weight of 2 px. Place it between the date and the left column guests list.

Step 37
To finish our event flyer, draw another line using the same settings, and this time place it between the hour and the right column guests list.


Comments