

by Diego Sanchez
January 31, 2018
Diego prevents carpal tunnel syndrome in designers worldwide by making incredible time-saving Photoshop actions and mock-ups.


How to Create a Pattern in Photoshop
Seamless Patterns in Photoshop
Patterns has become a ‘must’ for designers who wish to spice up their designs, make them more attractive or bring attention to other parts of their designs. But as every design needs a particular graphic, most of times the default Photoshop patterns are not enough, which gives you 2 choices: search (and find) for some pattern on the internet with the style, content and usage rights you need or make your own in Photoshop. Today, I will show you how easily you can make your own pattern in Photoshop and save hours of internet searching.
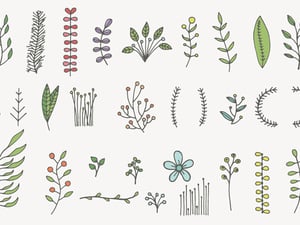
For this tutorial, we will need some graphics to make our pattern. It could be any graphic that you want and if it has a transparent background, even better. I will be using some of the elements included in the ‘Hand Drawn Floral Vector Elements’ that you can find here at Medialoot, so if you want to follow this tutorial exactly as shown, go ahead and download the file.
Step 1
Open Photoshop and go to File > New to create a new file. Name it ‘My Pattern’, set the canvas size to 600 x 600 px in RGB mode at 72 dpi (use 300dpi in CMYK mode if you will use it for printing purposes) and click OK.

Step 2
Bring the elements you want to use on your pattern into Photoshop using your preferred method. I will simply drag all elements from Illustrator (one by one) to our new created document, but I will keep 3 elements aside for later use.

Step 3
Once we have the elements in Photoshop, just arrange them to your liking but stay away from the borders (i.e. not touching the document border).

Step 4
Once we are happy with our layout, select all layers (except the Background) and go to Layer > Smart Objects > Convert to Smart Object.

Step 5
As our document size is 600 x 600 px, we will set an offset of 300 px for the Vertical and Horizontal values in order to make this design seamless. Go to Filter > Other > Offset. Set the Offset to +300 in the Horizontal axis and +300 in the Vertical axis, be sure to have the ‘Wrap Around’ option selected and click OK.

Step 6
As we have some bit larger white spaces on our pattern (that could work for certain designs) we will fill the gaps with those 3 extra elements we did not used before. Bring those 3 elements to our document using your preferred method just like we did before in Step 2.

Step 7
Arrange the new elements in a way that they fill the large white spaces of our pattern, but again be careful to not touch the document borders with the new elements.

Step 8
Once you are happy with the result, hide de Background layer by clicking on the eye icon next to the layer name.

Step 9
Go to Select > All.

Step 10
Go to Edit > Define Pattern. Give the new pattern a name (I will set it to ‘Floral’) and click OK.

Step 11
To test our pattern, create a new document in Photoshop larger than the original pattern size. In this case I will set it to 2000 x 1150 px.

Step 12
Go to Layer > New Fill Layer > Pattern. Set this layer name to ‘Pattern Test’ and click OK.

Step 13
In the Pattern Fill window, click on the pattern thumbnails and select our recently created ‘Floral’ pattern.

Step 14
Set the Scale to 100%, be sure to have the Link with Layer option selected and click OK.

Some Final Words
As the pattern we created is now available in the Photoshop patterns, we can apply it using any method that we like, via Layer Styles > Pattern Overlay, using the Edit > Fill dialog or like we just did with the Layer > New Fill Layer > Pattern. And as this pattern have a transparent background, you can use it over any background color you like.


Comments