

by Diego Sanchez
December 18, 2017
Diego prevents carpal tunnel syndrome in designers worldwide by making incredible time-saving Photoshop actions and mock-ups.


12 Photoshop Actions Every Designer Should Have (Updated 2023!)
SPEED UP YOUR WORKFLOW
Although every designer has their own working method, there are many common factors in all those hundreds of different ways to achieve the same purpose. Besides delivering the final design piece on time and with a very high quality, all of those processes of all of those millions of designers around the world are united by a common point: to do it in the shortest time possible.
Here is where Photoshop actions come into play and allow those designers to concentrate even more on the design concept and not so much on the design realization since many of the Photoshop actions are used as a design basis (sometimes as a final result) for the work to be done.
There are literally thousands of Photoshop actions, and between 5 and 10 for the same purpose. Of course every design work will have different styles and will require different steps (i.e. different actions) but here is a selection of Photoshop Actions that should be present in every designer's toolbox, because at some point, those actions will become handy when you need to save some time.
Summer Vibes Photoshop Action - $5

With 15 different presets, you can get a gorgeous summer look to your image in just 1 click (but still keep your original image)
Vanilla Photoshop Action - $5

This easy-to-use action is everything BUT vanilla. With 15 different presets, the action gives your images warm, cozy looks without sacrificing the quality of the picture.
Neutral Photoshop Action - $5

If you want to give your images a calming, cool, neutral look, you need to keep these presets in your designer toolbox. The pack of 15 keep the original image intact, but bring a layer of soothing neutrality to any picture. What makes this pack even better is you can adjust the capacity on each action or even use multiple presets to get your look just right.
Enlarger Photoshop Action

Sometimes when you need to use a particular image in one of your designs but there is not a hi-resolution version of it, you may use the Image Size function in Photoshop, but the end results are not quite professionals and you may end up with a blurry image. Fortunately, there is a much better way than simply use the Image Size function in Photoshop and hoping for the best when you have no choice but to increase the size of an image. The Enlarger Photoshop Actions is made to increase the resolution of any image in Photoshop without losing sharpness giving you a much better end result than the traditional method.
ReFocus Photoshop Action

Turning your photos into a dreamy soft focus photography effect with the ReFocus action is a breeze. First, open your photo and create a new layer with the name of ‘Brush’. Create a selection for the area you want to keep the focus and fill it with any color or brush over the ‘Brush’ layer. Then simply hit the PLAY button in the actions panel and after a few seconds your image will be ready. Once the action finish, you can adjust the settings to your liking.
Duotone Photoshop Action

What once was done to save money when printing images (just 2 colors instead of 4 to make full colored pictures prints) these days are used just because it looks cool. We may say that thanks to Spotify, the duotone Effect has grown in popularity. There are some advantages when using duotone images wisely, one of them (besides saving money) is to increase readability when it act as a color ‘stabilizer’ giving the text of your design piece a lot of space and contrast. And making a duotone effect in Photoshop with the ‘Duotone Photoshop Action’ has never been easier. With a single click, you will end up with 20 different duotone color effects and adjustment layers to make your image just perfect (and cool).
Double Exposure Photoshop Action

The double exposure effect was originally made by professional photographers using only their camera to combine two separate photos and create a surreal image. But all the procedure to achieve this same effect can also be made easily thanks to the ‘Double Exposure Action’ for Photoshop. This particular action has 30 different modes and allows an easy adjustments of Contrast, Curves, Saturation and more, which actually gives more control over the final output rather than the traditional method. Using the action is very simple, and the results are quite impressive.
Newspaper Photo Photoshop Action

A simple yet useful action to make your photos look like newspaper print, available in both grayscale and sepia tone. This action is really easy to use, just one click and you get that newspaper look. Although you do not have much control over the dots size, it is undoubtedly an action that saves us both the time and the process of transforming our images so that they look like printed in a newspaper.
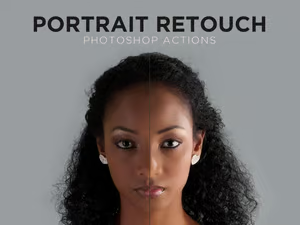
Portrait Sketcher Action

With the Portrait Sketcher Action, turning any portrait photographs into sketched art in a matter of seconds will take you just one click. Made for advanced and occasional users, with or without advanced Photoshop knowledge, all what is required is that you open your image (it does not matter if it is in Grayscale or Colored), select the Sketcher Action and click on the play button. Whether you want to give your photos a sketch effect or to develop drawing techniques, the ‘Portrait Sketcher Action’ can't be missing in your toolbox.
Mapita Isometric Map Photoshop Action

This free Photoshop action will transform any vector or raster shape to a 3d isometric map in 3 different styles: grass, snow and desert. Although Mapita is meant for maps, you can convert almost anything into a isometric 3D nice effect (fonts, logos, badges, etc). Right after you install all the actions, styles and patterns to Photoshop you may start using this action. Create a new document (2000 px wide and a resolution of 300 dpi is recommended) and import your map shape into the opened document or just paste it as a vector shape or as a smart object, then make sure to rename the layer with your design to “map” and run the action. Mapita also comes with a few extra elements to get you started on decorating your map, which can be really useful to make infographics.
Film Grade Photoshop Action

Adding beautiful analog styles to your photos is easy with the Film Grade action. Besides featuring 4 different film effects (cool, warm, basic and advanced) it only takes less than a minute to be completed. ‘Cool’ is a balanced cold tint for your photos, it is an action best suited for indoor, minimal photography. ‘Warm’ is a balanced warm tint for your photos, best suited for portraits. ‘Basic’ is a subtle film tint great for landscape and other outdoor photography. And ‘Advanced’ is a harsher, more impacting film style perfect for warm/summer photos.
HDR Photoshop Action

Not everyone has access to a professional camera that allows you to take pictures at different exposure levels to later merge those images into a single one and get an HDR image. But that is not all the requirements for a decent HDR picture, besides the camera you will also need a tripod or other type of stabilizer so you avoid some troubles when merging the images, and to merge those images, you will also need an HDR photo-blending software (which costs between $39 and $99 depending the features). Here is where the ‘HDR Photoshop Action’ becomes handy. With this Photoshop action, all you need is one single image, one click and a few seconds of your time.
Flat Shadow Photoshop Action

Another simple and useful action that will save us a lot of time when we need a long shadow for our designs. Making a long shadow uses a lot of our time since we have to repeat the main figure shape many times in a certain angle one pixel at the time to end up with a very long shadow effect. With the flat shadow action, it will only take less than a minute and can be applied to any type of object with transparent background, no matter if it is a smart object, a raster or a vector shape.
Some Final Notes
If you want to know more about Photoshop Actions, what it is, different methods to install them and how to use them, you may want to take a look at the ‘How To: Easily Install and Use Actions in Photoshop’ post. And be sure to browse the extensive catalogue of Photoshop Actions available here at Medialoot.


Comments