
by Tony Thomas
October 18, 2013
Tony creates pixel-perfect UI kits & icons. His pug, Wednesday, is Medialoot's beloved mascot.
Tips For Speeding Up Your UI Design Workflow in Photoshop CC
Your time is important. And you want to work as efficiently as possible, we get that! That's why we strive to provide the most useful design resources that make your life easier. But while we're creating these resources we also learn lot's of little tips and tricks that help speed up our own workflow. I'd like to share a few of my favorite tips with you now.
Adaptive Gradients for Quick Color Changes
 Even the most basic gradient uses 2 separate color values, twice as many as a solid color fill. Effectively doubling the time it takes to adjust the overall color of a UI element. How can this be sped up?
I came up with the concept of Adaptive Gradients for a resource available on Medialoot. The basic premise is that you have a single solid color fill for your element, and then you apply a grayscale gradient set to ‘Soft Light’ or ‘Overlay’ blending mode. Whatever the base layer color of the element, the adaptive gradient adjusts the hue and brightness automatically. That’ll save you some time!
Even the most basic gradient uses 2 separate color values, twice as many as a solid color fill. Effectively doubling the time it takes to adjust the overall color of a UI element. How can this be sped up?
I came up with the concept of Adaptive Gradients for a resource available on Medialoot. The basic premise is that you have a single solid color fill for your element, and then you apply a grayscale gradient set to ‘Soft Light’ or ‘Overlay’ blending mode. Whatever the base layer color of the element, the adaptive gradient adjusts the hue and brightness automatically. That’ll save you some time!
Always Use Vector Shapes
 Sometimes it may seem quicker to use Photoshop’s bitmap tools to draw complicated elements. Maybe even copy and paste them into your document from other sources. But the vector tools in Photoshop have come a long way in the last few years and the benefits of using them for UI design now greatly outweigh using bitmap tools.
A few key examples are:
Sometimes it may seem quicker to use Photoshop’s bitmap tools to draw complicated elements. Maybe even copy and paste them into your document from other sources. But the vector tools in Photoshop have come a long way in the last few years and the benefits of using them for UI design now greatly outweigh using bitmap tools.
A few key examples are:
- Non-destructive resizing of elements
- Editable corner radiuses (Photoshop CC)
- Selecting multiple vector points across separate layers (Photoshop CC)
Paste Shape Attributes and Layer Styles
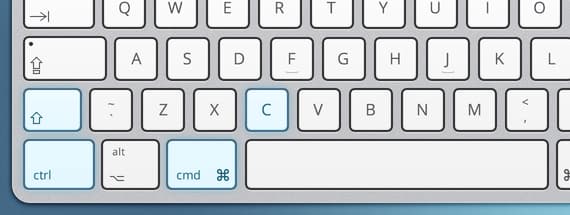
 Hopefully most UI designers are familiar with Photoshop’s ability to copy and paste layer styles. I know I’d certainly hate to think that there are people out memorizing layer styles and creating them again from scratch on each similar element. But something you may not be aware of is the ability to select more than one layer at a time by holding the CMD/CTRL or SHIFT keys and paste your styles across multiple elements.
That’s a huge time-saver already, but you can also take it further by using the new Layer Filter feature that was introduced in Photoshop CC to your advantage. For example if you get into the habit of naming your layers appropriately you can use the layer filter to search for all layers named ‘primary button’, or ‘icon style 1’, quickly select all of the results and paste your styles.
Hopefully most UI designers are familiar with Photoshop’s ability to copy and paste layer styles. I know I’d certainly hate to think that there are people out memorizing layer styles and creating them again from scratch on each similar element. But something you may not be aware of is the ability to select more than one layer at a time by holding the CMD/CTRL or SHIFT keys and paste your styles across multiple elements.
That’s a huge time-saver already, but you can also take it further by using the new Layer Filter feature that was introduced in Photoshop CC to your advantage. For example if you get into the habit of naming your layers appropriately you can use the layer filter to search for all layers named ‘primary button’, or ‘icon style 1’, quickly select all of the results and paste your styles.
Group Layer Styles
 A new addition to Photoshop CS6 was the ability to finally apply Layer Styles to groups. Use this to your advantage! Let’s say for example you have a row of 6 flat icons which will each have the same styles applied to them. Select all 6 in the layers pallete, hit CMD/CTRL + G to group them, and then apply layer styles to the group.
You can now edit and see the results applied to all 6 icons at the same time! And if you change your mind and want to try out different styles, you only need to make the changes once instead of 6 times. It may sound like a small thing, but when you get used to working this way the amount of time it saves you can really add up.
A new addition to Photoshop CS6 was the ability to finally apply Layer Styles to groups. Use this to your advantage! Let’s say for example you have a row of 6 flat icons which will each have the same styles applied to them. Select all 6 in the layers pallete, hit CMD/CTRL + G to group them, and then apply layer styles to the group.
You can now edit and see the results applied to all 6 icons at the same time! And if you change your mind and want to try out different styles, you only need to make the changes once instead of 6 times. It may sound like a small thing, but when you get used to working this way the amount of time it saves you can really add up.
Snap to Pixel Grid
 It’s very rare when designing user interfaces that you will need to use sub-pixel values. The result when viewed at 100% zoom is perceived as being blurry and out of focus if you do. So ensure that you tick ‘Snap Vector Tools and Transforms to Pixel Grid’ in Photoshop’s General Preferences.
This will not only hugely speed up drawing shapes, but because Photoshop’s traditional behavior was to adjust keyboard arrow nudging according to how much you had zoomed in (ie. 100% = whole pixel, 200% = half a pixel, 400% = a quarter pixel etc.) it will also allow you to zoom in on elements and push those pixels without worrying about going off the pixel grid.
It’s very rare when designing user interfaces that you will need to use sub-pixel values. The result when viewed at 100% zoom is perceived as being blurry and out of focus if you do. So ensure that you tick ‘Snap Vector Tools and Transforms to Pixel Grid’ in Photoshop’s General Preferences.
This will not only hugely speed up drawing shapes, but because Photoshop’s traditional behavior was to adjust keyboard arrow nudging according to how much you had zoomed in (ie. 100% = whole pixel, 200% = half a pixel, 400% = a quarter pixel etc.) it will also allow you to zoom in on elements and push those pixels without worrying about going off the pixel grid.
Quick and Easy Retina
 You may think that the introduction of Retina displays is adding a lot of extra work for designers who now have to create two different sizes. Well, the truth is that it really isn’t. If you follow tip number 2 to always use vector shapes, and have a calculator handy it is often simply a case of using Photoshop’s ‘Image Size’ function to exactly double (or halve) the resolution of the document. Just make sure you select the ‘Scale Styles’ option too!
There are also solutions such as MacRabbit’s Slicy which can speed up the process of exporting your layers as individual files at regular and Retina @2x sizes by naming your layers appropriately.
You may think that the introduction of Retina displays is adding a lot of extra work for designers who now have to create two different sizes. Well, the truth is that it really isn’t. If you follow tip number 2 to always use vector shapes, and have a calculator handy it is often simply a case of using Photoshop’s ‘Image Size’ function to exactly double (or halve) the resolution of the document. Just make sure you select the ‘Scale Styles’ option too!
There are also solutions such as MacRabbit’s Slicy which can speed up the process of exporting your layers as individual files at regular and Retina @2x sizes by naming your layers appropriately.
Comments