

by Jenn Coyle
May 20, 2014
You can find Jenn doodling and blogging, drinking beer, or running around Philly.
How to Style and Animate SVG Elements with CSS
In this tutorial, I will show you step-by-step how to animate a SVG (Scalable Vector Graphic) icon using CSS. This tutorial will give you valuable insight for using SVG as your preferred graphic format. Also, you can improve the UI and UX of your web applications by incorporating subtle animations into your SVG's.
Resources and articles for this tutorial are listed at the bottom of this tutorial.
Intro to Scalable Vector Graphics
What is SVG?
Scalable Vector Graphics (SVG) is an XML-based vector image format for two dimensional graphics with support for interactivity and animation. The SVG specification is an open standard developed by the World Wide Web Consortium (W3C) since 1999.
Why Use SVG?
SVGs have small file sizes that compress well and can scale to any size without losing clarity. It looks great on retina displays and you can maintain design control, like with interactivity and filters.
The purpose of this tutorial is to give you a deeper insight into how a SVG file is constructed and to give you the tools to experiment and animate the SVG files.
It'll give you more power to do awesome things with user interface elements, like logos and web form elements, or to give infographics animated parts like graphs and numbers. And all this will be scalable, which is a big advantage and time saver when your designs need to adapt to different devices.
For this tutorial, I chose a set of lovely icons named Vector Square Emoticons here on Medialoot.
After I downloaded these icons, I opened the ones I will use with Adobe Illustrator CC. You can use any vector based editor, like Adobe Illustrator, Sketch or Inkscape.

Step 1: Set Up the Icons in Illustrator
Choose 3 different icon states.
To use these next to an input field in a web form, we could use different states of emoticons to show the user if he's correctly filling out the field or the field contains an error. To do this, we will start with a neutral blue state emoticon. The success emoticon will turn green, and the failure will turn red.

Step 2: Set Up Your Workspace
Create different artboards for the three different states.
For each icon, create a separate artboard. Create the first artboard at 64x64px and name it Neutral and place the neutral icon in the center of this artboard. Create an artboard with the same dimensions (64x64px) for the Success icon and name it Success, and finally create an artboard at the same diensins for the Failure icon.
We do not need to give the emoticons any color as we will give them color through the use of CSS later in this tutorial. Just color them black.

Step 3: Save As and Optimize the SVG
Once the icon artboards are ready, we can save them to SVG. Select the first artboard by selecting it in the Artboard Panel and go to File > Save As and select SVG in the drop down list. You will see this window pop-up. Leave the values as in the example and choose a location to store the icons. Do this for the rest of the artboards as well.

Step 4: Optimize the SVG Code
The SVG code is ready to be optimized.
Once the SVG is saved, go to your text editor and double click the SVG file. The code will pop-up and you will see that a lot of redundant code like the doctype definition, so the file can be optimized before we start editing the SVG file. There are a number of online optimizers. I will use SVGO, is a Nodejs-based tool for optimizing SVG vector graphics files. It has a GUI and is easy to use on your desktop. Download it to optimize your SVG code.
Next, drag and drop the SVG files you want to optimize to the window. They will be optimized automatically and you'll get a small report about the optimization process.

Step 4: Style the SVG Code with CSS
Use CSS to style the icons.
You can use the SVG element in the HTML code (more info on how to do this here). There's a whole list of properties that you can use to style SVG through CSS.
Open the SVG in the editor and copy the SVG code into the HTML document.
Once the code for the icons is placed in your HTML, give each icon a unique ID. Name the icons: ico-neutral, ico-success and ico-failure.
Give each icon a unique color:
- neutral (#007AFF)
- success (#5AD427)
- failure (#FF4981)
See the Pen Step 4: Ready to style by Benedikte Vanderweeën (@Benevdw) on CodePen.
Also style the SVG hover states with CSS.
You have endless possibilities to style SVG's with CSS. SVG can be animated through the use of CSS or with SMIL.
We are focusing on animating with CSS because we know this code language and can implement it right away. We can provide a hover state when the icon is hovered over with the mouse.
In the example above, you can see that a opacity and scale hover state was used to make the icons slightly larger and less bright when hovered over.
Animate the SVG with CSS: Change the color state of the icon
See the Pen SVG Icons: step 6 by Benedikte Vanderweeën (@Benedikte) on CodePen.
To draw attention to an icon in the user interface, you can use CSS animation and apply that animation to one or more icons. Specific user states can ask for more attention on a page. An example can be when a user is filling out a form and the format is wrong. An animated icon can indicate to the user in real time that the field contains errors or is left blank, etc.
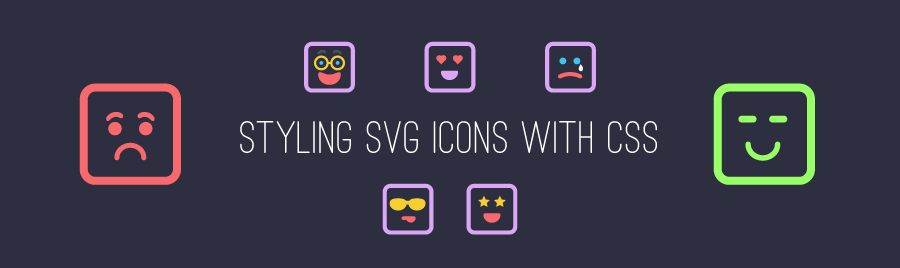
Bonus Tip: Style an Icon Group
The real power of SVG icons and CSS lays in the group styling approach. You can style a group of icons in a specific theme or use a specific color or stroke style.
You will need to export all the separate icons as SVG and optimize the code before starting the style process.
Depending on the needs, you can style individual parts of the icon, or give all the icons a background on hover and use animation to interact with the user.
See the Pen Step 7: styling an icon group by Benedikte Vanderweeën (@Benedikte) on CodePen.
Advantages of Styling and Theming Icons
Styling SVG icons with css is a challenge as you will have to decide upfront which parts you will style. I spent the most time analyzing all the parts in the SVG shapes and deciding how to theme these parts. These are all tasks a designer should do before digging into the code — it's a good idea to style the icons first and dive into code mode after you decided the styling phase of the icons.
Because SVG is a rather new graphic format for most designers, a lot of time goes into reading and testing out all the different properties and elements and the exporting phase.
My personal belief is that once you have found a method that works for you, SVG is a huge timesaver as you will no longer have to export different assets for several devices. The biggest benefit from using SVG: you will have no illustration quality loss and the flexible approach once your SVG is integrated with CSS.
If you have a good workflow for using SVGs, or have awesome SVG tips and tricks, comment below!

Comments