
by Jenn Coyle
December 04, 2014
You can find Jenn doodling and blogging, drinking beer, or running around Philly.

Quick Tip: Using a Displacement Map to Create a Photo Realistic Mockup
Create Your Own Mockups
Creating your own mockups to display your work is essential for any designer these days. It's an easy process if you're utilizing displacement maps in Photoshop. Let's take a quick look at a simple method for creating a mockup file that can be reused over an over.
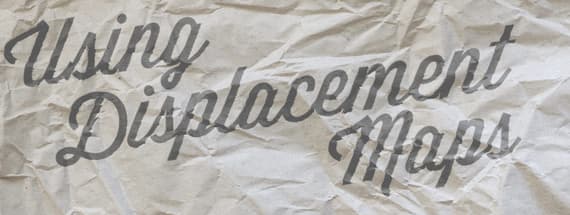
Step 1 - A Good Textured Photo
To start off, we'll need open an image with a good texture in Photoshop. A brick wall, some rusty steel, peeling paint, etc… For this example I chose some wrinkled newsprint paper.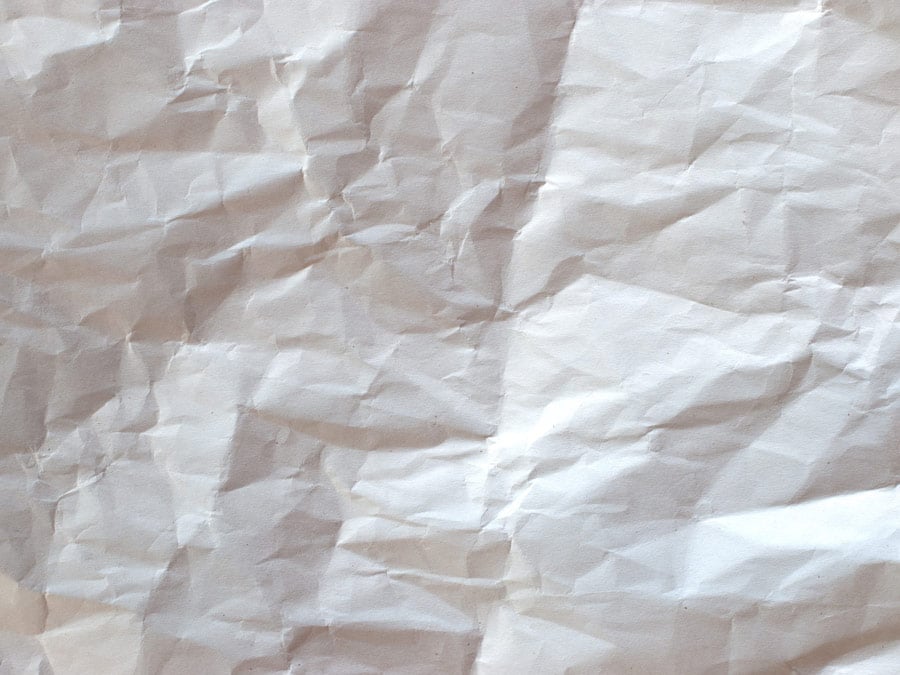
Step 2 - Create the Displacement Map
To create the displacement map switch over to the Channels panel, and duplicate the channel with the most contrast. I chose the blue channel. Then add more contrast to the channel by adjusting the level (Image | Adjust | Levels). With this new blue copy layer selected, press Cmd+A on your keyboard to select everything on the layer, then press Cmd+N to create a new document, and finally press Cmd+V to past the selection onto the new document.
Now save this new file as "displacement-map.psd"
With this new blue copy layer selected, press Cmd+A on your keyboard to select everything on the layer, then press Cmd+N to create a new document, and finally press Cmd+V to past the selection onto the new document.
Now save this new file as "displacement-map.psd"
Step 3 - Create a Smart Object
Head back over to the layers panel and add your artwork to a new layer. My artwork is vector based, so I copied it over from Illustrator as a vector shape.
Step 4 - Apply the Displacement Map
Now Ctrl+Click or right click on the artwork layer and select "Convert to Smart Object". In the case of this project, converting to a Smart Object allows you to edit the artwork even after filters have been applied. Now click Filter | Distort | Displace. You'll be prompted with a settings box, for this example I chose 5 for both vertical and horizontal scale. You'll have to play with this number based on the resolution of your texture. But something around a 5 will probably do. After applying the displacement map your artwork will bend and distort around the edges of the texture.

Step 5 - Finishing Up
As a final step, let's apply a mask to the artwork layer. With that layer selected click the "Add layer mask" icon at the bottom of the layers panel. Remember that copy of the blue channel that we made? Let's load that up for our mask. Click Select | Load Selection, and choose "blue copy" as the channel, then click okay.
 You'll now see a selection based on the blue copy channel. Now choose a medium gray for a foreground color (I chose #404040). With the mask selected on the layers panel, click Edit | Fill. For contents choose "Foreground Color" and click okay.
 You should now see a bit more of the texture showing through your artwork layer. And that's it!


Comments