

by Tony Thomas
March 11, 2014
Tony creates pixel-perfect UI kits & icons. His pug, Wednesday, is Medialoot's beloved mascot.


How to Create a Dynamic iOS 7 Style Background Blur in Photoshop
In this Photoshop tutorial I will demonstrate how to quickly and easily create a live background blur effect, like the one that is used in iOS 7. It only takes a few steps and once you know how to do it, you can use it any of your designs!
Step 1
Begin by placing an image into your document. Ideally let your image exceed the dimensions of the document, as this will give you the freedom to move it around the document without the edges becoming visible. For this tutorial I chose this image by Vinoth Chandar.
Step 2
Right click on your image in the layers panel and select 'Convert to Smart Object'.
Step 3
Next we want to draw the foreground shape, this can be any shape you want, for example to emulate the iOS 7 toolbar draw a rectangle 640 x 98 pixels. For this example however I just went with a simple circle using the Ellipse Tool in Photoshop.
Step 4
Duplicate both of the layers you have just created.
Step 5
Select the newly duplicated top foreground shape, and set the Fill value in the Layers panel to 50%. You should now be able to see the (duplicated) background image through the foreground shape.
Step 6
Right click the topmost background image layer and select 'Create Clipping Mask'. This should create a mask using the original foreground shape.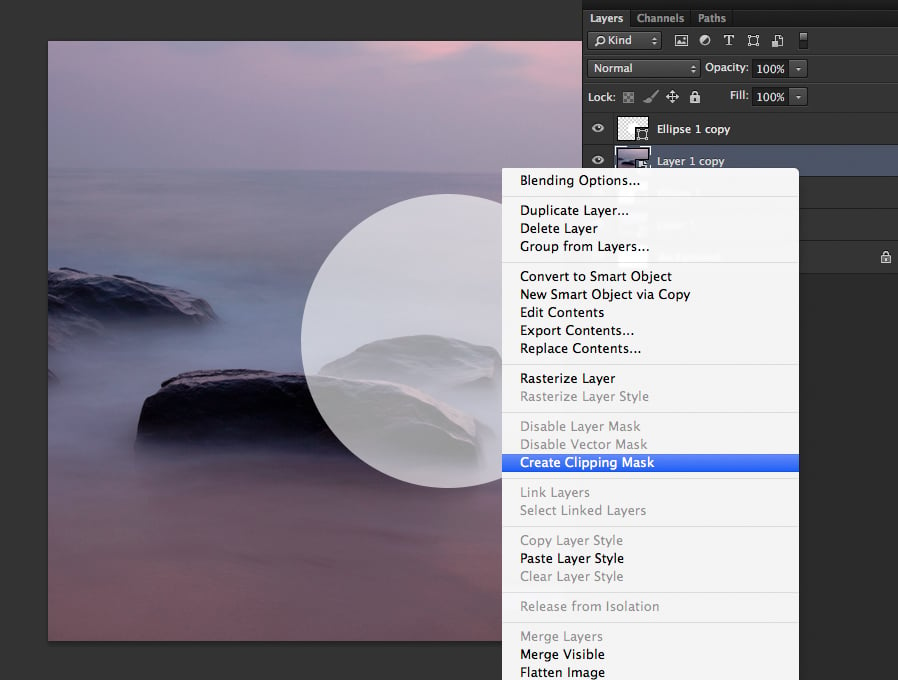
Step 7
We can now apply our Gaussian Blur effect (from the Filter menu) to the duplicated background image layer. The value you enter for the radius will depend on the overall resolution of the document, and the strength of the effect required. For this example I used 25 pixels.
Step 8
The effect is now complete, however if we move one of the blurred or unblurred background image layers then the effect would be compromised. To resolve this simply select both background layers and right click them, then select 'Link Layers'. Now whenever you move either layer, they will both move.
Conclusion &Download
Here is the final result of the effect, with a little added text to the foreground: It is now possible to move the background image around freely and watch the effect update live dynamically. And if you want to try out a different background image, that is possible too! Just double click the Smart Object, paste a new image, then save and close the Smart Object:

 Rather just dissect the source file? No problem, Here is the download link for the .psd file used in this tutorial.


Comments