

by Tony Thomas
June 16, 2011
Tony creates pixel-perfect UI kits & icons. His pug, Wednesday, is Medialoot's beloved mascot.


How to Code a Clean Website Template in HTML5 & CSS3
Last week on MediaLoot we posted a tutorial on designing a clean homepage template using Adobe Fireworks, the result was a sleek web page concept that we're now going to imagine that we have shown to our client, and they have just given us the go ahead to start coding it up into HTML and CSS!
Premium Members Get Source Files
Premium members can download the source files for this tutorial here. Alright, without any further ado, let's get started on this thing! To refresh your memory here is the design we created last week.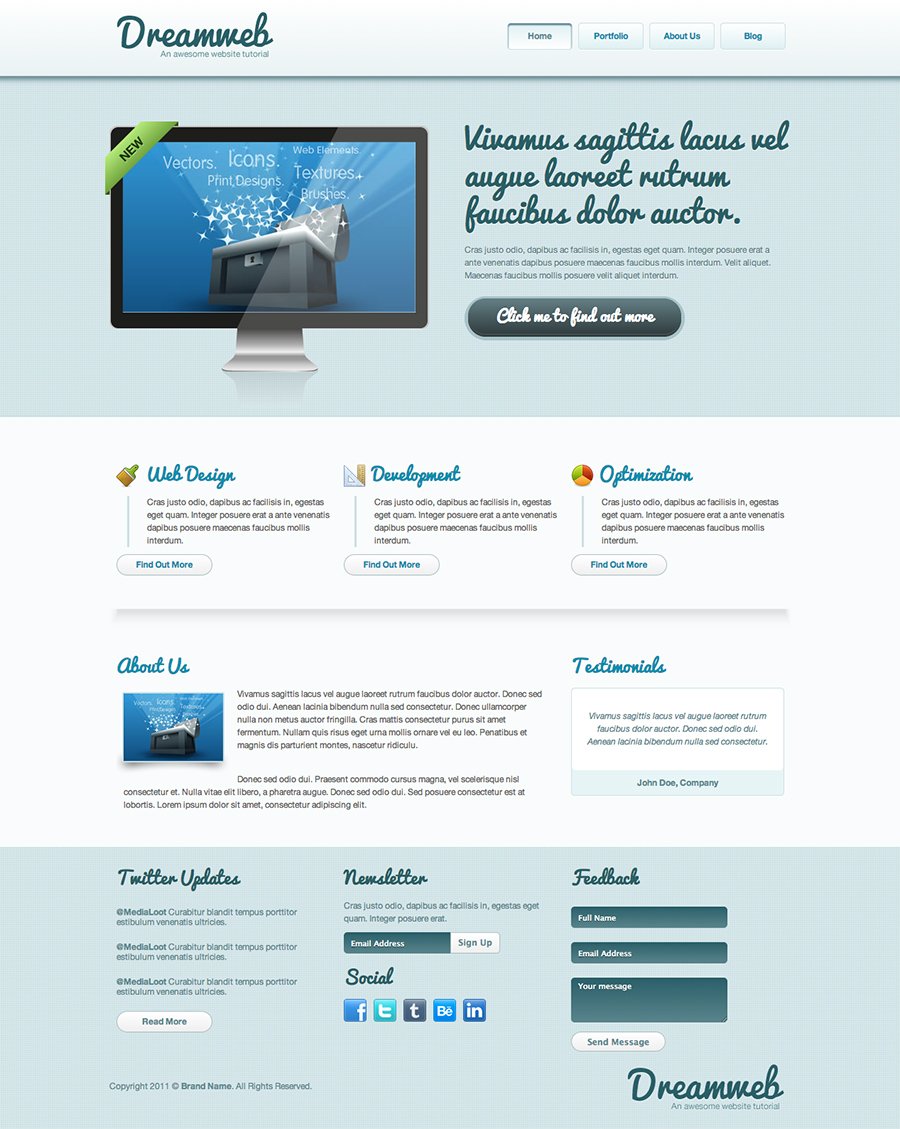 When it comes to coding up designs, there is a lot of personal preference, everybody has their own way of doing things, some people like to jump right in and juggle writing HTML, CSS and exporting images from the layout as needed all at the same time (this is a surprisingly common method actually), but some people break it down into stages, for example: export images, write HTML and then style with CSS, but personally I don't think that we always know which images we will need to extract from the design until we have broken down the layout into a HTML structure. so my preferred workflow goes something like:
- Plan structure and write HTML code
- Export images from the layout
- Style the HTML with CSS
Preparation
Start by creating a new folder and index.html and styles.css files. Then also create a new folder called images.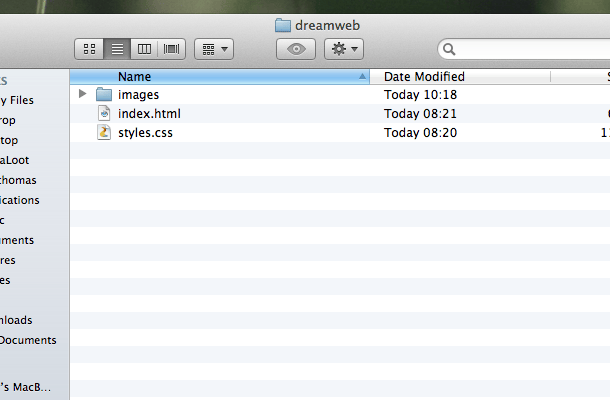
Doctype and Structure
Open up the index.html file in a text editor, my preferred editor for code is MacRabbit Espresso (Mac only), for Windows try Notepad++ or Dreamweaver if needs be.
<!DOCTYPE html>
<html>
	<head>
		<meta charset="utf-8" />
		<title>Dreamweb</title>
		<link rel="stylesheet" href="styles.css" type="text/css">
		<link href='http://fonts.googleapis.com/css?family=Pacifico' rel='stylesheet' type='text/css'>
		<!--[if IE]>
		<script src="http://html5shiv.googlecode.com/svn/trunk/html5.js"></script>
		<![endif]-->
	</head>
	<body>
	</body>
</html>
Header
<header>
	<div class="wrapper">
		<h1 class="logo"><a href="index.html">Dreamweb</a></h1>
		<ul>
			<li class="active"><a href="index.html">Home</a></li>
			<li><a href="#">Portfolio</a></li>
			<li><a href="#">About Us</a></li>
			<li><a href="#">Blog</a></li>
		</ul>
	</div><!--.wrapper-->
</header>
Main Feature
<section class="home_feature">
	<div class="wrapper">
		<article class="main_display">
			<img src="images/display_image_1.jpg" alt="Client Work" title="Client Work" />
			<div class="display_gloss"></div>
			<article class="banner_new"><p>New</p></article>
		</article>
		<article class="feature_text">
			<h2>Vivamus sagittis lacus vel augue laoreet rutrum faucibus dolor auctor.</h2>
			<p>Cras justo odio, dapibus ac facilisis in, egestas eget quam. Integer posuere erat a ante venenatis dapibus posuere maecenas faucibus mollis interdum. Velit aliquet. Maecenas faucibus mollis posuere velit aliquet interdum.</p>
			<a href="#">Click me to find out more</a>
		</article>
	</div><!--.wrapper-->
</section>
- the image that will be on the screen
- followed by the gloss from the screen
- and finally the banner in the corner than reads "NEW".
Featured Services
<ul class="featured_services">
	<li class="service_1">
		<Web Design&rt;
		<p>Cras justo odio, dapibus ac facilisis in, egestas eget quam. Integer posuere erat a ante venenatis dapibus posuere maecenas faucibus mollis interdum.</p>
		<a href="#" class="button_1">Find Out More</a>
	</li>
	<li class="service_2">
		<Development&rt;
		<p>Cras justo odio, dapibus ac facilisis in, egestas eget quam. Integer posuere erat a ante venenatis dapibus posuere maecenas faucibus mollis interdum.</p>
		<a href="#" class="button_1">Find Out More</a>
	</li>
	<li class="service_3">
		<Optimization&rt;
		<p>Cras justo odio, dapibus ac facilisis in, egestas eget quam. Integer posuere erat a ante venenatis dapibus posuere maecenas faucibus mollis interdum.</p>
		<a href="#" class="button_1">Find Out More</a>
	</li>
</ul>
About Us and Testimonials
<div class="wrapper">
			<article class="about_us_blurb">
				<About Us&rt;
				<img src="images/about_us.png" />
				<p>Vivamus sagittis lacus vel augue laoreet rutrum faucibus dolor auctor. Donec sed odio dui. Aenean lacinia bibendum nulla sed consectetur. Donec ullamcorper nulla non metus auctor fringilla. Cras mattis consectetur purus sit amet fermentum. Nullam quis risus eget urna mollis ornare vel eu leo. Penatibus et magnis dis parturient montes, nascetur ridiculu.</p>
				<p>Donec sed odio dui. Praesent commodo cursus magna, vel scelerisque nisl consectetur et. Nulla vitae elit libero, a pharetra augue. Donec sed odio dui. Sed posuere consectetur est at lobortis. Lorem ipsum dolor sit amet, consectetur adipiscing elit.</p>
			</article>

			<article class="testimonials">
				<Testimonials&rt;
				<div class="testimonial_wrapper">
					<p class="testimonial_quote">
						Vivamus sagittis lacus vel augue laoreet rutrum faucibus dolor auctor. Donec sed odio dui. Aenean lacinia bibendum nulla sed consectetur. </p>
					<p class="testimonial_name">John Doe, Company</p>
				</div>
			</article>
		</div><!--.wrapper-->
Footer
	<footer>
		<div class="wrapper">

<!--Twitter Widget-->

			<div class="column">
				<article class="widget_twitter">
					<h4>Twitter Updates</h4>
					<ul>
						<li><strong>@MediaLoot</strong> Curabitur blandit tempus porttitor estibulum venenatis ultricies.</li>
						<li><strong>@MediaLoot</strong> Curabitur blandit tempus porttitor estibulum venenatis ultricies.</li>
						<li><strong>@MediaLoot</strong> Curabitur blandit tempus porttitor estibulum venenatis ultricies.</li>
					</ul>
					<a href="#" class="button_1">Read More</a>
				</article>
			</div>

<!--Newsletter Widget-->

			<div class="column">
				<article class="widget_newsletter">
					<h4>Newsletter</h4>
					<p>Cras justo odio, dapibus ac facilisis in, egestas eget quam. Integer posuere erat.</p>
					<form>
						<input type="text" value="Email Address">
						<input type="submit" value="Sign Up">
					</form>
				</article>

<!--Social Widget-->

				<article class="widget_social">
					<h4>Social</h4>
					<ul>
						<li class="facebook"><a href="#">FaceBook</a></li>
						<li class="twitter"><a href="#">Twitter</a></li>
						<li class="tumblr"><a href="#">Tumblr</a></li>
						<li class="behance"><a href="#">Behance</a></li>
						<li class="linkedin"><a href="#">Linked In</a></li>
					</ul>
				</article>
			</div>

<!--Feedback Widget-->

			<div class="column">
				<article class="widget_feedback">
					<h4>Feedback</h4>
					<form>
						<input type="text" value="Full Name" name="name">
						<input type="text" value="Email Address" name="email">
						<textarea name="message">Your message</textarea>
						<input type="submit" value="Send Message" class="button_1">
					</form>
				</article>
			</div>

<!--Copyright Notice-->

			<p class="copyright_notice">Copyright 2011 © <strong>Brand Name</strong>. All Rights Reserved.</p>
			<div class="logo"><p>Dreamweb</p></div>

		</div><!--.wrapper-->
	</footer><!--End Footer-->
Images
Let's prepare the images we need, in total we need 17 images. Open up the original Fireworks design file if you haven't already and we can begin extracting the images we need. The basic method for extracting images is to select the object/s that you need, copy them and then create a new document using the clipboard dimensions (the same size as whatever you copied) and paste the objects into the new document.1. logo.png
 So open up the original Fireworks document if you haven't already and select the Logo symbol. hit CTRL+C to copy it, CTRL+N to create a new document, and CTRL+V to paste the logo again. Set the background of the document to transparent and in the Optimize window select PNG32 as the exporting option. Go to File > Export and select Images Only and Current Page. Choose the images folder we created as the export destination.
2. hatch_pattern.png
 Zoom in as far as possible on the design and use the Crop tool in Fireworks to select a 3x3px area of the pattern (as shown in the image below). Export using the same methods as used previously.
3. feature_display.png
 Again follow the same method, for the display you will need to select all of the objects that make up the display excluding the banner and gloss layers.
4. display_image_1.jpg
 You may need to crop the display image down if you used a clipping mask as Fireworks will use the original image's dimensions rather than the just the clipped area that we need.
5. display_gloss.png
 In the design this was set to 50% Soft Light, no web browsers support blending modes like Soft Light though to this date so it will treat it as Normal, this means we need to compensate and lower the Opacity to 20%.
6. btn_main_feature.png
 Copy the button from the original design and paste it into a new document, now make the canvas 3x taller than the button, and duplicate the button one below the other so that they each occupy exactly 1/3 of the image. This is out sprite for the main button, including hover and pressed states, so the second one down is the hover state and the bottom one is pressed state.
On the hover state, nudge the top layer down 3px. On the pressed state, nudge the top layer down 1px and make the gradient slightly darker to appear pressed in.
Copy the button from the original design and paste it into a new document, now make the canvas 3x taller than the button, and duplicate the button one below the other so that they each occupy exactly 1/3 of the image. This is out sprite for the main button, including hover and pressed states, so the second one down is the hover state and the bottom one is pressed state.
On the hover state, nudge the top layer down 3px. On the pressed state, nudge the top layer down 1px and make the gradient slightly darker to appear pressed in.
7. service_1.png
 Copy and paste the icon for your first service into a new 32x32px document.
8. service_2.png
 Copy and paste the icon for your second service into a new 32x32px document.
9. service_3.png
 Copy and paste the icon for yourthird service into a new 32x32px document.
10. hr_shadow.png
 Same method as previously used, be sure to set the background to transparent.
11. about_us.png
 Again, same method used, but we have also copied the shadow and border for this image as not all browser support advanced shadows like we created in the design.
12. social_facebook.png
13. social_facebook.png
14. social_twitter.png
15. social_tumblr.png
16. social_behance.png
17. social_linkedin.png

The CSS
First things first, open up style.css and let's use a basic CSS reset so that all browsers, new and old are working on the same playing field.
/* CSS Reset */
body,div,dl,dt,dd,ul,ol,li,h1,h2,h3,h4,h5,h6,pre,form,fieldset,input,p,blockquote,th,td{margin:0;padding:0;}
table{border-collapse:collapse;border-spacing:0;}
fieldset,img{border:0;}
ul{ list-style:none; list-style-position:outside;}
a {  outline: none;}

/* Tell old browsers how to handle HTML5 elements */
header, footer, aside, nav, article {display: block;}
/* Essentials */

body {
	background: #F9FCFC;
	color: #666666;
	font-family: "Helvetica Neue", Helvetica, Arial, sans-serif;
	font-size: 12px;
}

p {
	line-height: 150%;
}

h1, h2, h3, h4, h5, h6 {
	font-family: Pacifico, "Helveitca Neue", Helvetica, Arial, sans-serif;
	font-weight: lighter; /*counteract strong browser anti-aliasing*/
}

a:link, a:visited {
	color: #168FAD;
	text-decoration: none;
}

.wrapper {
	width: 960px;
	margin: 0 auto;
}
/* Header */
header {
	height: 110px;
}

header {
	/* Fallback Color */
	background: #F4F8F9;
	/* Firefox 3.6+ */
	background-image: -moz-linear-gradient(#FFFFFF, #E9F2F3);
	/* Safari 4+, Chrome 1+ */
	background-image: -webkit-gradient(linear, 0% 0%, 0% 100%, from(#FFFFFF), to(#E9F2F3));
	/* Safari 5.1+, Chrome 10+ */
	background-image: -webkit-linear-gradient(#FFFFFF, #E9F2F3);
	/* IE */
	filter: progid:DXImageTransform.Microsoft.gradient(startColorstr='#FFFFFF', endColorstr='#E9F2F3');
}
/* Logo */

h1.logo a {
	display: block;
	width: 221px;
	height: 65px;
	background: url('images/logo.png') no-repeat;
	float: left;
	margin: 20px 0 0 10px;
	text-indent: -5000px;
}
/* Main Navigation */

header ul {
	float: right;
	margin: 35px 0;
}

header li {
	float: left;
	display: inline-block;
	width: 90px;
	height: 36px;
	margin: 0 10px 0 0;
}

header li a {
	color: #2C6069;
	display: block;
	width: 90px;
	height: 36px;
	text-align: center;
	font-weight: bold;
	line-height: 36px;
	border: 1px solid #CDE0E4;
	-moz-border-radius: 5px; -webkit-border-radius: 5px; border-radius: 5px;
	-moz-box-shadow: 0 1px 0 #FFFFFF; -webkit-box-shadow: 0 1px 0 #FFFFFF; box-shadow: 0 1px 0 #FFFFFF;
}

header li a {
	/* Fallback Color */
	background: #E8F4F6;
	/* Firefox 3.6+ */
	background-image: -moz-linear-gradient(#FFFFFF, #DFF0F3);
	/* Safari 4+, Chrome 1+ */
	background-image: -webkit-gradient(linear, 0% 0%, 0% 100%, from(#FFFFFF), to(#DFF0F3));
	/* Safari 5.1+, Chrome 10+ */
	background-image: -webkit-linear-gradient(#FFFFFF, #DFF0F3);
	/* IE */
	filter: progid:DXImageTransform.Microsoft.gradient(startColorstr='#FFFFFF', endColorstr='#DFF0F3');
}

header li a:hover {
	/* Fallback Color */
	background: #FFFFFF;
	/* Firefox 3.6+ */
	background-image: -moz-linear-gradient(#FFFFFF, #E8F4F6);
	/* Safari 4+, Chrome 1+ */
	background-image: -webkit-gradient(linear, 0% 0%, 0% 100%, from(#FFFFFF), to(#E8F4F6));
	/* Safari 5.1+, Chrome 10+ */
	background-image: -webkit-linear-gradient(#FFFFFF, #E8F4F6);
	/* IE */
	filter: progid:DXImageTransform.Microsoft.gradient(startColorstr='#FFFFFF', endColorstr='#E8F4F6');
}

header li.active a {
	color: #5E8D94;
	-moz-box-shadow: inset 0 2px 3px #436E7D; -webkit-box-shadow:inset 0 2px 3px #436E7D; box-shadow: inset 0 2px 3px #436E7D;
}

header li.active a {
	/* Fallback Color */
	background: #DFF0F3;
	/* Firefox 3.6+ */
	background-image: -moz-linear-gradient(#DFF0F3, #FFFFFF);
	/* Safari 4+, Chrome 1+ */
	background-image: -webkit-gradient(linear, 0% 0%, 0% 100%, from(#DFF0F3), to(#FFFFFF));
	/* Safari 5.1+, Chrome 10+ */
	background-image: -webkit-linear-gradient(#DFF0F3, #FFFFFF);
	/* IE */
	filter: progid:DXImageTransform.Microsoft.gradient(startColorstr='#DFF0F3', endColorstr='#FFFFFF');
}
/* Main Feature */

section.home_feature {
	height: 480px;
	background: #CDE0E4 url('images/hatch_pattern.png') repeat;
	-moz-box-shadow: inset 0 5px 9px #66888E; -webkit-box-shadow: inset 0 5px 9px #66888E; box-shadow: inset 0 5px 9px #66888E;
}

article.main_display {
	display: block;
	float: left;
	position: relative;
	width: 450px;
	height: 397px;
	margin: 70px 0;
	background: url('images/feature_display.png') no-repeat;
}

article.main_display img {
	position: absolute;
	top: 23px;
	left: 19px;
}

article.banner_new {
	position: absolute;
	left: -6px;
	top: -6px;
	background: url('images/feature_banner.png') no-repeat;
	width: 103px;
	height: 103px;
}

article.banner_new p {
	text-indent: -5000px;
}

article.main_display .display_gloss {
	position: absolute;
	top: 2px;
	right: 2px;
	width: 269px;
	height: 283px;
	background: url('images/display_gloss.png') no-repeat;
}

article.feature_text {
	float: right;
	width: 450px;
	margin: 60px 10px 0 0;
}

article.feature_text h2 {
	font-size: 44px;
	color: #2C5F66;
	line-height: 120%;
	margin: 0 0 20px 0;
	text-shadow: 0 1px 0 #F1F7F8;
}

article.feature_text p {
	color: #5E8C92;
	text-shadow: 0 1px 0 #F1F7F8;
}

article.feature_text a {
	display: block;
	width: 310px;
	height: 62px;
	color: #FFFFFF;
	background: url('images/btn_main_feature.png') no-repeat;
	margin: 20px 0 0 0;
	text-align: center;
	line-height: 54px;
	font-family: Pacifico, "Helveitca Neue", Helvetica, Arial, sans-serif;
	font-weight: lighter; /*counteract strong browser anti-aliasing*/
	font-size: 22px;
	text-shadow: 0 -1px 0 #38474A;
}

article.feature_text a:hover {
	background-position: 0 -63px;
	line-height: 57px;
}

article.feature_text a:active {
	color: #EFEFEF;
	background-position: 0 -126px;
	line-height: 58px;
}
/* Featured Services */

ul.featured_services {
	clear: both;
	height: 240px;
	width: 960px;
	margin: 0 auto;
	background: url('images/hr_shadow.png') no-repeat bottom;
}

ul.featured_services li {
	width: 300px;
	margin: 0 10px;
	float: left;
}

ul.featured_services h3 {
	font-size: 25px;
	color: #168FAD;
	text-indent: 40px;
}

ul.featured_services li.service_1 h3 {
	background: url('images/icn_service_1.png') no-repeat; background-position: 0 10px;
}

ul.featured_services li.service_2 h3 {
	background: url('images/icn_service_2.png') no-repeat; background-position: 0 10px;
}

ul.featured_services li.service_3 h3{
	background: url('images/icn_service_3.png') no-repeat; background-position: 0 10px;
}

ul.featured_services p {
	border-left: 3px solid #CDE0E4;
	margin: 10px 0 10px 15px;
	padding: 0 0 0 25px;
}

.button_1 {
	display: block;
	width: 133px;
	height: 28px;
	-moz-border-radius: 50px; -webkit-border-radius: 50px; border-radius: 50px;
	text-align: center;
	line-height: 28px;
	border: 1px solid #ADC0C4;
	color: #5E8C92;
	font-weight: bold;
	font-size: 12px;
	cursor: pointer;
}

.button_1 {
	/* Fallback Color */
	background: #DFF0F3;
	/* Firefox 3.6+ */
	background-image: -moz-linear-gradient(#FFFFFF, #EFEFEF);
	/* Safari 4+, Chrome 1+ */
	background-image: -webkit-gradient(linear, 0% 0%, 0% 100%, from(#FFFFFF), to(#EFEFEF));
	/* Safari 5.1+, Chrome 10+ */
	background-image: -webkit-linear-gradient(#FFFFFF, #EFEFEF);
	/* IE */
	filter: progid:DXImageTransform.Microsoft.gradient(startColorstr='#FFFFFF', endColorstr='#EFEFEF');
}

.button_1:hover {
	background: #FFFFFF;
}

.button_1:active {
	background: #EFEFEF;
}
/* About Us Blurb */

article.about_us_blurb {
	clear: both;
	float: left;
	width: 620px;
	margin: 20px 10px;
}

article.about_us_blurb img {
	float: left;
	margin: 0 10px 0 0;
}

article.about_us_blurb h3 {
	font-size: 25px;
	color: #168FAD;
	margin: 10px 0;
}

article.about_us_blurb p {
	margin: 5px 20px 30px 10px;
}

article.testimonials {
	float: right;
	width: 300px;
	margin: 20px 10px;
}
/* Testimonials */

.testimonial_wrapper {
	background: #E7F4F6;
	border: 1px solid #CDE0E4;
	width: 298px;
	height: 150px;
	-moz-border-radius: 5px; -webkit-border-radius: 5px; border-radius: 5px;
}

article.testimonials h3 {
	font-size: 25px;
	color: #168FAD;
	margin: 10px 0;
}

p.testimonial_quote {
	text-align: center;
	background: #FFFFFF;
	color: #5E8C92;
	font-style: italic;
	height: 55px;
	-moz-border-radius: 5px; -webkit-border-radius: 5px; border-radius: 5px;
	padding: 30px 20px;
}

p.testimonial_name {
	line-height: 36px;
	font-weight: bold;
	text-align: center;
	color: #5E8C92;
}
/* Footer */

footer {
	clear: both;
	height: 400px;
	background: #CDE0E4 url('images/hatch_pattern.png') repeat;
	color: #5E8C92;
}

footer h4 {
	font-size: 25px;
	color: #2C5F66;
	margin: 0 0 10px 0;
	clear: both;
}

footer .column {
	float: left;
	display: inline_block;
	width: 300px;
	margin: 20px 10px;
}

/* Widgets */

article.widget_twitter li {
	margin: 20px 0;
}

article.widget_social li {
	float: left;
	display: inline_block;
}

footer input[type=text], footer textarea {
	width: 200px;
	height: 20px;
	border: none;
	color: #FFFFFF;
	-moz-border-radius: 5px; -webkit-border-radius: 5px; border-radius: 5px;
	padding: 5px 10px;
	margin: 10px 0;
	text-shadow: 0 1px 0 #0F2326;
}

footer input[type=text]:focus, footer textarea:focus {
	outline: none;
}

footer textarea {
	height: 53px;
}

footer input[type=text], footer textarea {
	/* Fallback Color */
	background: #46737B;
	/* Firefox 3.6+ */
	background-image: -moz-linear-gradient(#2C5F67, #5C858C);
	/* Safari 4+, Chrome 1+ */
	background-image: -webkit-gradient(linear, 0% 0%, 0% 100%, from(#2C5F67), to(#5C858C));
	/* Safari 5.1+, Chrome 10+ */
	background-image: -webkit-linear-gradient(#2C5F67, #5C858C);
	/* IE */
	filter: progid:DXImageTransform.Microsoft.gradient(startColorstr='#2C5F67', endColorstr='#5C858C');
}

article.widget_newsletter input[type=text] {
	width: 130px;
	-moz-border-radius: 5px 0 0 5px; -webkit-border-radius: 5px 0 0 5px; border-radius: 5px 0 0 5px;
	float: left;
}

article.widget_newsletter input[type=submit] {
	margin: 10px 0 0 0;
	float: left;
	display: block;
	border: 1px solid #4E7A81;
	width: 70px;
	height: 30px;
	-moz-border-radius: 0 5px 5px 0; -webkit-border-radius: 0 5px 5px 0; border-radius: 0 5px 5px 0;
	text-align: center;
	line-height: 28px;
	border: 1px solid #ADC0C4;
	color: #5E8C92;
	font-weight: bold;
	font-size: 12px;
	cursor: pointer;
}

article.widget_newsletter input[type=submit] {
	/* Fallback Color */
	background: #DFF0F3;
	/* Firefox 3.6+ */
	background-image: -moz-linear-gradient(#FFFFFF, #EFEFEF);
	/* Safari 4+, Chrome 1+ */
	background-image: -webkit-gradient(linear, 0% 0%, 0% 100%, from(#FFFFFF), to(#EFEFEF));
	/* Safari 5.1+, Chrome 10+ */
	background-image: -webkit-linear-gradient(#FFFFFF, #EFEFEF);
	/* IE */
	filter: progid:DXImageTransform.Microsoft.gradient(startColorstr='#FFFFFF', endColorstr='#EFEFEF');
}

article.widget_newsletter input[type=submit]:hover {
	background: #FFFFFF;
}

article.widget_newsletter input[type=submit]:active {
	background: #EFEFEF;
}
/* Social Links */

article.widget_social ul li a {
	display: block;
	width: 32px;
	height: 32px;
	text-indent: -5000px;
	margin: 0 10px 0 0 ;
}

article.widget_social ul li.facebook a {
	background: url('images/social_facebook.png') no-repeat;
}

article.widget_social ul li.twitter a {
	background: url('images/social_twitter.png') no-repeat;
}

article.widget_social ul li.tumblr a {
	background: url('images/social_tumblr.png') no-repeat;
}

article.widget_social ul li.behance a {
	background: url('images/social_behance.png') no-repeat;
}

article.widget_social ul li.linkedin a {
	background: url('images/social_linkedin.png') no-repeat;
}

footer .button_1 {
	color: #5E8C92;
}
/* Copyright/Logo */

footer p.copyright_notice {
	clear: both;
	padding: 20px 0 0 0;
}

footer .logo {
	float: right;
	width: 221px;
	height: 65px;
	background: url('images/logo.png') no-repeat;
	margin: -40px 10px 0 0;
	text-indent: -5000px;
}
Conclusion
And there you have it! we have successfully designed and coded a full homepage template. As always, I hope you have enjoyed reading these tutorials and perhaps gained a different perspective or even learned some new techniques. Thanks for reading! And don't forget that Premium members can download the source files from this tutorial.


Comments