

by Tony Thomas
July 05, 2016
Tony creates pixel-perfect UI kits & icons. His pug, Wednesday, is Medialoot's beloved mascot.
Create an Abstract Geometric Gradient Background with Photoshop
Unique effect for website headers and app splash screens
This tutorial will show you the process behind creating one of our most popular recent freebies on Medialoot, the Geometric Gradient Backgrounds pack. This technique uses vector shape layers, layer styles and of course gradients to create a stunning abstract background.
Step 1
Launch Photoshop and create a new 3000 x 3000 pixel document. The size of the document can be changed depending on your intended use.
Step 2
Create a new Gradient Fill layer for the background with three stops, #9e7cd1 at 0%, #ed8dba at 50% and #edad91 at 100%.
Step 3
Draw a white oval shape using the Ellipse tool from the top of the canvas to the bottom and align it horizontally with the center of the canvas.
Step 4
Double click the oval shape to bring up the Blending Options, set the Blend Mode to Soft Light, Opacity to 50% and Fill Opacity to 75%. This will allow us to use a white stroke which is slightly more visible than the fill. Add a white stroke, set the size to 3 pixels, Position Outside and Blend Mode Soft Light. The effect is subtle but will become more visible as we add more layers to the composition.


Step 5
Duplicate the oval shape and rotate it 60° around the center. And repeat once more.

Step 6
Group all 3 oval shapes together (CMD+G or CTRL+G) and set the Opacity of the group to 50%
Step 7
Duplicate the group and rotate it 30°.
Step 8
Now duplicate all 6 oval shapes and put them in a new group with 75% Opacity.
Step 9
Resize the new group whilst holding down the shift key to constrain proportions. Reduce the overall size to approximately 65% or to where the points shown below intersect.

Step 10
Duplicate the top group. Select each of the oval shapes in the new group and change their fill colors to black, then set their Opacity to 10% and Fill to 75%.

Step 11
For a final touch, lets add a bit of noise. Create a new blank layer and fill it with white. Optionally, you can tidy up the layers panel by creating a new group for the noise layer and also grouping the existing layers together.

Step 12
With the Noise layer selected, go to Filter > Noise > Add Noise.. and enter 200% for the Amount, Gaussian for Distribution and check the Monochromatic option.
Step 13
Set the Blend Mode of the Noise layer to Soft Light and the Opacity to 20%. This will make the noise effect more subtle.
Result & Variations
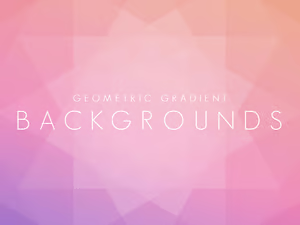
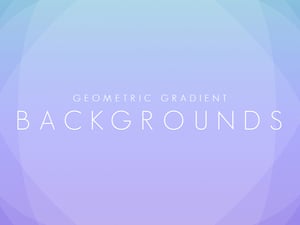
Here is the final result, you can now play around with it and tweak the colors if desired. The feel of the whole image can be changed by simply updating the background gradient layer. Here are a few examples:


Download Geometric Gradient Backgrounds
 These free backgrounds combine vivid gradients and abstract geometric overlays for a unique effect. They are great for use in website headers, app splash screens and other backgrounds. Included in the pack are 8 high resolution (3000x3000px) JPG files.


Comments